Image source: Pexels / Amoria Made (Pexels License)
How to make iced coffee in a coffee maker
You don’t need a fancy cold brew kit or a trip to the drive-thru to get a great glass of iced coffee. Your trusty drip machine, the same one that handles your morning pot, can produce a batch of smooth, concentrated coffee that’s perfect for pouring over ice.
The trick isn’t complicated. It’s about adjusting your ratios, avoiding the classic “watered-down” mistake, and knowing a few timing hacks. We’ve tested these methods extensively, and this guide walks you through every single step to get café-quality results right on your kitchen counter.
Why Your Drip Coffee Maker is Perfect for Iced Coffee
Let’s be honest: brewing directly into a glass full of ice usually results in a weak, sad drink. The ice melts too fast, and the coffee gets diluted before you even take a sip. That’s why most coffee experts, including the crew over at the National Coffee Association, recommend brewing a stronger concentrate first.
Your coffee maker is built for consistency. It heats water to the optimal temperature (around 195°F to 205°F) and distributes it evenly over the grounds. This ensures you extract the full flavor profile without the bitterness you often get from stovetop methods.
Plus, you can set it and forget it, no babysitting a French press.
We’re going to turn that standard brewing cycle into a focused iced coffee production line. It takes about ten minutes of active time, plus a little cooling. The result?
A crisp, bold, and refreshing drink that actually tastes like coffee, not brown ice water.
The Golden Ratio: Brewing Coffee Double-Strength
The single biggest mistake people make is using the same amount of coffee they would for a hot cup. When you pour that regular-strength brew over a glass packed with ice, the ice melts and dilutes the liquid by roughly 40%. You lose all the body and flavor.
To fix this, you need to brew double-strength coffee. This isn’t just about scooping more powder; it’s about adjusting the ratio.
The Math Behind the Beans
Think of it this way: you are making a concentrate that will be “cut” with ice and (optionally) milk.
- For a single serving (16 oz glass): Use 2 tablespoons of ground coffee for every 4 oz of water.
- For a full carafe (to serve 4): Use 1 cup of ground coffee for every 8 cups of water? No, that’s too much.
Let’s correct that. Here is the exact ratio we use:
Standard Recipe:
- Coffee: 1/2 cup (about 40 grams) of medium-coarse ground coffee
- Water: 3 cups (24 ounces) cold, filtered water
This yields about 20 ounces of strong coffee liquid. When you pour this over 12 ounces of ice, you get a full 32 ounces of perfectly balanced iced coffee.
Grind Size Matters
If you grind your own beans, now is the time to pay attention. For a standard drip machine, you want a medium grind. It should look like sea salt, not too powdery, not too chunky.
- Too fine: Extracts too quickly, leading to bitter, over-extracted coffee.
- Too coarse: Extracts too slowly, leading to sour, weak coffee.
Freshly ground beans will always produce a richer, sweeter iced coffee. Pre-ground works fine in a pinch, but if you can, grind right before brewing. That volatile aroma is half the flavor.
How to Brew the Coffee Base
Image source: Pexels / Denys Gromov (Pexels License)
Now that you have the ratio locked in, let’s get the machine working. This process is straightforward, but a few tweaks elevate the final cup significantly.
Step 1: Prep the Machine
Start with a clean coffee maker. If you don’t remember the last time you ran a vinegar solution through it, do that first. Old coffee oils go rancid and ruin the flavor of anything new.
Fill the reservoir with the cold, filtered water. Pro tip: Use bottled water or a filtered pitcher if your tap water tastes heavily chlorinated. Coffee is 98% water; if the water tastes off, the coffee will too.
Step 2: Set Up the Filter
Place a fresh paper filter or your permanent mesh filter into the basket. If using paper, give it a quick rinse with warm water. This removes the “papery” taste that can sometimes sneak into the brew.
Step 3: Add the Grounds and Brew
Add your 1/2 cup of medium-ground coffee to the filter. Level it out gently. Don’t pack it down.
The water needs to flow through evenly.
Place the carafe on the warming plate and start the brew cycle. Let the machine do its thing.
Step 4: The Immediate Chill
Here is a professional barista trick: take the empty carafe and place it in an ice bath while the coffee brews. Just fill your sink with a few inches of cold water and a tray of ice cubes, then sit the carafe in it.
When the brewing cycle finishes, pour the hot coffee into a heatproof container (like a large glass measuring cup) and place that in the ice bath. This rapid drop in temperature locks in the volatile aromatic compounds. If you let it sit on the hot plate for 20 minutes, it develops a burnt, dusty flavor.
We want to stop the extraction process immediately.
Let it cool in the ice bath for about 10, 15 minutes, stirring occasionally.
Assembling the Iced Coffee
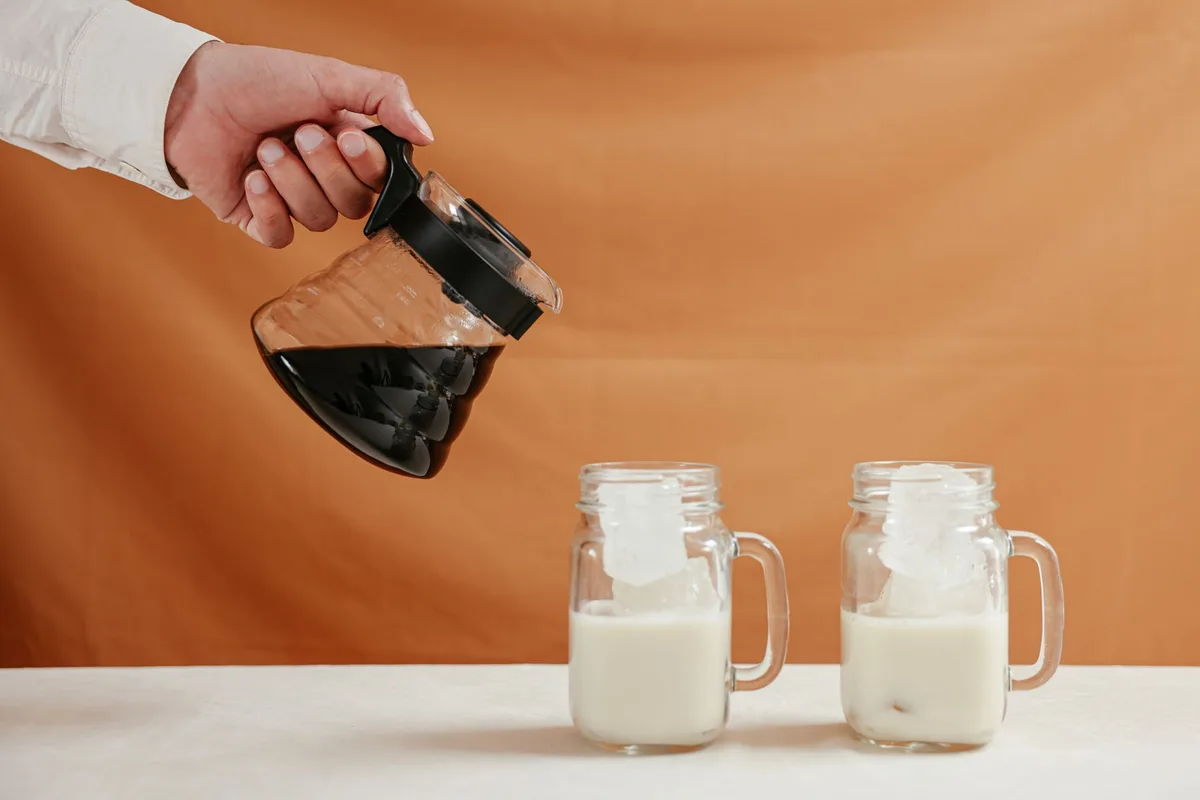
Image source: Pexels / Cup of Couple (Pexels License)
The hard part is done. You have a carafe of concentrated coffee that is cold and ready. Now comes the fun part, building the glass.
Ice First, Coffee Second
This sounds like basic common sense, but the order matters more than you think.
- Fill the glass to the brim with ice cubes. Use large, dense ice cubes if you have them. They melt slower than the small crescent cubes from your freezer tray.
- Pour the cooled coffee over the ice. Fill the glass about 3/4 of the way full.
- Add your add-ins. This is where you customize.
The Customization Station
Don’t just dump sugar in. Let’s build some flavor layers properly.
- The Sweetener: Simple syrup is the industry secret. Since it’s a liquid, it dissolves instantly in cold coffee. To make it: heat equal parts water and white sugar until dissolved, then cool. It keeps in the fridge for a month. Brown sugar syrup or maple syrup also work brilliantly.
- The Dairy: Whole milk, oat milk, or a splash of cream adds body. If you’re using regular milk, don’t add it all at once. Pour a splash, stir, and taste. The concentrated coffee can handle a surprising amount of dairy without tasting milky.
- The Flavor: A pinch of sea salt (seriously) cuts the bitterness and brightens the sweetness. A dash of vanilla extract or cinnamon in the grounds before brewing is also a game-changer.
Troubleshooting Weakness
If your iced coffee still tastes thinner than you’d like, check the ice-to-coffee ratio. If you packed the cup with ice, that’s about 12 ounces. You should only add about 8 ounces of liquid on top.
If you brew 12 ounces of coffee to fill the glass, you’ve defeated the purpose. Stick to 2 parts strong coffee to 1 part ice by volume.
Hot Brew vs. Cold Brew: What’s the Difference?
Since you’re using a coffee maker, you’re making “hot brew” iced coffee. That’s different from the cold brew you buy at the store.
Cold brew is steeped in cold water for 12, 24 hours. It produces a very low-acid, smooth concentrate. Hot brew, which we’re doing here, extracts at a much faster rate.
It captures the brighter, more complex acidic notes that make coffee taste like coffee.
Our method, brewing hot, then chilling, yields a drink that’s often more aromatic and flavorful than traditional cold brew, with a higher level of caffeine extraction due to the heat. Plus, it takes 15 minutes, not 15 hours.
Three Ways to Upgrade Your Iced Coffee Game
You’ve got the base. You’ve got the glass. Here are three quick spins to keep things interesting.
1. The Vietnamese Style
Add 2 tablespoons of sweetened condensed milk to the bottom of the glass. Pour the hot (or just-brewed) strong coffee directly in. Stir immediately to dissolve the sticky milk.
Then, pack the glass with ice. It’s decadent and sweet.
2. The Caramel Shakerato
Pour 1 cup of cold concentrate into a cocktail shaker. Add 1 tablespoon of caramel sauce and 1/4 cup of milk. Add a few ice cubes, put the lid on, and shake vigorously for 15 seconds.
You’ll get a foamy, creamy top and a fully mixed body.
3. The Mocha Freeze
Blend 1 cup of cold concentrate, 1 cup of ice, 2 tablespoons of chocolate syrup, and 1/4 cup of half-and-half in a blender until smooth. Pour into a tall glass and top with a swirl of whipped cream. This is dessert in a glass.
Storage: Does it Keep?
Absolutely. This is one of the best parts of making a full carafe.
In the Fridge: Store your gently cooled double-strength coffee in a sealed glass jar or pitcher in the refrigerator. It stays good for up to one week. However, the flavor degrades slightly after 48 hours.
We find it tastes best on days one and two.
In the Freezer: Pour leftover concentrate into an ice cube tray. These coffee cubes are the ultimate trick. Instead of diluting your iced coffee with water-ice, use coffee-ice.
As they melt, they just make your drink stronger and colder.
The Final Checklist
Before you walk away, let’s reduce this whole process to a quick mental checklist you can use every morning.
- Brew Strength: Double the coffee-to-water ratio. No exceptions.
- Water Quality: Use filtered water for the cleanest flavor.
- Immediate Cooling: Remove the brewed carafe from the machine instantly. Shock it in an ice bath.
- Full Ice: Fill the serving glass to the top with ice.
- Ratio Control: Use 2 parts coffee to 1 part ice.
Frequently Asked Questions
Do I need a special setting on my coffee maker?
No. Most standard drip machines don’t have an iced coffee setting. If yours does, it just adjusts the water flow.
Don’t worry about it, just use the “regular” setting with our double-strength ratio.
Can I use instant coffee?
Yes, in a pinch. Use 1 tablespoon of instant coffee granules dissolved in 1/2 cup of hot water. Then double the strength by adding another 1/2 tablespoon.
It’s not as rich, but it works.
Why does my coffee taste bitter after chilling?
This is usually from over-extraction (water too hot or grounds too fine). Make sure your machine isn’t holding the coffee on the hot plate. We cool it immediately in an ice bath to stop the cooking process.
Should I brew a full pot or just a cup?
It’s easier to brew a small batch (2, 3 cups of water) than to brew a full pot and waste coffee. Adjust your grind size and coffee dose accordingly. More water means more grounds to keep the ratio tight.
Making iced coffee in a coffee maker is a habit worth starting. It saves money, reduces waste from single-use cups, and guarantees you get exactly the strength and flavor you crave. Once you dial in your preferred ratio, you’ll never buy a pre-bottled concentrate again.