Image source: Pexels / Apoteosico (Pexels License)
How to Make Whipped Cream in a Blender
If you’ve ever stood in front of a stand mixer just to whip up a half cup of cream, you already know how overbuilt that tool feels for the job. A good blender gets you from cold cream to soft, billowy peaks in about a minute. No whisk, no sore wrist, no babysitting a bowl.
Just pour, blend, and stop before you go too far.
I’ll walk you through the whole process, what to use, how long to blend, how to fix the small problems that pop up, and a few tricks that make your whipped cream taste better than anything from a can. Let’s get into it.
Why a Blender Works So Well for Whipped Cream
A blender does in 30 to 90 seconds what takes a hand whisk several minutes of elbow grease. The blades spin fast, they pull in air fast, and the closed jar keeps the cream cold while it whips. That’s why you get a stable, fluffy result without much effort.
A few reasons I keep coming back to this method:
- Speed. Way faster than a hand whisk.
- Consistency. You get even texture with no soft pockets.
- Easy cleanup. One jar, one lid, rinse and you’re done.
- No special tools. You don’t need a stand mixer or a fancy whisk attachment.
There’s a catch, though. A blender can take cream from perfect to butter in about five seconds. So the trick isn’t really about how to make whipped cream in a blender, it’s about knowing when to stop.
I’ll show you exactly how to nail that timing.
What You’ll Need
Before you touch a button, get your gear ready. Whipped cream is a short, fast process, and you don’t want to be rummaging through a drawer mid-blend.
Ingredients
- Heavy cream (or heavy whipping cream). This is the non-negotiable base. It needs to have at least 36% milk fat, or it won’t hold air. Anything labeled “whipping cream” with a lower fat percentage will stay soupy.
- Powdered sugar. It dissolves faster than granulated sugar and contains a little cornstarch, which helps the cream hold its shape. Two tablespoons per cup of cream is a good starting point.
- Vanilla extract. Optional but lovely. About half a teaspoon per cup gives you that classic flavor.
- A pinch of salt. Optional, but it sharpens the sweetness and rounds out the flavor.
Equipment
- A blender. Standard countertop blender works. You can also use an immersion blender in a jar, same idea.
- A chilled blender jar. This matters more than most people think. Cold cream whips faster and stays stable longer.
- A rubber spatula. For scraping the sides and getting every last bit out.
- A fine mesh strainer or a piece of cheesecloth. Only needed if you want to strain out any tiny bits of butter.
Pro tip from years of doing this: stick your blender jar in the freezer for 15 to 20 minutes before you start. The colder everything is, the better the result.
The Best Cream to Use (and What to Skip)
Let’s talk fat content for a second, because it’s the single biggest factor in whether your whipped cream holds up.
Heavy cream typically has 36% to 40% milk fat. That’s the sweet spot. Anything less, like “light cream” or “coffee cream”, has too much water and not enough fat, so the bubbles collapse and you end up with a sad puddle.
Here’s a quick rule of thumb:
- Heavy cream (36%+ fat): Whips beautifully. Holds peaks. What you want.
- Whipping cream (30, 36% fat): Whips, but softer. Holds for a while.
- Half-and-half (10, 18% fat): Won’t whip. Save it for coffee.
- Non-dairy substitutes: Some coconut-based creams whip well if you chill the can overnight. Almond and oat milk won’t whip reliably, skip them.
If you’re buying cream in the US, look at the label. If it says “heavy whipping cream” or “heavy cream,” you’re good. If you want to read more about milk fat standards, the USDA’s dairy grading page breaks down the categories.
Step-by-Step Guide to Whipping Cream in a Blender
This is the heart of the article, so take it slow. Each step is short, but skipping one is usually what causes trouble.
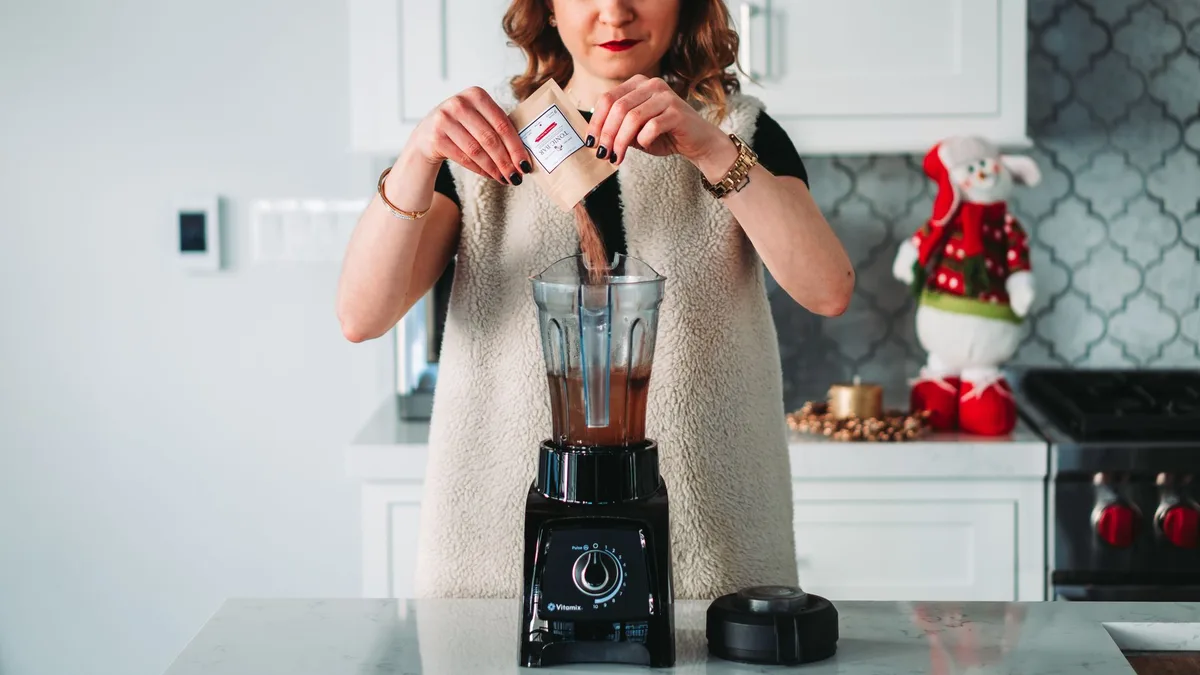
Image source: Pexels / Chait Goli (Pexels License)
Step 1: Chill Everything
Pop your blender jar, the lid, and even the cream itself in the fridge for 20 minutes before you start. If you have freezer space, 10 minutes in the freezer is even better. Cold fat is firmer fat, and firmer fat traps air better.
The difference between room-temp cream and chilled cream is the difference between fluffy peaks and a runny mess.
Step 2: Add the Ingredients in the Right Order
Pour the cream into the blender jar first. Then add the powdered sugar, vanilla, and salt on top. The order matters less than the temperature, but I find this order blends the most evenly.
Start with:
- 1 cup cold heavy cream
- 2 tablespoons powdered sugar
- ½ teaspoon vanilla extract
- A small pinch of salt
That ratio gives you lightly sweet, classic whipped cream. Bump the sugar to 3 tablespoons if you like it sweeter, or cut it down to 1 tablespoon for a more savory profile (great on pies and hot chocolate).
Step 3: Start on Low
Here’s where most people mess up. They crank the blender to high and walk away. Don’t.
Put the lid on, set the blender to the lowest speed, and pulse it for 5 seconds at a time. You’re not trying to whip air into the cream yet, you’re just getting the ingredients mixed. Once you see the cream moving in a smooth vortex with no dry sugar sitting at the bottom, you’re ready to crank it up.
Step 4: Blend on Medium-Low
Now move up to medium-low. Blend for 15 to 20 seconds. Stop and check.
You’re looking for these signs:
- The cream has thickened noticeably.
- It coats the back of a spoon.
- When you lift the blender slightly or pause, the cream holds a soft peak that curls over.
If it looks like softly melted ice cream, you’re there. If it still sloshes like milk, give it another 10 seconds.
Step 5: Stop Right There
I’m serious, stop. The biggest mistake people make with this method is over-blending. Once cream passes “soft peaks,” it races toward “butter” in seconds.
If you’re not sure, stop a little early. You can always pulse it once more.
A good rule: the moment the cream starts to look grainy, stop and scrape it out. Grainy means you’ve broken the emulsion and you’re heading toward butter.
Step 6: Scrape and Use
Use a rubber spatula to scoop the whipped cream out of the jar. It clings to the walls and the bottom, so scrape those down, that’s where the good stuff hides.
Serve it right away, or store it in the fridge for up to 24 hours.
Common Mistakes to Avoid When Whipping Cream in a Blender
Let me save you from the four big mistakes I see all the time.
Image source: Pexels / RDNE Stock project (Pexels License)
Mistake 1: Warm Cream
If your cream has been sitting on the counter for 20 minutes, the fat has softened and won’t hold air. The result is thin whipped cream that weeps liquid within minutes. Fix: chill everything thoroughly before you blend.
Mistake 2: Too Much Speed Too Soon
Cranking the dial to “high” from the start slams air into the cream unevenly. You get big bubbles, then over-whipping, then butter. Always start low, work up gradually, and pulse in short bursts.
Mistake 3: Skipping the Lid
It sounds obvious, but every blender has a lid vent or seal that creates pressure. Without the lid fully on, you lose the vortex that pulls cream down into the blades, and the mix just spins uselessly. Plus, cream will fly out and you’ll spend the rest of your evening cleaning your ceiling.
Mistake 4: Walking Away
The window between “perfect whipped cream” and “sweet cream butter” is about five to ten seconds. Don’t walk away. Don’t answer the phone.
Stand there, watch through the jar, and stop at the first sign of thickening.
If you do end up with butter, don’t throw it out. You just made butter. Strain off the buttermilk and save it for baking or toast.
Flavor Variations Worth Trying
Once you’ve nailed the basic method, the fun begins. Whipped cream is a blank canvas. Here are a few directions to take it:
- Chocolate whipped cream. Add 2 tablespoons of cocoa powder with the sugar. Best on espresso and raspberries.
- Espresso whipped cream. Stir in 1 teaspoon of instant espresso powder. Killer on tiramisu and mochas.
- Maple whipped cream. Replace the powdered sugar with 2 tablespoons of pure maple syrup. Skip the vanilla or use bourbon instead.
- Cinnamon whipped cream. Add ½ teaspoon of ground cinnamon. Beautiful on apple pie and sweet potatoes.
- Citrus whipped cream. Add the zest of half a lemon or orange. Great on berry shortcakes and lemon bars.
Each one follows the same method, just add the flavoring with the sugar before blending.
How to Store Whipped Cream (and How Long It Lasts)
Homemade whipped cream doesn’t last as long as the stuff from a can because it doesn’t have stabilizers. But it holds up better than most people think.
- In the fridge: Up to 24 hours in a sealed container. After that, it starts to weep and deflate.
- In the freezer: Up to 1 month. Spoon dollops onto a parchment-lined tray, freeze until solid, then transfer to a freezer bag. These frozen dollops are perfect for hot chocolate.
- Stabilized for longer storage: Add 1 teaspoon of unflavored gelatin (bloomed in 1 tablespoon of cold water, then melted) per cup of cream. This lets it hold for 2 to 3 days in the fridge.
A quick note: if your whipped cream weeps liquid in the fridge, just give it a quick whisk or pulse to bring it back. It’ll look a little looser than the original, but it’ll still taste great.
When to Use a Blender vs. a Stand Mixer vs. a Hand Whisk
You came here for the blender method, and that’s what you’ll get. But it’s worth knowing when another tool might serve you better.
- Blender: Best for small to medium batches (1 to 2 cups of cream). Fast, easy cleanup.
- Stand mixer: Best for large batches (3+ cups) or when you’re multitasking in the kitchen. More forgiving on timing.
- Hand whisk: Best for tiny amounts or when you want a quiet, meditative five minutes.
For most home cooks making whipped cream for a few pies or a bowl of berries, the blender wins. It hits the sweet spot of speed, control, and cleanup.
A Few Quick Questions Answered
Can I use a Nutribullet or personal blender?
Yes, as long as it has a sharp blade and a tight lid. Just blend in smaller batches, about ½ cup at a time, and pulse more frequently to avoid over-whipping.
Can I make whipped cream ahead of time?
Absolutely. Whip it, store it in a sealed container, and give it a quick stir before serving. Best within 24 hours.
Why did my cream turn into butter?
You blended too long or too fast. Next time, stop earlier and use a lower speed. Don’t toss the butter, it’s delicious on toast.
Can I whip non-dairy cream?
Coconut cream works well if you chill the can overnight and scoop out the solid fat. Almond and oat milk don’t whip reliably.
Is powdered sugar necessary?
No, but it dissolves fast and adds a touch of cornstarch that helps stability. You can use granulated sugar if you blend a bit longer, or use maple syrup or honey for a different flavor.
Final Thoughts
Whipped cream in a blender is one of those small kitchen tricks that punches way above its weight. Once you get the timing down, you’ll never go back to wrestling with a whisk. Chill your cream, start on low, pulse in short bursts, and stop the second it thickens.
That’s the whole game.
The next time you need a cloud of cream for strawberries, hot cocoa, or a last-minute pie topping, you’ll have it on the table in under two minutes. No fuss, no stress, just fluffy peaks and clean plates.