Your toaster oven hums, the light comes on, the timer ticks, and the food stays cold. Few kitchen problems are more frustrating, especially when breakfast is on the line.
Here’s the good news: a toaster oven that won’t heat is one of the most fixable small appliances in your kitchen. In my experience, roughly eight out of ten “dead” toaster ovens fail because of one of four cheap parts, a blown thermal fuse, a burned-out heating element, a faulty thermostat, or a bad outlet. Most of these repairs cost under $25 and take less than an hour.
This guide walks you through the entire process. We’ll start with the checks that take five minutes, move into proper multimeter diagnostics, then cover the actual repairs part by part. By the end, you’ll know exactly what’s wrong with your oven and whether it’s worth fixing.
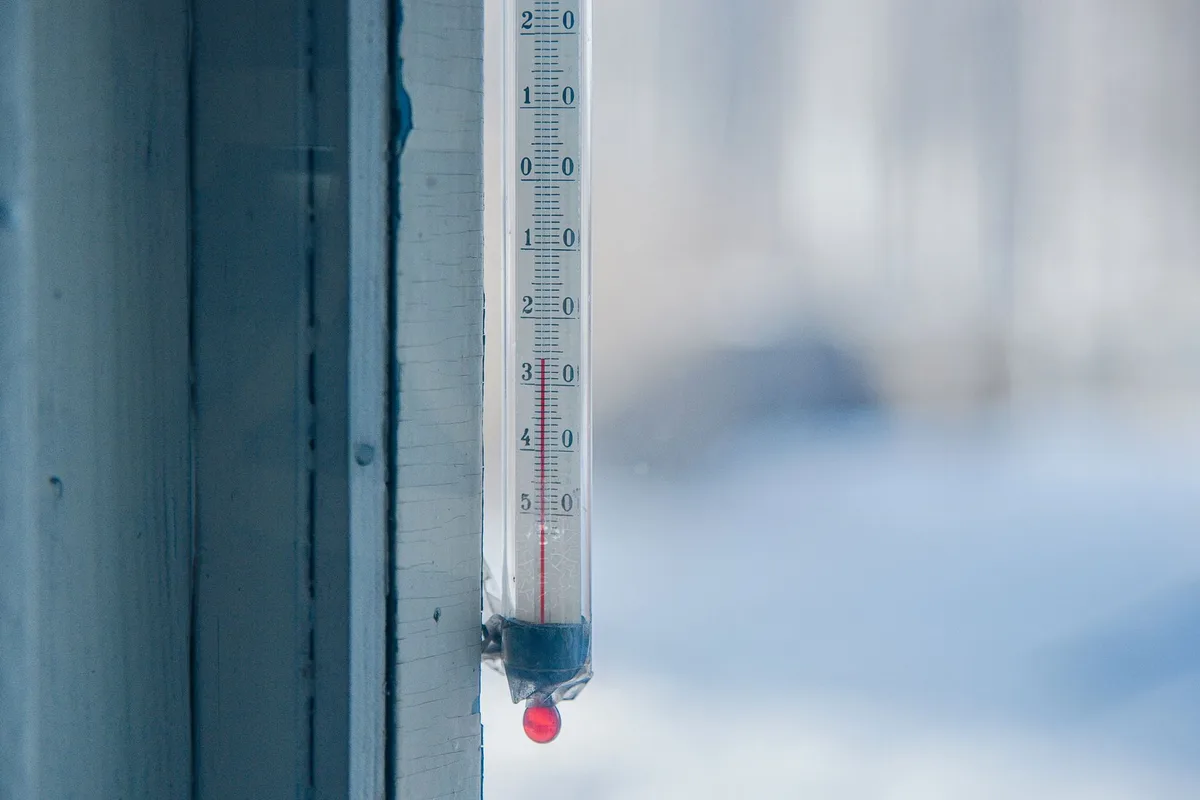
Image source: Pexels / Ivan Babydov (Pexels License)
Quick Answer: Why Your Toaster Oven Won’t Heat
If you want the short version, here it is.
A toaster oven fails to heat for one of six reasons:
- Dead outlet or tripped breaker, the oven never gets power in the first place
- Blown thermal fuse, the single most common internal failure
- Burned-out heating element, especially when only one side heats
- Faulty thermostat or selector switch, power can’t reach the elements
- Damaged power cord or plug, broken wires inside the insulation
- Failed control board or relay, mainly on digital models
Test the outlet first. Then check whether the elements glow. Those two checks alone will point you to the culprit most of the time.
Everything else in this guide builds on those steps.
How a Toaster Oven Heats (and What Usually Breaks)
Before you fix anything, it helps to understand the chain you’re troubleshooting. A toaster oven is one of the simplest heating appliances ever made. Power flows through a short list of parts, in order:
Wall outlet → power cord → main switch/timer → thermostat or control board → thermal fuse → heating elements → back to neutral.
If any single link in that chain fails, the elements never see power, or they see power and can’t use it. That’s the entire problem in a nutshell.
Here’s what each part does:
- Heating elements are loops of nichrome wire, usually four of them (two on top, two on the bottom), sometimes behind quartz sleeves. Nichrome glows orange when current flows through it. That glow is your heat.
- The thermal fuse is a small, one-shot safety device wired in series with the elements. If the oven’s internal temperature climbs past its rating, typically around 216°C (420°F), the fuse blows permanently and cuts power. It’s doing its job when it fails.
- The thermostat is a bimetal switch controlled by your temperature knob. It clicks open and closed to hold the cavity at your set point. On basic models, it’s mechanical. On digital models, a thermistor and control board do this job instead.
- The selector switch or timer routes power to different elements. “Broil” feeds the top elements. “Bake” feeds the bottom. “Toast” feeds all four and depends on the browning timer.
- The control board (digital models only) uses relays to switch the elements on and off. When a relay burns out, the panel works fine but the oven never heats.
Because the chain is so simple, diagnosis is logical. Power dies at the first failed link. Your job is to find that link.
Match Your Symptom to the Cause
Different failures produce different symptoms. Use this table to jump straight to the likely culprit.
| Symptom | Most Likely Cause | Where to Start |
|---|---|---|
| Completely dead — no light, no sound, no clock | Outlet, cord, or thermal fuse | Outlet test |
| Controls light up but no heat at all | Open element, selector switch, or relay | Element test |
| One element glows, the other stays dark | Single burned-out element | Visual + ohm test |
| Heats briefly once, then never again | Blown thermal fuse | Fuse continuity test |
| Clicks off before food is done | Weak thermostat or blocked vents | Thermostat test |
| Trips the breaker the moment you turn it on | Short in cord, plug, or element touching the chassis | Cord and plug inspection |
| Digital panel is dead | Blown board-level fuse or failed board | Board inspection |
| Audible click, but still no heat | Relay engaging into an open circuit | Element test |
Safety First: Read This Before You Touch Anything
I’ve repaired enough small appliances to say this plainly: the inside of a toaster oven can hurt you, and the outside of a working one absolutely will. Take these precautions seriously.
Unplug the oven before any inspection. Not “turn it off.” Unplug it. Many toaster ovens keep parts of the circuit energized even when the switch is off, because the switch often sits downstream of the mains connection.
Let it cool completely. Elements and surrounding metal stay dangerously hot for 30 minutes or more after use. The thermal fuse and element terminals can also burn you long after the cavity feels cool.
Never bypass a safety device. I’ll say this again later because it matters. Some online “fixes” suggest replacing a blown thermal fuse with foil, wire, or a plain jumper. Don’t.
That fuse exists because UL safety standards for household cooking appliances require thermal protection. The U.S. Consumer Product Safety Commission attributes countless appliance fires to modified or bypassed safety components.
A $6 fuse is never worth skipping.
One reassuring note: unlike microwaves, toaster ovens don’t contain a high-voltage capacitor that stores a lethal charge after unplugging. There’s no magnetron, no klysov assembly, nothing in the kilovolt range. The risk here is ordinary household current and heat, real, but manageable with basic care.
Photograph everything. Before you remove a single wire, take clear photos from two angles. Toaster oven wiring is simple, but it’s not always intuitive, and a photo costs nothing.
Check your warranty first. Opening the case on a newer oven usually voids the coverage. If your oven is less than a year old, a warranty claim costs you nothing and a DIY repair costs you the warranty. Make that trade deliberately.
Finally, if your specific model has been recalled, stop and contact the manufacturer. Recalled toaster ovens have caused fires and burns, and the fix is usually free. Searching the CPSC recall database with your brand and model number takes two minutes.
For context on why all this caution is justified: cooking equipment remains a leading cause of home fires, according to the National Fire Protection Association.
Five-Minute Checks Before You Grab a Screwdriver
Don’t open the case yet. These checks resolve a surprising share of “dead” toaster ovens, and they cost nothing.
1. Test the outlet with something else. Plug a lamp or phone charger into the same socket. No power?
You’ve found your problem. Check whether it’s a GFCI outlet, kitchen receptacles trip easily, and the reset button sits mid-face on GFCI units. Press it firmly.
2. Check the breaker panel. A toaster oven draws 10 to 15 amps at 120 volts. If it shares a 15-amp kitchen circuit with a kettle, microwave, or air fryer, you’ll trip the breaker without any fault in the oven itself.
Reset the breaker, then run the oven on a circuit with less competition.
3. Confirm your settings. This sounds obvious, but I’ll admit I’ve fallen for it myself. Many toaster ovens only power up when the timer is turned past a threshold, set it to “Stay On” or a real time, not “Off.” Digital models often require you to press Start or Toast within a few seconds of selecting a mode, or they simply sit there.
Some also have a child lock engaged by holding a button.
4. Inspect the plug and cord. Look for scorch marks, a bent or loose prong, a plug that feels hot after use, or kinks in the cord. Flex the cord gently along its length while the oven runs, intermittent power that flickers with movement means broken conductors inside the insulation.
That cord gets replaced, not taped.
5. Check the door. Some models interrupt heating when the door opens and resume through a door switch or latch sensor. A misaligned latch on a well-used oven can leave the oven in “door open” mode forever.
Close it firmly and listen for the click.
Still nothing? Time to open it up.
Diagnosing a Toaster Oven That Won’t Heat, Step by Step
Here’s the systematic approach I use on every unit. Work through the steps in order, each one either finds the fault or eliminates a suspect.
Step 1: Test the Outlet and Circuit Properly
A lamp test tells you the outlet has power, but not that it has enough power. A weak or corroded outlet can run a phone charger fine and still drop voltage under a toaster oven’s heavy load. If you have a multimeter, set it to AC volts and probe the slot.
You want to see 110, 125V in North America or 220, 240V in the UK, EU, and Australia. Anything well below that points to a wiring or breaker problem, not an oven problem.
Step 2: Inspect the Power Cord and Plug
Unplug the oven and examine the full length of the cord. Toaster oven cords take abuse, they get slammed in drawers, pinched under counter edges, and yanked around. Look for:
- Discoloration or melting near the plug
- A loose prong that wiggles in its housing
- Kinks or flat spots in the insulation
- Burn smells
If the plug has a screwed-on faceplate (common on UK models with a fused 13-amp plug), open it and check the fuse. A blown plug fuse is a five-second fix with the correct rating. Use the same amperage, never a higher one.
Step 3: Run the Visual Element Test
This is the fastest way to split the problem in half. With the oven reassembled and plugged in, set it to a high temperature and “Stay On” (or run the toast cycle). Watch the elements through the open door for up to two minutes.
- All four elements glow orange evenly → the heating system works; your issue is likely the thermostat or control board cycling incorrectly
- Top elements glow, bottom stays dark (or vice versa) → the dark pair or its feed has failed
- One element glows brilliantly while its neighbor stays dark → that neighbor is dead
- Nothing glows, but the interior light works → power reaches the oven but dies between the switch and the elements
- You see sparks or smoke → unplug immediately; you have a short
Stand back while you do this, keep kids and pets away, and don’t leave the oven unattended during the test.
Step 4: Open the Casing
Unplug the oven. Seriously, unplug it again, even if you’re sure you did. Then flip it over or rotate it to reach the fasteners.
Most toaster ovens come apart with a Phillips screwdriver. The screws typically hide under the base plate, behind the back panel, or beneath rubber feet. A few brands use Torx screws (T10 or T15 covers most of them), and a handful use tamper-resistant bits.
If you hit a security screw, the right bit costs a few dollars at any hardware store.
Remove the screws, keep them organized in a muffin tin or magnetic tray, and lift the shell carefully. Wires run from the body to the shell in places, door switches and indicator lights especially. Don’t yank anything.
Step 5: Test the Heating Elements With a Multimeter
Now we get precise. A digital multimeter costs $15, 20 and pays for itself with this one repair.
How to test an element:
- Set your meter to the ohms (Ω) setting, 200-ohm range.
- Disconnect at least one lead from the element you’re testing. This matters, with both leads connected, current can loop through other components and give you a false reading.
- Touch one probe to each element terminal.
- Read the display.
A healthy element has low resistance because its whole job is passing current. The exact number depends on wattage and your local voltage:
| Component | Meter Setting | Healthy Reading | Failed Reading |
|---|---|---|---|
| Element, 120V, 1200–1500W (US) | Ohms, 200Ω range | Roughly 9–18 Ω | OL / infinite |
| Element, 230V, 1500–2200W (UK/EU) | Ohms, 200Ω range | Roughly 24–40 Ω | OL / infinite |
| Thermal fuse | Continuity | Beep, 0–1 Ω | OL / no beep |
| Thermostat (cold, knob at max) | Continuity or ohms | 0–2 Ω | OL |
| Selector switch, active position | Continuity | Near 0 Ω | OL on one or more positions |
| Power cord, prong to terminal | Continuity | 0–1 Ω per leg | OL, or fluctuating when you flex the cord |
An “OL” (over-limit) or infinite reading means the nichrome wire inside has burned through. That element is finished. No cleaning, no re-crimping, no second chances, replace it.
One catch: an element can test perfectly when cold and fail when hot. If your readings look good but the element never glows, run the oven (carefully!) and watch for arcing, or re-test right after a heating attempt. Heat-related opens usually show themselves.
Also check that the element coils aren’t sagging and touching each other. Two adjacent coils in contact create a shorter path, which changes resistance and concentrates heat, a common cause of scorched spots and premature failure.
Step 6: Test the Thermal Fuse
If all the elements read open, or the entire oven is stone dead despite a good outlet and cord, suspect the thermal fuse before anything else. This little cylinder, usually silver or black, about the size of a pill, is the most common single point of failure in the whole appliance.
Find it by tracing the wires from where mains power enters the oven. The fuse sits in series along that path, often clipped or strapped to the oven’s inner wall near the elements, because it needs to sense the oven’s actual temperature.
The test: set your meter to continuity. Touch a probe to each end of the fuse.
- Continuous beep, near-zero ohms → the fuse is good; move on
- OL, no beep → the fuse has blown; that’s your fault
A blown thermal fuse isn’t random. It blew because something got too hot. Before you replace it, look for the underlying cause: a crumb tray packed with debris, aluminum foil draped over the elements, blocked vents, or a thermostat stuck closed.
Fix the cause too, or the new fuse will blow the same way the old one did.
And to repeat the point that keeps people’s kitchens from burning down: do not bypass this fuse. Not with wire, not with foil, not “just temporarily.” The fuse is a tested, certified safety device. Bypassing it removes the last line of defense between a runaway oven and a fire. Replace it with the correct part or don’t run the oven at all.
Step 7: Test the Thermostat and Selector Switch
The thermostat is the next suspect when elements are healthy but don’t receive power. It’s a bimetal switch behind the temperature knob, usually a flat disc assembly with two spade terminals and a small adjustment shaft.
The cold test: with the oven unplugged and at room temperature, turn the temperature knob to its maximum setting. Set your meter to continuity and probe the thermostat’s two terminals. A healthy thermostat reads closed (near 0 Ω) when cold and set high, it should be calling for heat.
- OL at maximum, oven cold → the thermostat’s contacts have burned open; replace it
- Closed and stays closed forever → a different failure: the oven will overheat and eventually blow the thermal fuse
The selector switch routes power to different element groups. Set it to each position (broil, bake, toast) and check continuity between the common terminal and the terminal for that position. Every position should show near-zero ohms when selected.
One dead position means a burned contact, a very common failure on heavily used ovens, and usually the reason an oven “works in bake but not toast.”
Step 8: Check the Timer, Door Switch, and Control Board
Mechanical timers double as power switches on many models. Inside that ticking dial is a set of contacts that carry full element current, and they pit and burn over years of use. Test continuity through the timer contacts in the “on” position.
If they read open, the timer is your problem.
Door switches are simple: continuity when the door is closed, open when it’s pressed. A stuck or corroded door switch can lock the oven out of heating entirely.
Control boards (digital models) add two failure points: the low-voltage transformer that powers the panel, and the relays that switch the elements. Symptoms of board trouble include a dead panel with a good outlet, a panel that works but never clicks a relay, or visible damage, bulged capacitors, darkened traces, a burnt smell near the board. Probe the relay output terminals while the oven calls for heat; if the relay never closes, the board or relay is done.
I’ll be blunt about boards: they’re rarely worth repairing at component level unless you enjoy soldering micro-electronics. Evaluate them under “repair or replace” instead.
How to Fix Each Failure
Diagnosis done? Here’s how to repair each part correctly, including the details that separate a repair that lasts from one that fails in a month.
Replacing a Heating Element
Burned-out elements are the most satisfying fix in appliance repair: cheap, direct, and instantly visible when they work.
What you’ll need: a replacement element matched to your exact model number, a screwdriver, a small nut driver, and gloves.
How to do it:
- Find the right part. The model number sticker lives on the bottom or back of the oven. Order the element from the manufacturer’s parts department or a reputable appliance parts supplier. Generic “universal” elements rarely fit the mounting geometry correctly, buy the OEM part.
- Photograph the wiring before you disconnect anything. Note which wire lands on which terminal.
- Remove the old element. It’s usually held by one or two screws or nuts at each end, with the mounting tab passing through an insulated bushing. Slide the spade connectors off the terminals.
- Extract it from its supports. Elements thread through mica or ceramic insulators and small wire clips. Ease the old element out along the same path, keeping the support hardware.
- Thread the new element through the same supports in the same path. Keep the coil spacing consistent and match the original shape exactly. Spacing affects how evenly the heat spreads, and clearance from the chassis keeps the oven safe.
- Reconnect the leads, matching your photos. Push spade connectors on firmly, a loose high-current connection generates heat and dies young.
- Reassemble and test. Run a full toast cycle before loading real food.
Two tips from experience: wear gloves while handling quartz-sleeved elements, since skin oils can create hot spots on the quartz, and check that no wire or insulation sits closer to the new element than it sat to the old one.
A replacement element typically costs $10, 25.
Replacing the Thermal Fuse (the Right Way)
This repair costs less than a coffee, but it has more ways to go wrong than any other fix in this guide. Do it properly.
Match all three ratings. The old fuse prints its specs on the body, temperature (commonly 216°C/420°F, sometimes 192°C or 240°C), current (usually 10A or 15A), and voltage (250V). All three must match. A fuse with a lower temperature rating will nuisance-blow; a higher rating defeats the protection the engineers designed around the oven’s materials.
Mount it where the old one sat. This is the detail people miss. The thermal fuse must sit in physical contact with the surface it protects, usually clipped or clamped to the oven wall near the elements. A fuse dangling in the air on its leads senses nothing and protects nothing.
Reuse the original clip, strap, or clamp.
Make the connection correctly. Most factory fuses attach with high-temperature crimp connectors and fiberglass sleeving. Crimp with a proper crimping tool, not pliers. If you solder, work fast and clip a heat sink (an alligator clip on a jumper wire) to each lead between the fuse body and the joint, thermal fuses are calibrated devices, and soldering heat can shift or damage their trip point.
Route the leads safely. Keep the new fuse and its wires clear of the elements and sharp metal edges, exactly as the original was routed.
Cost: $5, 10 for the part. Time: 20 minutes including disassembly.
Replacing the Thermostat or Selector Switch
If the thermostat failed its cold test, replace it with the OEM part for your model. The job is straightforward: disconnect the leads, remove the mounting screws or clips, transfer the knob shaft adapter if there is one, and reconnect.
While you’re in there, check the knob itself. A knob that spins freely without engaging the thermostat shaft, or one that’s cracked at the D-shaped socket, produces “won’t heat” complaints that are really “no signal” complaints. A new knob costs a few dollars.
Selector switches replace the same way: photograph the terminal layout first, because these switches often have four to six positions and mixing up two wires sends power to the wrong elements. OEM replacement switches cost $10, 20.
Replacing the Power Cord
If your cord fails the continuity or flex test, replace the whole cord set. Never splice or tape a mains cord on a heating appliance, the splice becomes a heat and fire risk under a 12-amp load.
Buy a cord set with the same gauge and rating as the original (most US toaster ovens use 14- or 16-gauge, 125V-rated cords). Connection is usually two or three screw terminals or crimps where the cord enters the body, secured by a strain-relief clamp. The strain relief matters, it’s what stops the cord from tugging on the terminals every time you move the oven.
Control Board Repairs: Usually Not Worth It
If your digital oven’s board or relay has failed, you have two options: an OEM replacement board or a new oven. Check the board’s price first. On budget toaster ovens, replacement boards regularly cost 40, 70% of a new unit’s price.
On premium models, the $200+ tier, board replacement often makes sense, since those ovens hold their performance for years.
Unless you’re comfortable desoldering surface-mount relays and sourcing exact components, skip component-level board repair. One wrong move and you’ve converted a $40 part into a $150 problem.
How to Test Your Toaster Oven’s Temperature After the Repair
You’ve fixed the fault. Now confirm the oven actually heats correctly, because “turns on” and “holds accurate temperature” are two different claims. Toaster ovens are notorious for running hot or cold, and verifying the repair protects your food and your new parts.
Start by making sure your measuring tool is trustworthy. An inexpensive oven thermometer is the right tool, but only if it reads true.
How to Do the Ice Water Test
Before you trust any thermometer to judge your repair, calibrate it with ice water. This is the standard method, and it takes five minutes.

Image source: Pexels / Engin Akyurt (Pexels License)
- Fill a tall glass with crushed ice, then top it off with cold water.
- Stir well and let it sit for four or five minutes so the water stabilizes at freezing.
- Insert the thermometer’s probe into the center of the glass, keeping it off the sides and bottom and out of the ice chunks.
- Stir gently and wait for the reading to settle.
A correct thermometer reads 32°F (0°C). Within a degree or two is fine. If your oven thermometer is off by five degrees or more, replace the thermometer before blaming the oven, otherwise you’ll chase a problem that lives in your tool, not your appliance.
Checking the Oven’s Actual Temperature
With a verified thermometer, place it in the center of the toaster oven’s rack. Set the oven to 350°F (175°C) on bake and run it with “Stay On” or a long timer. Wait 15, 20 minutes for the cavity and walls to fully saturate with heat, then read the thermometer without opening the door any longer than necessary.
Expect some variance. A swing of ±25°F from the dial setting is common even in healthy toaster ovens, because these are small cavities with big heating elements and simple thermostats. What matters is consistency:
- Consistently 20, 30°F off in one direction → adjust your dial setting to compensate and note it. That’s normal behavior, not a fault.
- Erratic swings of 50°F or more → the thermostat is failing, or the vents are blocked.
- Wildly off, or never reaching temperature → re-check the thermostat and element connections from your repair.
Verifying Temperature Readings While Cooking
The final proof is food. Real cooking loads the oven with mass and moisture, which is the harshest honest test.
Image source: Pexels / Mohamed Olwy (Pexels License)
Use an instant-read probe thermometer in your actual food to confirm heat is reaching where it matters. Toast two slices of bread and check for even browning on both faces, uneven color means one element is still weak or a reflector is misplaced. Bake something forgiving, like biscuits, and check the interior temperature against the expected result.
If you roast poultry or meat in your toaster oven, verify it hits the safe internal temperatures from the USDA before serving.
If your first post-repair toast comes out golden on both sides, you’re done. Go make something celebratory.
When to Repair vs. Replace
Sometimes the smartest fix is a receipt for a new oven. Here’s my honest cost math, based on typical prices and repair-shop rates in the US and UK.
| What’s Broken | DIY Part Cost | Shop Repair Cost | My Call |
|---|---|---|---|
| Blown thermal fuse | $5–10 | $60–90 | Repair it yourself |
| One heating element | $10–25 | $70–100 | Repair it yourself |
| Thermostat or selector switch | $10–20 | $60–90 | Repair it yourself |
| Power cord or plug | $10–15 | $60–80 | Repair it yourself |
| Control board | $30–70 | $90–150 | Replace if the oven cost under $100 |
| Multiple failed parts | Varies | $100+ | Replace |
| Recalled model | Free fix from maker | — | Contact the manufacturer |
The pattern is clear: single-part failures on DIY-friendly ovens are almost always worth fixing. The moment you’re paying shop labor, or the failure is on the board of a budget oven, replacement wins.
Two more factors to weigh. First, parts availability: mainstream brands (Breville, Cuisinart, Oster, Hamilton Beach, Black+Decker, Toshiba, and Russell Hobbs or Sage on the UK side) stock spares for years; obscure brands may not, which decides the question for you. Second, the repair’s shelf life: a new thermal fuse on a clean, well-ventilated oven should outlast the oven’s other parts.
A new fuse on an oven that’s already cooked its thermostat halfway will buy you months, not years.
Preventing Heating Problems in the Future
Every dead toaster oven I’ve opened tells the same story backwards. A little prevention would have saved it. Here’s the short list.
Empty the crumb tray weekly. Crumb buildup insulates heat, reflects it onto components, and feeds flare-ups. This is the single highest-value habit.
Never line the floor with foil. I know the temptation. Foil on the oven floor blocks designed airflow, reflects heat back onto the elements and thermal fuse, and can short against exposed terminals. If drips are your problem, place foil on the tray below the rack, never touching elements.
Give it breathing room. Keep the clearance the manual calls for, usually several inches from walls, cabinets, and curtains. Blocked vents cook the thermal fuse slowly, invisibly, until one day it blows.
Unplug it after use. Toaster ovens stay energized at the plug even when switched off. Unplugging protects the electronics from surges and eliminates a standby fire risk entirely.
Clean the interior gently. Wipe the cavity with a damp cloth and baking soda paste. Keep degreasers and oven sprays away from the elements and wiring, residue on nichrome scorches and degrades insulation.
Glance at the cord monthly. Heat damage, kinks, and chewed insulation announce themselves early if you look.
Do those six things and the thermal fuse will likely live out its natural life, which, on a good oven, is a long one.
Frequently Asked Questions
Why does my toaster oven turn on but not heat up?
Power is reaching the oven but dying before the elements. The usual suspects are an open heating element, a failed selector switch, a thermostat stuck open, or a blown thermal fuse downstream of the switch. Test the elements with a multimeter first, one 15-minute check resolves it most of the time.
Can I fix a toaster oven that won’t heat without a multimeter?
Partly. The visual glow test, the outlet test, and a cord inspection will find a dead element, a tripped breaker, or a damaged cord. But you can’t verify a thermal fuse or thermostat without a continuity check, and guessing leads to replacing good parts.
A basic multimeter costs less than the parts you might wrongly buy. Buy the meter.
Why does only one heating element in my toaster oven work?
Two possibilities. Either one element has burned out (confirmed by an OL reading on your meter), or the selector switch has a burned contact feeding that element’s group. Test the dead element first.
If it reads healthy, test the selector switch next.
Why does my toaster oven trip the breaker as soon as I turn it on?
You have a short circuit. The most common causes are a damaged cord, moisture inside the oven, or an element coil that has sagged into contact with the metal chassis. Unplug the oven, inspect the cord, and look for any element touching bare metal.
Also check the obvious: if the oven shares a 15-amp circuit with a kettle or microwave, the breaker may simply be overloaded, not tripping on a fault.
Is it safe to bypass or remove the thermal fuse?
No, and I won’t soften this. The thermal fuse is a certified safety device that stands between a runaway oven and a fire. Replacing it with wire, foil, or a jumper removes the only automatic cutoff in most models.
The correct move is always a like-for-rated replacement, plus fixing whatever caused it to blow in the first place.
How much does it cost to repair a toaster oven that won’t heat?
DIY, the four common failures run $5, 25 in parts: thermal fuse, element, thermostat, or cord. A repair shop charges $60, 100 because disassembly and testing take an hour of bench time. That math is why this repair is worth doing yourself.
Why does my toaster oven heat up and then shut off?
Distinguish between two very different behaviors. Thermostatic cycling, a click, then a pause, then heating again, is normal; the thermostat is holding temperature. A shutdown that’s permanent, where the oven never heats again, means the thermal fuse has blown and needs replacement.
If the fuse keeps blowing, find the underlying heat problem: blocked vents, foil contact, or a stuck thermostat.
Why is my toaster oven not browning the top of my food?
The top elements aren’t getting power or aren’t producing heat. Run the broil setting and watch: if the top elements stay dark, test them and the selector switch. Also check for heavy grease buildup on the top elements and reflectors, which insulates heat and dulls browning even when everything works electrically.
How long do toaster ovens last, and is a repair worth it?
Budget models typically deliver 3, 5 years of service; well-built ones routinely run 8 or more with care. Use the repair-versus-replace table above as your rule of thumb: single cheap part on an otherwise healthy oven, repair it. Board failure on a budget unit, or a second major failure, replace it.
Why does my toaster oven work in bake mode but not toast mode?
Toast mode adds the browning timer and feeds all the elements, so it has more failure points than bake. A worn toast timer with burned contacts is the classic culprit, test continuity through the timer contacts in the run position. If the timer reads open, replacing it restores both toast mode and the auto-shutoff.
A toaster oven that won’t heat looks like a paperweight, but it’s almost always a $15 repair and forty minutes of your time. Test the outlet, check the glow, meter the fuse and elements, and fix what reads open. Work the chain in order and the fault has nowhere to hide.