Toasters feel harmless. They’re small, cheap, and they’ve sat on kitchen counters since before most of us were born. That familiarity is exactly the problem.
People treat them like furniture. They’re not. A toaster is a box of exposed heating elements running at over 1,000°F, sitting inches from your curtains, your paper towels, and your kids’ cereal boxes.
I’ve pulled apart enough scorched small appliances to tell you this plainly: toaster fires almost never come out of nowhere. They build up over weeks, a layer of crumbs, a stretched spring, a cord pinched behind the counter. Then one Saturday morning, the conditions line up.
The good news? Every one of those conditions is under your control.
Here’s the short answer for anyone in a hurry: empty the crumb tray weekly, keep flammable items at least 12 inches away, never leave a running toaster unattended, inspect the cord and outlet monthly, match your settings to what you’re toasting, and unplug the unit when you’re done. The rest of this guide explains how to do each one properly, plus what to do if it’s already too late.
The stakes are real. Cooking equipment is involved in roughly half of all reported home fires in the United States, according to the NFPA, and unattended equipment is one of the most common contributing factors. Toasters are a small slice of that number, but it’s a slice nobody has to be part of.

Why Toasters Catch Fire in the First Place
Every toaster fire traces back to one of three failure modes. Understand these, and every prevention tip in this guide will make sense instead of sounding like a random list.
Fault #1: Fuel From Crumbs
Bread crumbs are dried carbohydrates with a huge surface area. That’s a technical way of saying they light easily. The elements inside your toaster run well over 1,000°F, hot enough to ignite paper on contact.
Crumbs that fall to the bottom of the cavity sit a couple of inches below those elements, slowly drying out every time you use the machine.
Left alone for weeks, that crumb layer turns into tinder. A single flake that pops upward during a toasting cycle can carry a glowing ember down into the pile. This is the single most common cause of toaster fires, and it’s also the easiest one to eliminate.
Fault #2: Runaway Heat
Here’s what most people never realize: the browning dial on a toaster isn’t a thermostat. It’s a timer. The elements run at full temperature the entire cycle, the dial just decides when to cut them off.
That means anything that keeps bread in contact with the elements past the cut-off point creates a runaway situation. A jammed latch. A slice too thick to pop up.
A wobbly grilled sandwich that flops onto the wires. Plain bread will char first and smoke before it flames. Sugary pastries are worse, sugar caramelizes, then ignites, in under a minute.
Fault #3: Electrical Failure
The third mode lives in the cord, the plug, and the internal wiring. Heat degrades insulation over years. A cord pinched behind the counter can crack internally long before you see damage on the outside.
A loose plug in a worn outlet arcs quietly every time you make toast, throwing microscopic sparks.
Inside the unit, a failing thermostat or corroded element connection can do the same thing. All it takes is one spark near a crumb-filled cavity.
The 12 Rules That Prevent Almost Every Toaster Fire
If you remember nothing else from this article, remember this list:
- Empty the crumb tray once a week. Non-negotiable.
- Never leave a running toaster unattended. Stay in the kitchen.
- Keep 12 inches of clearance between the toaster and anything flammable.
- Never store anything on top of the toaster.
- Inspect the cord and plug monthly for frays, kinks, and scorch marks.
- Plug directly into a wall outlet. No power strips, no daisy chains.
- Unplug the toaster when you’re done, not just after every use, but every day.
- Match the browning setting to the bread. Thin slices never go past medium.
- Use the frozen or defrost setting for frozen items, and watch sugary pastries like a hawk.
- Never toast foil-wrapped items or retrieve stuck bread with metal.
- Check the CPSC recall database for your model at least once.
- Replace the toaster at the first sign of electrical trouble. A $30 appliance isn’t worth a $300,000 house.
Clean the Crumb Tray Regularly
This is the habit that prevents more toaster fires than everything else combined. Yet it’s the one almost everyone skips, until the smoke alarm makes them reconsider.
Think about the geometry. The crumb tray sits at the very bottom of the cavity, directly below the elements. Every slice you toast sheds flakes down there.
A toaster used daily can accumulate a visible layer in under two weeks. In a dry kitchen, that layer is essentially kindling with a heater above it.
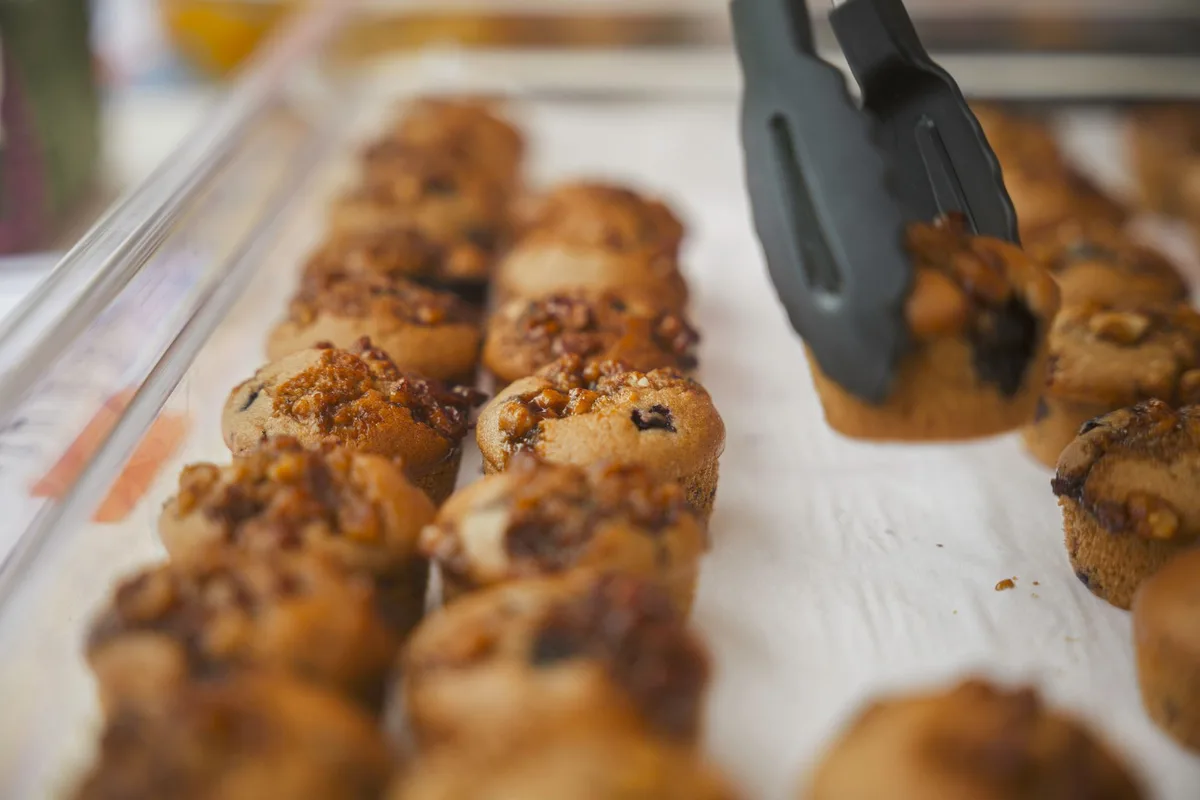
Image: Pexels / Youn Seung Jin
How to Clean It Properly
The process takes three minutes. Do it like this:
- Unplug the toaster and let it cool for 10, 15 minutes. Never clean a warm unit.
- Slide out the crumb tray from the bottom or back, depending on the model.
- Dump the crumbs into the trash or directly over the sink. Do this over a sink, not over the counter, you’ll make a mess otherwise.
- Wipe the tray with a damp cloth. Warm water only. No soap unless it’s genuinely greasy, and if you use soap, rinse and dry thoroughly.
- Dry the tray completely before sliding it back. Moisture inside a toaster cavity is its own problem.
- Hold the toaster upside down over the sink and give it a gentle shake to dislodge anything stuck between the slots.
For toasters without a removable tray, the upside-down shake over the sink is your primary method. Do it after every two or three uses. Just make absolutely sure the unit is unplugged and cool first.
What Never to Do
- Never immerse the toaster in water. Ever. This is how people get shocked later.
- Never stick metal utensils into the slots. Not forks, not knives, not tongs. You risk electrocution and you can damage the elements.
- Never spray cleaner into the slots. Residue on the elements burns and smokes on the next cycle.
- Never run the toaster empty on maximum as a “self-clean.” All that does is give loose crumbs direct flame contact. If a crumb ignites during a normal toasting cycle, at least the bread is there to smother it. On an empty run, nothing is.
A Cleaning Schedule That Actually Works
| Task | Frequency | Time required |
|---|---|---|
| Empty crumb tray | Weekly | 3 minutes |
| Upside-down shake (no removable tray) | Every 2–3 uses | 1 minute |
| Wipe exterior, especially near slots | Weekly | 2 minutes |
| Brush interior walls with a dry pastry brush | Monthly | 5 minutes |
| Inspect cord, plug, and outlet | Monthly | 2 minutes |
| Full clean, including tray wash and housing wipe-down | Quarterly | 15 minutes |
That monthly interior brush matters more than it sounds. Grease and sticky residue build up on the interior walls over time, and they smoke long before they ignite. A dry pastry brush (or a clean, dry toothbrush) reaches most of it.
Inspect the Power Cord and Outlet
The crumb tray prevents fuel fires. The cord inspection prevents electrical ones. Both take minutes, and both catch problems before they become emergencies.

Image: Pexels / Andrey Matveev
What Cord Damage Actually Looks Like
Cord failures almost always happen at two points: right where the cord meets the plug, and right where it enters the toaster body. Those are the stress points. Flexing and yanking eventually break the internal copper strands, even when the outer insulation looks fine.
Run your fingers along the full length of the cord once a month. You’re feeling for:
- Kinks and sharp bends that never relax back
- Cracks or fraying in the insulation
- Soft spots or swelling, which mean internal damage
- Discoloration anywhere, a brown or charred patch on the plug body is a loud warning
Then check the plug itself. The prongs should be straight and bright, not blackened or pitted. Scorched prongs mean the connection has been arcing.
That toaster goes in the bin, not back in the outlet.
One more check during use: touch the cord, not the plug, partway through a toasting cycle. It should be room temperature. A warm cord means resistance somewhere it shouldn’t be.
A hot cord means stop using it today.
Your Outlet Is Part of the System
A perfect toaster plugged into a failing outlet is still a fire hazard. Loose receptacles cause arcing, and arcing at the outlet has started plenty of kitchen fires with no fault in the appliance at all.
Test the fit: plug the toaster in and wiggle it gently. A healthy outlet grips the plug firmly. If the plug hangs loose or slides out under its own weight, have an electrician replace the receptacle.
Also worth knowing: modern electrical code requires GFCI protection on kitchen countertop receptacles, and newer codes add arc-fault protection as well. GFCIs primarily protect people from shock, while AFCI breakers detect the dangerous arcing that starts fires. If your kitchen outlets predate both, that’s worth a conversation with an electrician, not an emergency, but a real upgrade.
Never run a toaster through a power strip. Toasters draw 800 to 1,500 watts, which is more than most strips are rated to deliver continuously. Plug straight into the wall.
A Note for UK and 230V Households
If you’re in the UK, Ireland, or most of Europe, your toaster runs on 230, 240V rather than the North American 120V. Higher voltage means lower current for the same wattage, so cords generally run cooler, but everything else in this section applies unchanged. UK plugs contain a cartridge fuse (typically 3A or 5A for a toaster); if your toaster trips that fuse or the RCD, don’t just swap the fuse and carry on.
A repeated trip is the machine telling you something inside has failed.
Give Your Toaster Breathing Room
Placement is fire prevention that costs nothing. Yet most toasters live their whole lives in exactly the wrong spot, shoved against the backsplash, tucked under cabinets, hemmed in by the paper towel roll.
Heat is the issue. A toaster sheds heat from the sides and top during use, and the goal is simple: give that heat somewhere to go that isn’t flammable.
Follow these clearances:
- 12 inches minimum from curtains, dish towels, paper towel holders, and wall hangings
- Nothing stored on top of the unit, not cereal boxes, not cookbooks, not the bread bag
- A full hand-width of space between the toaster and the underside of cabinets if it sits near the counter edge under an upper cabinet
- At least an arm’s length from the stove, so a burner flare-up or a greasy pan never interacts with the toaster
Under-cabinet placement deserves special mention. Heat rises straight up. If your toaster sits directly under upper cabinets, that heat beats against the cabinet bottom every morning.
Laminate and paint will scorch slowly, and the cabinet interior, often full of boxed food and paper packaging, warms with it. If you have no choice about placement, pull the toaster forward and toward open counter space while it runs.
One last placement rule people forget: keep the toaster away from the counter’s edge. A toaster that gets knocked off the counter mid-cycle can land face-down on the floor, elements still glowing. That’s how pets, kids, and clumsy mornings turn into fires.
Use the Right Settings for the Right Bread
The browning dial is a timer, not a temperature control. Once you internalize that, the settings make sense, and the risks do too.
Low to medium settings (1, 4) are for standard sandwich bread, especially thin slices. Thin bread toasts fast and chars faster. There’s no reason a thin slice ever needs the top of the dial.
The bagel setting cuts power to the center elements and runs only the outer pair. The idea: the cut faces of a bagel point outward, so they toast while the rounded crust side just warms. If your toaster has this setting, use it for bagels and anything else with a flat cut face.
It also makes a surprisingly safe setting for thick English muffins.
The frozen or defrost setting starts slow and low, thawing the bread before the browning phase. Frozen bread thrown straight onto a full-power cycle does two bad things: the outside burns while the inside stays cold, and condensation from the thawing process drips toward the elements.
Reheat runs a brief, low-heat cycle. Use it for toast that went cold. Never re-toast already-browned bread on a normal setting, twice-dried bread ignites dramatically faster than fresh.
One warning about new toasters: most manuals recommend one or two empty break-in cycles on medium to burn off manufacturing oils, which produce a brief smell. That’s legitimate. What’s not legitimate is using “burn-off” as an ongoing cleaning method on an older unit.
Break-in cycles are for new machines in a ventilated room. Crumb removal is done with the tray and a brush.
Never Walk Away From a Running Toaster
This is the rule people break daily, and it’s the rule behind the most destructive toaster fires I’ve read incident reports on.
Here’s the uncomfortable physics. The danger window in a toasting cycle is the last 30 to 60 seconds, precisely the window when people wander off to pour coffee. Sugars in the bread caramelize and then ignite quickly.
Crumbs on the elements smoke and then flame. Everything happens fast, and it happens while you’re in the next room.
The warning isn’t just mine. Kellogg’s own instructions for Pop-Tarts state that due to the risk of fire, you should never leave your toasting appliance unattended, a warning the company added after real incidents involving frosted pastries igniting. When a breakfast pastry giant puts a fire warning on the box, the risk has already proven itself in court-tested numbers.
NFPA data consistently shows that equipment left unattended is a leading factor in cooking fires. The pattern is always the same: “I was only gone for a minute.”
You don’t have to hover over it. Just stay in the kitchen. If you genuinely need to leave, cancel the cycle and pop the toast up.
Thirty seconds of lost toast beats a house fire every single time.
What You Put In Matters More Than You Think
Half of toaster fire incidents come down to somebody putting the wrong thing in the slots. Here’s the honest scoreboard.
| Item | Why it’s dangerous | Verdict |
|---|---|---|
| Foil-wrapped foods | Metal reflects heat back onto elements and can cause arcing | Never |
| Frozen pastries with frosting or filling | Sugar ignites fast; frosting melts onto elements | Frozen setting only, full attention |
| Buttered bread or cheese sandwiches | Fats drip onto elements and flare | Use a toaster oven or pan instead |
| Oversized artisan slices | Jam against elements; won’t pop up | Cut down to fit, never force |
| Grilled or stuffed sandwiches | Fillings fall onto glowing wires | Not for a slot toaster |
| Toast reheated twice | Twice-dried bread chars then ignites quickly | Use the reheat setting, or skip |
| Metal utensils for stuck toast | Electrocution risk plus element damage | Unplug first, then use wooden tongs |
| Packaging, napkins, wrappers | Paper and plastic ignite on contact | Keep them away from the slots entirely |
A few of these deserve explanation, because they trip people up.
The stuck slice is the classic scenario. Bread too wide for the slots gets wedged, the cycle ends, the slice doesn’t pop, and the elements keep glowing against it. The correct response is: unplug the toaster, wait for the elements to go completely dark, and only then retrieve the bread, with wooden or silicone tongs, never a fork. Do this before the next cycle, not during.
Foil deserves a hard line. Some people wrap day-old bread in foil to “refresh” it in a slot toaster. That’s a toaster oven trick, not a toaster trick. In a slot toaster, foil reflects radiant heat back onto the elements, which overheats them, and a crinkled edge can bridge two elements and arc.
There is no version of this that ends well.
Sugary pastries are a contained risk. They’re not forbidden, millions are toasted safely every morning. But the sugar content changes the math. A frosted pastry goes from golden to flaming faster than any plain bread, and the frosting drips down onto the wires.
If you toast them, use the frozen setting, stay in the kitchen, and pull them the moment they’re done.
Seven Warning Signs Your Toaster Is Failing
Toasters announce their decline. Most people just don’t speak the language. Learn these symptoms and you’ll replace the machine on your schedule, not during an emergency.
| Symptom | What it likely means | What to do |
|---|---|---|
| Burning smell during normal use | Trapped crumbs, or degrading insulation inside | Deep clean; if smell persists, stop using it |
| Elements glow unevenly, with dark sections | Aging or partially failed element | Replace the unit |
| Lever won’t stay down, or pops up too early | Failing latch or timer mechanism | Replace — shutoff is now unreliable |
| Toast doesn’t pop up at all | Jammed carriage or failed spring | Unplug immediately; this is the biggest fire risk; replace |
| Cord or plug warm to the touch | Internal resistance from damage | Stop using it today |
| Breaker trips when the toaster starts | Internal short, or circuit overload | Replace the toaster; if it persists, call an electrician |
| Sparks or visible flames inside | Arcing at element connections | Unplug at the wall; replace; never use again |
Two of these outrank the others. Toast that doesn’t pop up is the single most dangerous failure a toaster can develop, because it defeats the machine’s only safety feature, the automatic shutoff. Everything else on the list degrades margins. This one removes them.
And a lever that won’t latch is the same problem arriving early.
The breaker-tripping symptom works in reverse: the breaker is doing its job. Don’t reset it and carry on. One trip is a message.
Two trips from the same appliance is a verdict.
If a Toaster Fire Starts: The First 60 Seconds
Even well-maintained toasters occasionally flame up, a rogue crumb, a freak element failure. What happens in the next minute determines whether you lose a toaster or a kitchen.
Here’s the sequence:
- Assess before you move. Is it a small flame inside the slots, or is it spreading to the counter? Your next step depends entirely on this.
- Unplug at the wall, only if you can reach it safely. Never reach over flames. Cutting power removes the energized-electrical component instantly.
- Smother it. A metal baking sheet slid over the slots, a metal pot lid, or a generous pour of baking soda all starve a small fire of oxygen. Baking soda works because sodium bicarbonate releases carbon dioxide when heated.
- Use a fire extinguisher if smothering fails. A standard home ABC extinguisher handles it. Aim at the base of the flames, sweep side to side.
- If it isn’t controlled within seconds, get out. Close the kitchen door behind you if you can, call emergency services from outside, and stay out. Flames reaching the cabinets or the wall mean the fire has left the appliance. That’s a fire department call, not a DIY moment.
And the absolute prohibitions:
| Never do this | Why |
|---|---|
| Throw water on it | Shock risk if it’s still plugged in; splatters burning crumbs everywhere |
| Use flour | Flour is combustible — it burns and can even flash |
| Use sugar or salt from the shaker | Sugar burns; salt works but only in quantity, and shakers throw it everywhere |
| Pick up the toaster | You’re now carrying a burning appliance through your kitchen |
| Reach over the flames to unplug | Sleeve ignition happens in under a second |
| Ignore it because “it went out” | Embers can smolder inside the housing and reignite minutes later |
That last line matters more than people expect. If a toaster fire self-extinguished, unplug it, get it onto a non-flammable surface like the stovetop or a concrete step, and keep an eye on it for half an hour. And check the area around it, the wall behind, the cabinet above, for scorching or smoldering.
One prevention-adjacent note: never disable the smoke alarm near your kitchen, even if it false-alarms during normal toasting. Move the alarm farther from the toaster or choose a model with hush or smart features instead. An alarm you silenced is an alarm that can’t save you.
Repair or Replace Your Toaster?
Here’s my honest position after years around small appliances: a toaster is never worth repairing once electrical symptoms appear. A basic two-slice unit costs less than a nice dinner. Internal parts, elements, thermostats, latches, are rarely sold separately, and opening the housing puts you fingers-deep in the exact failure you’re trying to avoid.
Replace immediately if:
- Any electrical symptom from the table above appears
- The unit has been through a fire, even a small self-extinguished one, heat that chars the interior will have weakened insulation you can’t see
- The cord shows damage you can’t fully trace
- The model appears in a recall
That last one deserves a genuine habit, not a passing thought. The CPSC maintains a public recall database where you can search any appliance by brand and model in under a minute. Do it once for the toaster you own today, and again whenever you buy one.
Registering a new toaster with the manufacturer takes two minutes online and gets you notified directly if a defect surfaces later.
There’s no hard age limit on toasters, a well-made, well-cared-for unit can run for a decade. But if yours is past the five-year mark, make the monthly cord inspection non-negotiable. Time and heat degrade insulation whether or not the machine gets used.
Standards, Certifications, and What They Actually Protect You From
Flip a quality toaster over and you’ll find a small mark on the base: UL, ETL, or CSA. These aren’t decorative. They mean an independent testing laboratory evaluated the appliance against a safety standard, for household electric cooking appliances, that’s primarily UL 1026, covering fire risk, shock hazard, and mechanical failures like a stuck carriage.
What certification does: it means the unit met a baseline for element containment, insulation quality, and shutoff behavior under fault conditions.
What it doesn’t do: it doesn’t forgive a full crumb tray, a frayed cord, or a foil-wrapped bagel. Certification assumes a user doing their part. Every incident I’ve described in this guide involves a failure mode certification can’t prevent, because the hazard was introduced at the countertop, not the factory.
One practical shopping note: very cheap imported toasters sometimes carry no listing mark at all. If the base is blank or the marking is a sticker you don’t recognize, treat the price savings as what it is, money saved by skipping safety testing. Buy a listed unit.
Toaster Fire Myths That Refuse to Die
“A burning smell from a new toaster is always normal.” Break-in smell on day one, yes. A burning smell every use, no. New units smell briefly as manufacturing oils cook off.
If the smell never fades, something else is burning, usually residue or degrading insulation.
“Unplugging is pointless, it’s just turned off.” A toaster switched off but plugged in still has live connections from the outlet to the switch. Internal shorts, rodent damage to wiring, or moisture in the housing can energize parts that should be dead. Unplugging removes that entire failure mode.
It also saves the trickle of standby draw, for what that’s worth.
“Fires only happen to old toasters.” Brand-new units start fires too, usually through crumb buildup from near-daily use, foil in the slots, or sugary pastries left unattended. Age amplifies risk; it isn’t the source of it.
“Running it on max burns the crumbs off.” It burns the crumbs, all right, as flames. High heat with nothing in the slots gives loose debris direct element contact. Clean with the tray and a brush instead.
“It popped up, so I can walk away.” The elements cut off at pop-up, but the cavity is still hot, and the risk of a second batch igniting faster grows with every cycle back to back. Batch-toast on busy mornings? Fine.
Just stay in the room while the machine runs.
“Water is fine as long as I unplug first.” Even unplugged, water on a hot toaster splatters embers and can crack components. Smother with baking soda or a metal lid. Keep the extinguisher for anything smothering can’t handle.
Frequently Asked Questions
Can a toaster catch fire when nobody is using it?
Yes, though it’s uncommon. The main scenarios: a plugged-in unit with an internal short, a stuck element energizing despite the switch, or residual heat reigniting crumbs after a cycle. Unplugging when you’re done eliminates all three.
If your toaster ever shows a burning smell or warm cord while switched off, unplug it and don’t use it again.
Why does my new toaster smell like burning?
Manufacturing oils and dust on the elements burn off during the first one or two cycles. Run it empty on a medium setting once or twice in a ventilated room and the smell should disappear. A smell that persists past a week of use, or intensifies, means something else is burning, and the unit should be cleaned thoroughly or replaced.
How often should I really clean the crumb tray?
Weekly for a household that toasts daily; every two weeks minimum for lighter use. If you toast frozen items or sugary pastries, step it up, because they shed more debris. The full shake-out over the sink after every two or three uses keeps the interval from ever becoming critical.
Is it safe to leave a toaster plugged in all the time?
It’s lower risk than leaving it unattended while running, but it’s not zero. Live connections exist from the outlet to the internal switch, and faults, pests, or moisture can bypass the switch. Plugging in when you need it and unplugging after costs four seconds a day and closes the book on that entire risk category.
Can I safely toast frozen pastries like Pop-Tarts?
Yes, with conditions. Use the frozen or defrost setting, never leave the room, and pull them the instant they’re done. The manufacturer’s own guidance warns against unattended toasting because of fire risk, the sugar and frosting ignite far faster than plain bread.
Skip re-toasting them entirely.
What type of fire extinguisher should I keep in the kitchen?
A standard ABC-rated extinguisher covers toasters, grease, wood, and paper in one unit. Keep it mounted near the kitchen exit, never next to the stove, where a flare-up could block your path to it. Check the pressure gauge once a month when you do your cord inspection.
Why does my toaster keep tripping the breaker?
Either the toaster has an internal short, or it’s sharing an overloaded circuit with high-draw appliances like a kettle and microwave. Test it alone in another outlet. If it still trips, the toaster is the problem, replace it.
If it doesn’t, have an electrician assess the kitchen circuit. Never just keep resetting the breaker.
Are toaster ovens or air fryers safer than slot toasters?
Different risks, not fewer. Toaster ovens add grease drips and open racks (so foil misuse becomes tempting), while air fryers add high-velocity hot air that can blow light debris around. All three need crumb management, clearance, and attendance.
A well-maintained slot toaster is arguably the simplest of the three to keep safe.
What should I do with a toaster after a small fire?
Don’t use it again, even if it looks fine. Heat from a fire chars internal insulation in ways you can’t see, and the next failure could be worse. Unplug it, let it cool fully, keep it on a non-flammable surface away from anything combustible for half an hour in case of reignition, then dispose of it.
Check the wall and cabinets around it for scorching before you call it done.