Image source: Pexels / Clem Onojeghuo (Pexels License)
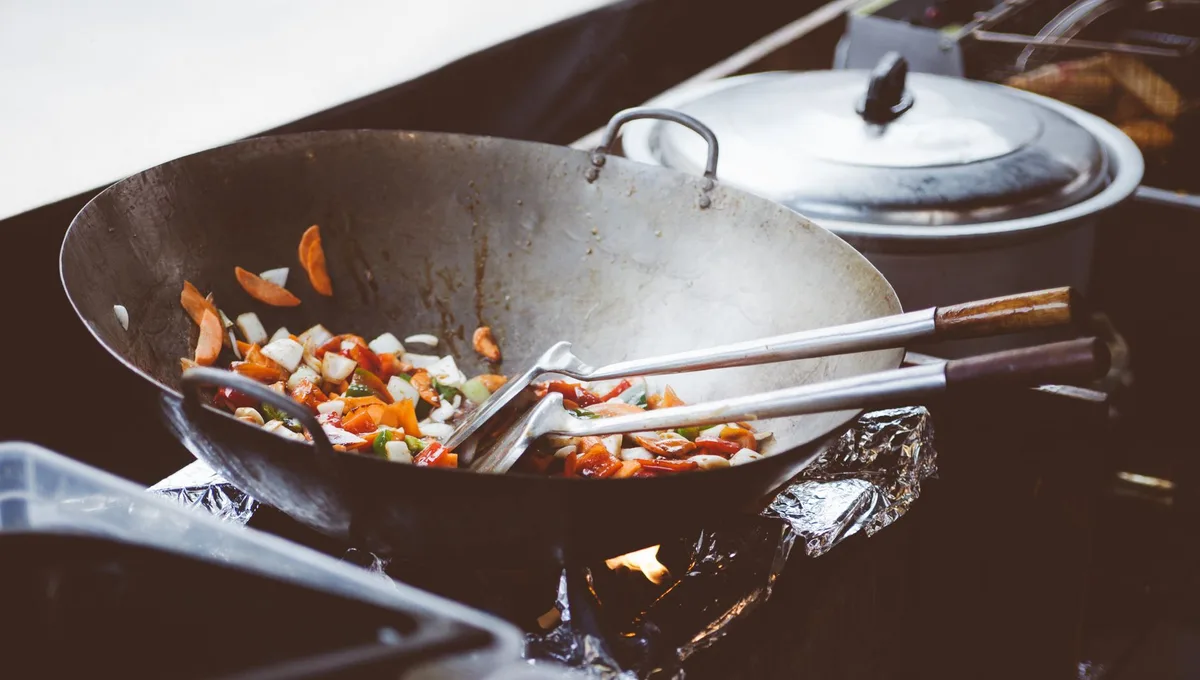
You just bought a carbon steel stir fry pan. It looks bare, almost raw. The surface is pale grey, not the deep black you see in professional kitchens.
You already know your first stir fry will stick like glue if you cook in it now.
Don’t panic. That grey metal is a blank canvas. Seasoning transforms it into something almost magical, a slippery, naturally non-stick surface that only gets better the more you use it.
Here’s the truth: seasoning isn’t complicated. It’s not some arcane ritual passed down from wok masters. It’s controlled polymerization.
You’re bonding oil to metal at high heat. That’s it. But you have to do it right, or you’ll end up with a sticky mess that flakes into your food.
I’ve seasoned dozens of stir fry pans, carbon steel, cast iron, even stainless steel (though that’s a different beast). I’ve made every mistake you can make. I’ve had seasoning peel off like sunburn.
I’ve had pans rust overnight because I rushed the drying step.
Let me save you the trouble. This guide covers everything: why seasoning matters, which oil to use, the exact stovetop method (no oven required), how to fix mistakes, and how to maintain that beautiful black patina for years.
Why Seasoning Matters for a Stir Fry Pan
A stir fry pan, whether it’s a wok or a flat-bottomed carbon steel pan, isn’t like your non-stick Teflon skillet. That coating is applied at the factory. Seasoning is something you create.
It’s a layer of polymerized oil that fills the microscopic pores in the metal.
When you season properly, three things happen:
First, you get genuine non-stick performance. Not Teflon-level slick, but close. Eggs slide. Rice doesn’t glue itself to the bottom.
Protein sears instead of tearing when you flip it.
Second, you prevent rust. Carbon steel and cast iron are reactive. Leave them wet for ten minutes, and orange rust spots appear. A good seasoning layer seals the metal from moisture.
Third, you build flavor. This is the part home cooks overlook. Every time you stir fry, a tiny amount of oil polymerizes onto the surface. That layer carries the flavor of everything you’ve cooked before.
Your fifth stir fry will taste better than your first. That’s not placebo, it’s chemistry.
The USDA’s food safety guidelines confirm that properly seasoned cookware is safe for cooking at high temperatures. Seasoning doesn’t create any health risks when done correctly.
Choosing the Right Oil for Seasoning
Not all oils work for seasoning. Some smoke at too low a temperature. Others leave a tacky, sticky residue.
You need an oil with a high smoke point and a high percentage of unsaturated fats.
The best choices are:
- Flaxseed oil, The gold standard. It polymerizes hard and fast. Creates a dark, durable coating. The downside? It’s expensive and goes rancid quickly if you don’t refrigerate it.
- Grapeseed oil, My personal go-to. High smoke point (420°F). Neutral flavor. Polymerizes well. It’s affordable and easy to find.
- Avocado oil, Excellent choice. Very high smoke point (520°F). Creates a hard coating. The flavor is mild enough not to interfere.
- Vegetable or canola oil, Budget-friendly. They work fine. The seasoning won’t be quite as hard as with flaxseed or grapeseed, but for most home cooks, it’s totally acceptable.
Never use these oils for seasoning:
- Olive oil (extra virgin or regular), Too low a smoke point. It burns before it polymerizes.
- Butter or coconut oil, Contains solids that burn and create a gummy layer.
- Walnut or sesame oil, Too expensive, prone to rancidity, and the flavor is too strong.
One more thing: use a clean, lint-free cloth to apply the oil. Paper towels leave lint behind. Those tiny fibers burn and create texture on your seasoning.
Preparing Your Pan for First-Time Seasoning
Before you apply a single drop of oil, you need to prep the pan. New stir fry pans come with a factory coating of protective wax or oil. That’s not seasoning, it’s shipping protection.
You have to remove it completely.
Here’s the process:
Step 1: Wash the pan with hot water and dish soap. Scrub vigorously. Use a sponge or brush.
Get every surface, inside, outside, handle, rim.
Step 2: Dry the pan immediately. Don’t let it air dry. Use a towel.
Then put it on the stove over medium heat for two minutes to evaporate any remaining moisture.
Step 3: Check for residue. If the pan looks blotchy or feels greasy after drying, you missed some factory coating. Wash it again with more soap and a scrubber.
Step 4: (Optional but recommended) Give the pan a quick vinegar wipe. Mix one part white vinegar with three parts water. Wipe the interior.
This removes any mineral deposits or oxidation. Rinse thoroughly and dry.
You should now have a clean, bone-dry pan with a uniform grey surface. That’s the starting point.
Step-by-Step: How to Season a Stir Fry Pan on the Stovetop
This is the method I use every time. It works for round-bottom woks, flat-bottom carbon steel pans, and even cast iron woks. You don’t need an oven.
You just need your stove, oil, and a few minutes of patience.
What You Need
- Your clean, dry stir fry pan
- High-smoke-point oil (grapeseed or flaxseed preferred)
- Clean lint-free cloth or paper towels (folded into a pad)
- Tongs (to hold the cloth)
- Stove (gas is best; electric or induction works but requires more attention)
The Process
Step 1: Heat the pan until it smokes.
Place the pan on your largest burner. Turn the heat to high. Wait.
Don’t walk away. After one to three minutes, the pan will start smoking lightly. It’s ready.
Step 2: Add a thin layer of oil.
Pour in about one tablespoon of oil. Use tongs to hold your cloth pad. Spread the oil across the entire interior surface, bottom, sides, up to the rim.
The pan is hot, so work quickly. The oil will smoke immediately. That’s normal.
Step 3: Wipe out the excess.
This is the most important step. Take your cloth and wipe the oil off as if you made a mistake putting it on. You want the thinnest possible layer.
If you can see oil pooling, you used too much. Wipe again. The pan should look almost dry, with just a faint sheen.
Step 4: Let it smoke until the oil stops.
Let the pan continue heating. The tiny amount of oil left will polymerize. You’ll see smoke.
You’ll smell hot metal. That’s the seasoning forming. After two to four minutes, the smoking will stop.
The pan surface will darken slightly, from grey to a light bronze.
Step 5: Remove from heat and cool.
Take the pan off the burner. Let it cool completely. Don’t run water on it.
Don’t touch the surface. Let it sit for ten to fifteen minutes.
Step 6: Repeat three to five times.
One layer of seasoning is better than nothing, but it’s fragile. You need multiple layers. Repeat steps one through five.
Each layer adds to the last. The color will shift from bronze to brown to deep black. After four or five coats, you’ll have a durable, non-stick surface.
Pro Tips for Stovetop Seasoning
- Gas stoves work best because the flames wrap around the pan’s sides, heating evenly. If you have an electric coil burner, move the pan around every thirty seconds to distribute heat.
- Induction stoves can be tricky. Carbon steel sometimes warps on induction. Heat slowly, medium heat, not high, and use a flat-bottomed pan.
- Work in a well-ventilated area. Seasoning creates smoke. Open windows. Turn on the hood fan. If you have sensitive smoke alarms, temporarily relocate them.
- Don’t rush the cooling step. If you apply oil to a pan that’s still hot, it burns immediately and creates a rough, uneven layer.
The Oven Method (Alternative for Flat-Bottomed Pans)
If your stir fry pan has an oven-safe handle (no plastic or silicone), you can season it in the oven. This method is slower but more even. It’s ideal for flat-bottomed pans that won’t fit comfortably over a burner’s flame.
Step 1: Preheat your oven to 450°F (232°C).
Step 2: Wash and dry your pan as described above.
Step 3: Apply a paper-thin layer of oil to the entire pan, inside, outside, handle. Use a clean cloth. Wipe off all excess.
Step 4: Place the pan upside down on the middle oven rack. Put a baking sheet on the rack below to catch any drips.
Step 5: Bake for one hour. Turn off the oven. Let the pan cool inside.
Step 6: Repeat the oil application and baking process three to four times.
The oven method produces a slightly harder, more uniform seasoning than stovetop. The trade-off is time. You’ll spend four hours with multiple cycles.
But if you have the patience, it works beautifully.
How to Know Your Seasoning Is Done
You don’t need a special tool to test seasoning. Here’s what to look for:
- Color: The surface should be dark brown to black. It won’t be perfectly uniform. Some spots will be darker than others. That’s fine.
- Feel: Run your finger across the surface. It should feel smooth, almost waxy. Not sticky. Not rough.
- Smell: A properly seasoned pan has a faint, clean oil smell. If it smells rancid or burnt, something went wrong.
- The egg test: Crack an egg into the hot pan with a little oil. If it slides around without sticking, your seasoning is ready. If it sticks, add another layer or two.
Common Seasoning Mistakes and How to Fix Them
I’ve made every mistake on this list. Here’s how to fix them.
Sticky or Tacky Seasoning
Cause: You used too much oil. The excess didn’t polymerize. It stayed as a semi-solid gummy layer.
Fix: Wash the pan with hot water and a stiff brush. No soap (soap can strip seasoning). Dry it thoroughly.
Then re-season with a very thin oil layer. Wipe it off as if you’re trying to remove it.
Flaking or Peeling Seasoning
Cause: Oil layer was too thick, or the pan wasn’t cleaned properly before seasoning. New layers can’t bond to old ones if there’s a greasy residue.
Fix: Strip the pan completely. Use steel wool and a little dish soap to scrub off all seasoning. Dry it.
Start from scratch with clean metal.
Rust Spots
Cause: The pan wasn’t dried after washing. Or the seasoning layer is too thin to protect the metal.
Fix: Scrub off the rust with steel wool. Dry the pan immediately. Heat it on the stove for two minutes to drive off moisture.
Then apply two or three fresh seasoning layers.
Uneven Color or Patchy Surface
Cause: Uneven heating during seasoning. One side of the pan got hotter than the other.
Fix: This is cosmetic, not functional. If the pan cooks fine, leave it. If it bothers you, strip and re-season, paying attention to heat distribution.
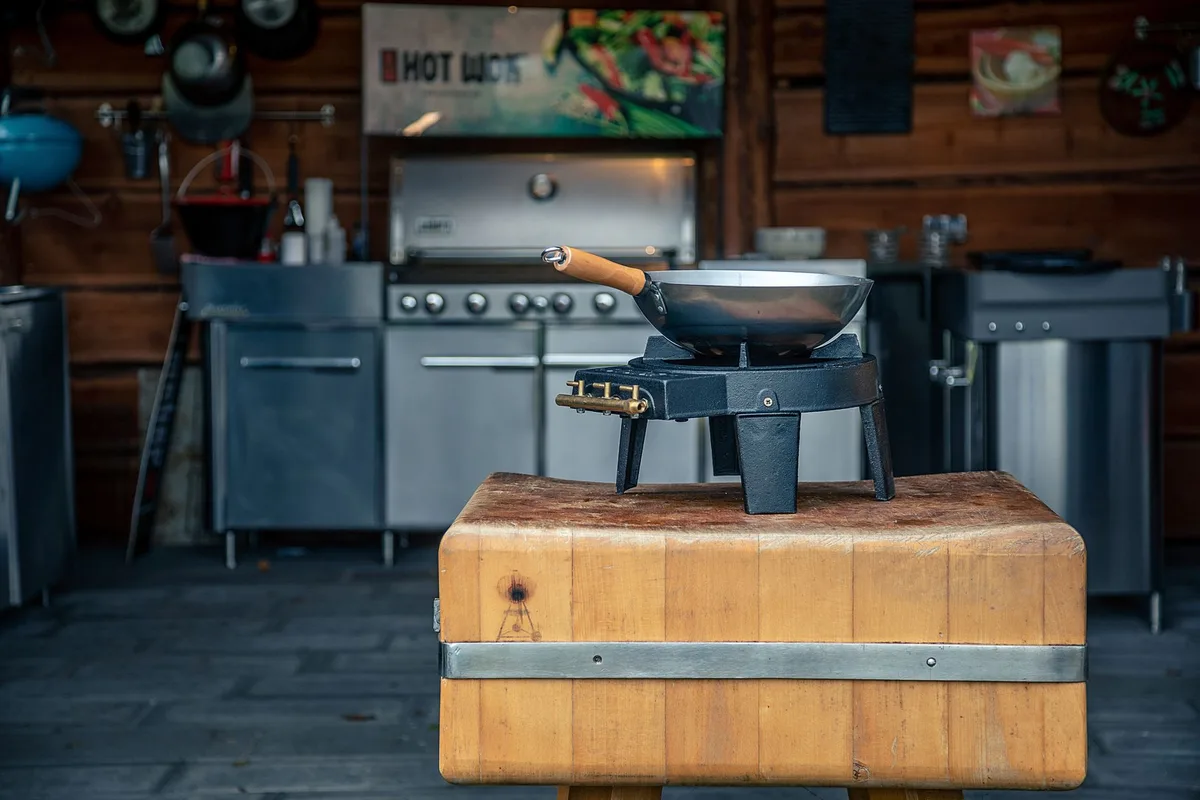
Image source: Pexels / HOT WOK (Pexels License)
Maintaining Your Seasoned Pan
You’ve put in the work. Now keep it alive. A well-maintained seasoning lasts years.
Neglect it, and you’re back to grey metal and rust.
After Every Use
Cool the pan slightly, don’t shock it with cold water while it’s screaming hot. Carbon steel can warp. Let it sit off the heat for two to three minutes.
Wash with hot water only. Use a soft sponge or a bamboo brush. If food is stuck, add a little coarse salt and scrub with a paper towel. The salt acts as an abrasive without damaging seasoning.
Dry it immediately. This is non-negotiable. Use a towel. Then put it on the stove over medium heat for a minute until all moisture evaporates.
Apply a micro layer of oil. While the pan is still warm, wipe the interior with a drop of oil on a cloth. This seals the surface and prevents rust.
Deep Cleaning (When Needed)
Sometimes your seasoning gets thick and crusty. Bits of burnt food build up. It happens.
For mild buildup: Use a chainmail scrubber or bamboo brush with hot water. Scrub in circles. Rinse.
Dry. Re-season with one thin layer.
For heavy buildup: Boil a cup of water in the pan for five minutes. Scrape the softened residue with a wooden spatula. Pour out the water.
Scrub, dry, and re-season.
What to Never Do
- Don’t soak the pan. Never leave it in water. Even five minutes can start rust.
- Don’t use soap regularly. A little dish soap once in a while won’t destroy seasoning, but daily soap use will strip it slowly.
- Don’t put it in the dishwasher. Ever. The detergent and heat will destroy seasoning and rust the metal.
- Don’t cook acidic foods for long periods. Tomato sauce, vinegar, wine, these react with bare metal if your seasoning is thin. Quick stir fries are fine. Simmering a tomato-based curry for thirty minutes is not.
Image source: Pexels / Clem Onojeghuo (Pexels License)
Stripping and Restoring Old Seasoning
Sometimes you need to start over. Maybe the seasoning is too thick and flaky. Maybe you bought a used pan with decades of burnt-on crud.
Stripping isn’t hard, but it takes elbow grease.
The Easy Method (Baking Soda and Vinegar)
Step 1: Fill the pan with water. Add one cup of white vinegar. Bring to a boil.
Step 2: Add two tablespoons of baking soda. It will fizz. Let it boil for ten minutes.
Step 3: Pour out the solution. Scrub with steel wool. The old seasoning should come off as dark sludge.
Step 4: Wash with dish soap and water. Rinse thoroughly. Dry immediately.
Step 5: Re-season from scratch with four to five thin layers.
The Fire Method (Outdoor Only)
This is aggressive. I’ve used it on thrift store pans with half an inch of carbonized grease.
Step 1: Put the pan on a gas grill or campfire. Heat it until the old seasoning burns to white ash. This takes ten to fifteen minutes.
Step 2: Let it cool. Scrub off the ash with steel wool.
Step 3: Wash, dry, and re-season.
Warning: This method can warp thin pans. Use it only on thick carbon steel or cast iron.
Frequently Asked Questions About Seasoning Stir Fry Pans
Can I season a stainless steel stir fry pan?
Sort of. Stainless steel doesn’t bond to polymerized oil the way carbon steel does. You can create a temporary non-stick surface by heating the pan, adding oil, and cooking, but it won’t last.
For stainless steel, focus on technique (preheating properly, using enough oil) instead of trying to build a permanent seasoning.
How long does seasoning last?
With proper care, seasoning lasts for months or years. It gets stronger with use. The initial layers are fragile.
After ten to fifteen stir fries, the patina becomes durable.
My seasoning looks blotchy. Is that bad?
No. Blotchy seasoning is normal. The pan bottom gets more heat than the sides, so it darkens faster.
Uneven color doesn’t affect cooking performance. Keep using it. The color will even out over time.
Can I use metal utensils on my seasoned pan?
Yes, but be gentle. Metal spatulas and wok ladles are fine for normal cooking. Avoid scraping aggressively.
Don’t use a metal fork to pry stuck food loose. Use a wooden or bamboo spatula when possible.
Does seasoning add calories to food?
Negligible amounts. The polymerized oil is bonded to the metal. It doesn’t transfer to food.
A few molecules might come off with aggressive scraping, but it’s far less than the oil you add during cooking.
Final Thoughts on Seasoning a Stir Fry Pan
Seasoning a stir fry pan isn’t hard. It’s repetitive. You apply thin oil.
You heat it until it smokes. You repeat. That’s the whole process.
The mistake most people make is expecting perfect results on the first try. Your first seasoning won’t look like a seasoned chef’s wok. It’ll be patchy and light brown.
That’s fine. Use the pan. Cook stir fries.
Fry eggs. The seasoning will darken and strengthen with every meal.
One more thing: don’t obsess over perfection. A seasoned pan is a tool, not a museum piece. It will get scratches.
It will develop uneven color. It might get a rust spot that you have to scrub and re-season. All of that is normal.
Keep cooking.
The best seasoned stir fry pans in the world aren’t the ones that were babied. They’re the ones that were used every day, washed quickly, dried immediately, and given a thin oil wipe before being put away.
Do that consistently, and your stir fry pan will outlast you.