I get asked this question all the time: “Do I need to season my ceramic cookware like I do with cast iron?” The short answer is no, but the longer answer is a bit more interesting.
Ceramic cookware is fundamentally different from cast iron or carbon steel. Those pans need a polymerized oil layer to create a non-stick surface. Your ceramic pan already has a non-stick coating built in.
That’s the whole point of buying it.
But here’s what most manufacturers won’t tell you: while you don’t need a traditional seasoning process, there is a simple conditioning step that can dramatically extend the life of your ceramic pans and keep food sliding off like magic. And if your ceramic pan has started sticking after months of use? There’s a way to restore it.
Let me walk you through exactly what seasoning means for ceramic cookware, when you should do it, and how to get it right every single time.
What “Seasoning” Actually Means for Ceramic Cookware
First, let’s clear up a massive point of confusion.
Traditional seasoning, the kind you do on cast iron, involves heating oil until it polymerizes. That means the oil bonds chemically to the metal, creating a hard, slick coating. That’s not what’s happening with ceramic.
Ceramic cookware has a silica-based coating that’s already non-stick. It’s fired at extremely high temperatures during manufacturing. You aren’t adding a layer.
You’re maintaining the one that’s already there.
When people talk about “seasoning” ceramic cookware, they really mean:
- Initial conditioning, A light oil treatment before first use that fills microscopic pores in the ceramic surface
- Restorative treatment, A deeper oil application to revive older pans that have lost their slip
- Protective maintenance, A thin oil layer that prevents food residue from bonding to the surface
Think of it less like seasoning cast iron and more like conditioning a wooden cutting board. You aren’t building layers. You’re feeding and protecting the surface.
Why You Should Season Ceramic Cookware (Even Though It’s “Non-Stick”)
I’ll be straight with you: not everyone needs to do this. If you just bought a high-quality ceramic pan and you cook with plenty of oil or butter, you’ll probably be fine without any special treatment.
But here’s why I recommend it anyway.
Ceramic coatings are porous at a microscopic level. When you look at a ceramic pan, it looks perfectly smooth and glossy. Under a microscope, though, it’s full of tiny hills and valleys.
Food particles and oils get trapped in those valleys. Over time, they burn and carbonize, which creates sticking points.
A light seasoning fills those microscopic gaps. It creates a smooth barrier that food slides right over. Plus, it adds a layer of protection against scratches and thermal shock.
The main benefits include:
- Better non-stick performance, Especially for delicate foods like eggs and fish
- Longer lifespan, The coating stays intact longer with proper maintenance
- Easier cleanup, Food residue has nothing to grab onto
- Prevents staining, Tomato sauces and turmeric won’t leave their mark
- Reduces oil usage, You’ll need less cooking fat over the long run
If you’ve ever wondered why your friend’s ceramic pan still performs like new after two years while yours started sticking after six months, this is often the difference.
When to Season Your Ceramic Cookware
Timing matters. Here’s when you should condition your ceramic pans.
Before First Use
This is the most important one. Most ceramic cookware comes with a thin protective coating from the factory, but a quick conditioning step ensures optimal performance from day one.
Wash the pan with warm soapy water first to remove any manufacturing residue. Dry it thoroughly. Then follow the seasoning process below.
After Every 15–20 Uses
For regular maintenance, I recommend a light conditioning after about every 15, 20 cooking sessions. You’ll notice the surface starting to look a little dull or feel slightly less slick. That’s your cue.
When Food Starts Sticking
If your scrambled eggs suddenly start leaving a residue or your fried eggs won’t release cleanly, it’s time for a treatment. Don’t wait until the pan is completely unusable.
After Cooking Acidic Foods
Tomato sauce, citrus, vinegar, and wine can be tough on ceramic surfaces. If you cook something highly acidic, wash the pan and apply a light oil coating afterward. It helps neutralize any microscopic etching the acid might have caused.
Before Long-Term Storage
If you’re putting your ceramic cookware away for a season (or you just don’t use it often), give it a light oil treatment first. It prevents dust and air from degrading the surface.
What You’ll Need — The Simple Setup
You don’t need fancy equipment. Here’s what I use:
- Ceramic cookware, Clean and completely dry
- High smoke point oil, Avocado, grapeseed, or refined coconut oil work best. Avoid olive oil, it has a low smoke point and can leave sticky residue.
- Paper towel or soft cloth, Lint-free is ideal
- Stove, Any cooking surface works
- Mild dish soap, For washing beforehand
That’s it. No special seasoning paste. No oven required.
No complicated temperature gauging.
Step-by-Step: How to Season Ceramic Cookware
Let me walk you through the exact process I use. This works for ceramic frying pans, saucepans, Dutch ovens, any piece with a ceramic coating.
Step 1: Wash and Dry Thoroughly
Start with a completely clean pan. Wash it with warm water and mild dish soap. Scrub gently with a soft sponge, no steel wool or abrasive pads.
Rinse well. Then dry it completely with a clean towel. Any water droplets will interfere with the oil bonding to the surface.
Step 2: Apply a Thin Layer of Oil
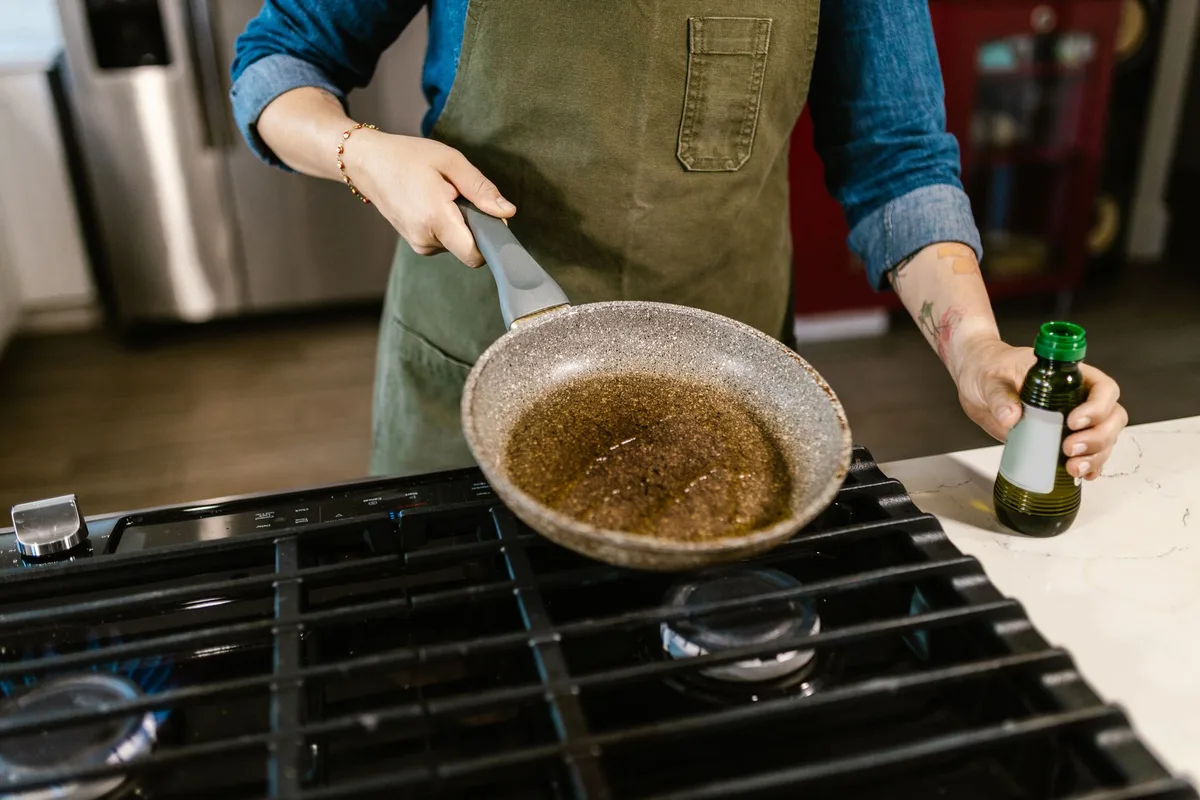
Pour about a teaspoon of oil into the pan. Less is more. You want a whisper-thin coating, not a puddle.
Use a paper towel to spread the oil across the entire cooking surface. Work it into the sides and up the rim too. Keep wiping until the surface looks glossy but not wet.
If you see pooling or streaks of oil, you’ve used too much. Wipe the excess away.
The goal here is to fill the microscopic pores without leaving any oil standing on the surface.
Step 3: Heat the Pan Gently
Place the pan on the stove over medium-low heat. Don’t crank it to high. Ceramic coatings can be damaged by rapid temperature changes, and high heat can cause the oil to burn instead of conditioning the surface.
Let it heat for about 60 to 90 seconds. You’ll see the oil start to look slightly more transparent as it warms. Some people say to heat until the oil just barely starts to smoke, I don’t recommend that.
Keep the heat low and steady.
Step 4: Let It Cool Naturally
Turn off the heat and let the pan cool down on its own. Don’t run it under cold water. Don’t put it in the sink.
Thermal shock is the fastest way to crack a ceramic coating.
Wait until the pan is cool to the touch.
Step 5: Wipe Away Excess Oil
Once cooled, take a clean paper towel and give the pan one final wipe. You’re removing any oil that didn’t absorb into the surface.
At this point, the pan should look smooth, glossy, and uniform. No oily patches. No dull spots.
Step 6: Store or Use Immediately
Your pan is ready. You can cook with it right away or store it. If you’re stacking pans, place a soft cloth or paper towel between them to prevent scratching.
Common Mistakes That Ruin Ceramic Seasoning
I’ve seen people make the same errors over and over. Here’s what to avoid.
Using Too Much Oil
This is the number one mistake. Thick oil doesn’t season anything on ceramic, it just sits on top and turns sticky or rancid. You’ll end up with a gummy surface that catches food worse than before.
If your pan feels tacky after seasoning, you used too much oil. Wash it with soap and start over with a lighter hand.
Heating the Pan Too Fast
Ceramic coatings expand and contract with temperature changes. Slamming a cold pan onto high heat creates stress fractures in the coating. Those microscopic cracks become food traps.
Always preheat your ceramic pan gradually. Medium heat is plenty for most cooking.
Using the Wrong Oil
Olive oil, butter, and unrefined coconut oil all contain compounds that burn at relatively low temperatures. That burnt residue bonds to the ceramic surface and creates permanent sticking points.
Stick with oils that have high smoke points. The National Institute of Standards and Technology (NIST) provides comprehensive data on smoke points for cooking oils, and the science backs this up, oils with higher smoke points produce fewer polymerization byproducts that can foul ceramic surfaces.
Scrubbing With Abrasives
Steel wool, scouring pads, and harsh cleaning powders will strip the ceramic coating over time. Once that coating is gone, no amount of seasoning will bring it back.
Use soft sponges and non-abrasive cleaners only.
Seasoning a Pan That Isn’t Clean
Any food residue or grease left on the pan will become baked into the coating when you heat it. That defeats the entire purpose.
Always wash and dry your pan before conditioning it.
How to Restore an Old Ceramic Pan That’s Lost Its Non-Stick
If your ceramic pan has been sitting in the cupboard for months or you’ve just been using it without maintenance, don’t throw it away. You can often bring it back.
Here’s the restorative treatment I use for pans that need serious help.
The Deep Clean First
Make a paste with baking soda and a tiny amount of water. Gently scrub the entire cooking surface with a soft sponge. This lifts off carbonized food residue without damaging the coating.
Rinse thoroughly and dry.
The Vinegar Trick
Fill the pan with equal parts water and white vinegar. Bring it to a gentle simmer on low heat for five minutes. The acid helps dissolve mineral deposits and stubborn oil residues.
Pour it out, wash with soap, and dry completely.
The Heavy Conditioning
Once the pan is clean, apply a slightly thicker layer of oil than you would for normal seasoning. Use about a teaspoon and a half. Spread it evenly with a paper towel.
Heat the pan on medium-low for two to three minutes. Let it cool completely. Wipe away the excess.
You may need to repeat this process two or three times for severely neglected pans. I’ve revived pans that looked completely dead using this method.
Ceramic vs Nonstick Cookware: Why Seasoning Matters Differently
This comparison comes up constantly, so let me address it directly.
Traditional nonstick cookware uses a PTFE (polytetrafluoroethylene) coating, you probably know it as Teflon. That coating is chemically non-stick by nature. You cannot season it.
Any oil you apply will just sit on top and eventually burn off.
Ceramic coating is fundamentally different. It’s made from silica, essentially sand, that’s been processed and fired. It’s naturally slick, but it’s also porous.
That porosity is why oil treatment actually does something useful.
The other big difference is heat tolerance. PTFE coatings break down at around 500°F and release toxic fumes. Ceramic coatings can handle temperatures up to 800°F without degrading.
That makes them safer for high-heat cooking.
But ceramic also has a downside: it’s less durable than PTFE. The coating can scratch more easily and it tends to lose its non-stick properties faster if not maintained properly.
That’s exactly why seasoning matters more for ceramic. You’re compensating for its natural weakness.
How to Maintain Your Ceramic Seasoning Over Time
Getting the seasoning right is one thing. Keeping it in good shape is another.
Use Medium Heat
Ceramic cookware is not wok-ready. It performs best at low to medium heat. High heat damages the coating and burns off your seasoning layer.
Most ceramic pans have an aluminum core that conducts heat efficiently anyway. You don’t need high temperatures to get good results.
Use the Right Utensils
Metal utensils are the enemy of ceramic coatings. Use wooden spoons, silicone spatulas, or nylon turners. Even a single scrape with a metal spatula can create a scratch that compromises the coating.
If you absolutely must use metal, be gentle. But honestly, just don’t.
Store With Care
Stacking ceramic pans directly on top of each other is asking for scratches. Place a paper towel, felt pad, or soft cloth between each pan.
If you have hanging pot racks, that’s ideal for ceramic cookware. No stacking pressure means longer coating life.
Clean Gently
After each use, let the pan cool completely before washing. Pouring cold water into a hot ceramic pan is one of the fastest ways to crack it.
Use warm water, mild soap, and a soft sponge. If food is stuck, soak the pan for 10, 15 minutes rather than scrubbing hard.
Reapply Oil Regularly
Make it a habit. After you wash and dry your pan, give it a quick oil wipe. It takes 15 seconds and it keeps the surface conditioned between uses.
How to Tell If Your Ceramic Cookware Needs Replacement
Seasoning and maintenance can extend the life of your ceramic pans significantly, but nothing lasts forever.
Here are the signs that it’s time to let go:
- Visible cracks or chips in the coating, These can release ceramic particles into your food
- Persistent sticking, If you’ve conditioned the pan three times and food still sticks, the coating is worn through
- Dull, rough texture, The surface should feel smooth. If it feels like sandpaper, the coating is compromised
- Discoloration that won’t wash off, Heavy staining usually means the coating has degraded
Most ceramic pans last 1, 3 years with regular use. High-end brands can last longer with proper care. When the coating is gone, no amount of seasoning will bring it back.
Final Thoughts on Seasoning Ceramic Cookware
Here’s the bottom line: seasoning ceramic cookware isn’t complicated. It’s not the same as seasoning cast iron. It’s simpler, gentler, and more about maintenance than transformation.
Wash the pan. Apply a whisper-thin layer of high-smoke-point oil. Heat it gently.
Let it cool. Wipe the excess. That’s the whole process.
Do this before first use. Do it every few weeks. Do it whenever food starts sticking.
Your ceramic pans will last longer, perform better, and save you from the frustration of ruined meals.
Ceramic cookware gets a reputation for being fragile or short-lived. In my experience, that reputation comes from people who never knew this simple conditioning step existed. Now you do.
Treat your ceramic pans right, and they’ll reward you with years of reliable, non-stick cooking.