A toaster that won’t toast is annoying. A toaster that’s jammed solid, smelling like burnt crust, or refusing to pop up is worse. I’ve pulled everything from welded-on bagel chunks to a melted bread tag out of these machines, and I can tell you the fix is almost always simpler than it feels in the moment.
Learning how to unclog a toaster is one of those kitchen skills nobody teaches you. Then one morning you’re standing there with half a slice of sourdough wedged in the slot, a fork in your hand, and no idea what to do next. Put the fork down.
That’s how people get hurt.
This guide walks you through the entire process. We’ll cover the safe prep steps, the crumb tray, stuck bread, deep cleaning, stubborn clogs like melted plastic, and the mistakes that ruin perfectly good toasters. By the end, you’ll be able to handle any jam this appliance throws at you.
Quick answer: Unplug the toaster and let it cool completely. Slide out the crumb tray and wash it. Hold the toaster over a sink and gently shake out loose debris. Pull stuck bread out with wooden tongs or chopsticks, never a metal fork. Brush the interior with a soft pastry brush, vacuum the slots, wipe it down, let everything dry fully, then run two empty “burn-off” cycles. That’s the whole job in most cases.
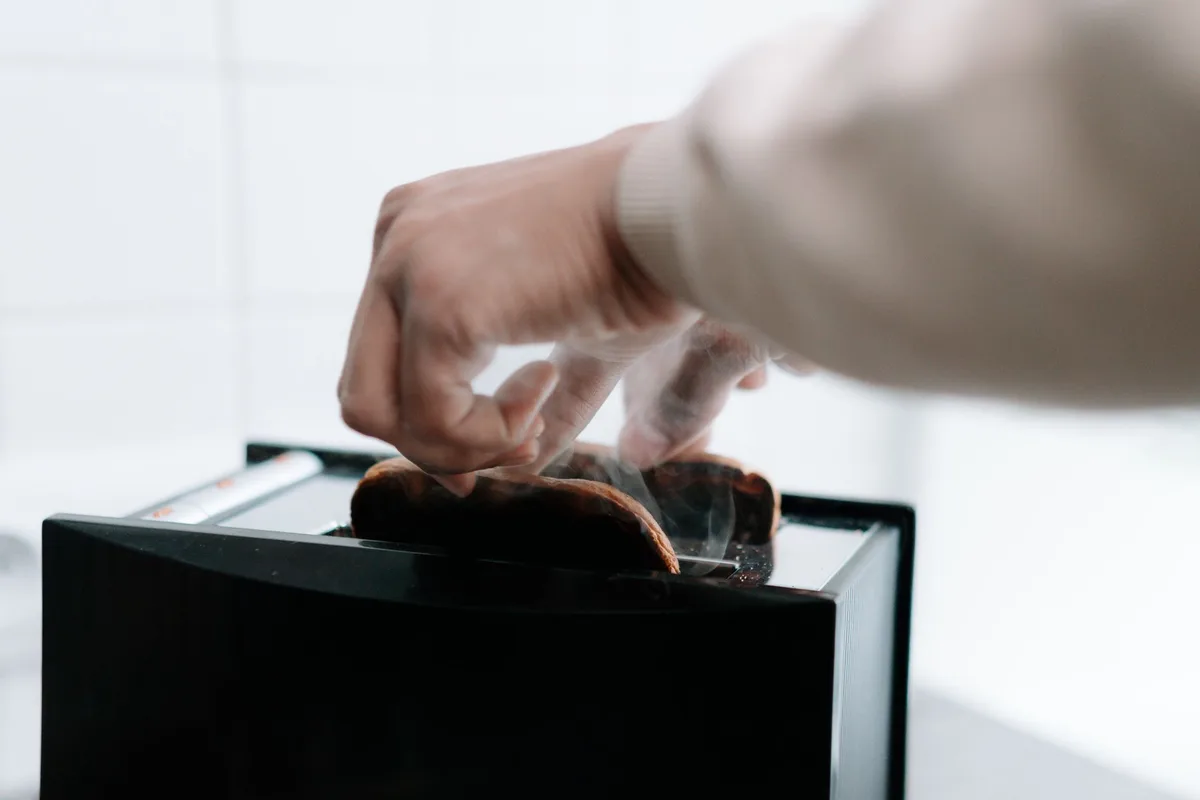
Image source: Pexels / cottonbro studio (Pexels License)
What Does a “Clogged” Toaster Actually Mean?
“Clogged” sounds like a plumbing problem, but a toaster clogs in a few distinct ways. Knowing which one you’re dealing with tells you exactly which fix to reach for.
Compact crumb buildup. This is the most common type. Crumbs fall past the bread and collect in the crumb tray or the bottom of the machine. When nobody empties that tray for months, the debris packs down into a dense, greasy mat.
That mat can block the lever mechanism, smother the heating elements, and cause that unmistakable burning smell every time you toast.
Bread wedged in a slot. A slice that’s too thick, a bagel that broke apart mid-cycle, or a frozen waffle that expanded as it thawed can all jam between the guide wires. Sometimes it stops the carriage halfway down. Sometimes it just sits there fused to an element.
Either way, you’ve got a physical blockage.
Sticky or melted gunk on the elements. Cheese, frosting, butter, and jelly all melt at toasting temperatures. They drip onto the heating elements and mica boards, then carbonize into a hard black crust. This kind of clog doesn’t block bread, it smells terrible, smokes, and eventually becomes a genuine fire risk.
A jammed lever or carriage. On many modern toasters, an electromagnetic latch holds the carriage down. When crumbs and grease pack into the lever track or coat the magnet’s contact plate, the lever won’t stay down or won’t pop back up. It feels like a mechanical failure, but it’s usually just debris.
Each of these has a different solution, and the order matters. You’ll always start the same way, though: making the machine safe to work on.
Why Toasters Get Clogged in the First Place
If you understand the causes, you can prevent most of them. Here’s what actually fills these machines up:
- Bread sliced too thick. Homemade and bakery loaves often exceed the slot width. The slice scrapes the guide wires on the way down, sheds crumb, and can wedge tight.
- Bagels and English muffins that break apart. They’re dense. When a chunk tears free, it drops straight onto the elements or the slot floor.
- Frosted pastries, frosting-side down. Frosting melts at a fraction of toasting temperature. It drips onto the element and turns into burnt sugar glue within seconds.
- Melted cheese. Reheating a cheese-filled item, or toasting a grilled sandwich someone “improvised,” dumps fat and dairy onto hot wiring.
- Buttered bread. Butter liquefies, runs off the slice, and coats everything below it.
- Loose packaging bits. Bread tags, plastic film, and foil wrappers that ride down with the slice. Foil is the worst offender because it can short or damage an element.
- Months of ignored crumbs. Every slice sheds. A tray that gets emptied weekly stays loose and harmless. A tray that gets ignored becomes a solid block.
- Pests and storage dust. A toaster stored in a pantry or garage can collect dust, and crumb residue attracts ants and roaches, which nest inside the housing. It happens more often than you’d think.
None of these are exotic. They’re all ordinary kitchen habits, which is exactly why clogged toasters are so common.
Safety First: Do These Three Things Before Anything Else
Cleaning a toaster is easy and low-risk, if you set it up right. Skipping these steps is where people get burned, shocked, or worse.
1. Unplug it. Don’t just turn it off.
The toast lever only cuts power to the elements while the carriage is down. A plugged-in toaster has live voltage waiting inside it, and the heating elements run on full mains power. The U.S.
Consumer Product Safety Commission has documented serious injuries, including electrocutions, from people inserting metal objects into plugged-in toasters. It’s a hazard the agency has warned about for decades, and it’s entirely avoidable.
Pull the plug from the wall. Physically. Verify it.
Then move the cord away from the machine so it can’t drift back in while you’re working.
2. Let it cool completely.
Heating elements reach several hundred degrees during a normal cycle. If you just toasted something, give the machine a solid 15 to 30 minutes. Touch the top of the housing first.
If it’s warm to the touch, wait longer. Hot nichrome wire is fragile when handled carelessly, and burnt skin ruins the whole project.
3. Set up your workspace.
Work over a sink, a trash can, or a spread-out newspaper. Crumbs fall everywhere, that’s just physics. Gather your tools before you start so you’re not rummaging through drawers with one hand while holding a half-disassembled appliance in the other.
One more quick check while you’re at it: look over the power cord. If you see cracked insulation, exposed wire, or scorch marks, stop here. That toaster needs to be replaced, not cleaned.
Tools and Supplies You’ll Need
You probably own everything on this list already. Nothing here is specialized except the toaster tongs, which cost a few dollars and are worth every penny.
| Tool | What it’s for | Notes |
|---|---|---|
| Wooden or bamboo toaster tongs | Pulling stuck bread from slots | Never use metal. Chopsticks work in a pinch. |
| Soft pastry brush | Sweeping crumbs from the interior | A clean, dry paintbrush does the same job. |
| Old toothbrush | Detailing around elements and the lever track | Soft bristles only. |
| Vacuum with crevice tool | Extracting deep crumb buildup | Use low suction and a gentle touch. |
| Canned compressed air | Blowing debris out of tight spots | Hold the can upright; short bursts only. |
| Microfiber cloths | Wiping the housing and slot tops | One damp, one dry. |
| Warm water and dish soap | Washing the crumb tray | Hand wash only, dry fully. |
| White vinegar | Cutting grease on the tray and housing | Dilute 50/50 with water. |
| Baking soda | Paste for burnt-on residue on the tray | Never soak the element boards with liquid. |
| Flashlight | Seeing into the slots | A phone light works fine. |
| Small screwdriver set | Only if disassembly becomes necessary | Check your warranty first. |
How to Unclog a Toaster, Step by Step
Here’s the full routine, start to finish. For a standard pop-up toaster with a typical crumb clog, the whole thing takes about 20 minutes of actual work plus drying time.
Step 1: Remove and Clean the Crumb Tray
The crumb tray is where most of your clog lives, so start here.

Image source: Pexels / Polina Tankilevitch (Pexels License)
First, find the tray. On most modern toasters, it’s a flat drawer that slides out from the back or the side. On some mid-range and retro models, it’s a hinged drop-down door on the bottom, you flip a latch and it swings open.
A few four-slice models have two separate trays, one per pair of slots. Check both sides if the first tray comes out nearly clean.
Pull the tray out slowly. Over a trash can, ideally, because whatever hasn’t packed solid yet will spill.
Now wash it. Warm water, a drop of dish soap, and a sponge handle the job. For stubborn, burnt-on crust, make a paste of baking soda and a few drops of water, spread it on the gunk, let it sit for ten minutes, then scrub with the rough side of the sponge.
Rinse well.
Here’s the step people rush: dry the tray completely. Every trace of moisture gone. A damp tray reinserted into a machine with heating elements is how you get rust, steam, and eventually electrical problems. I leave trays on a drying rack for a couple of hours, then give them a final wipe with a dry cloth before sliding them back in.
If your toaster has no removable tray at all, skip to Step 3, you’ll be working with gravity instead.
Step 2: Clear Stuck Bread from the Slots
This is the step that causes the accidents, so slow down.
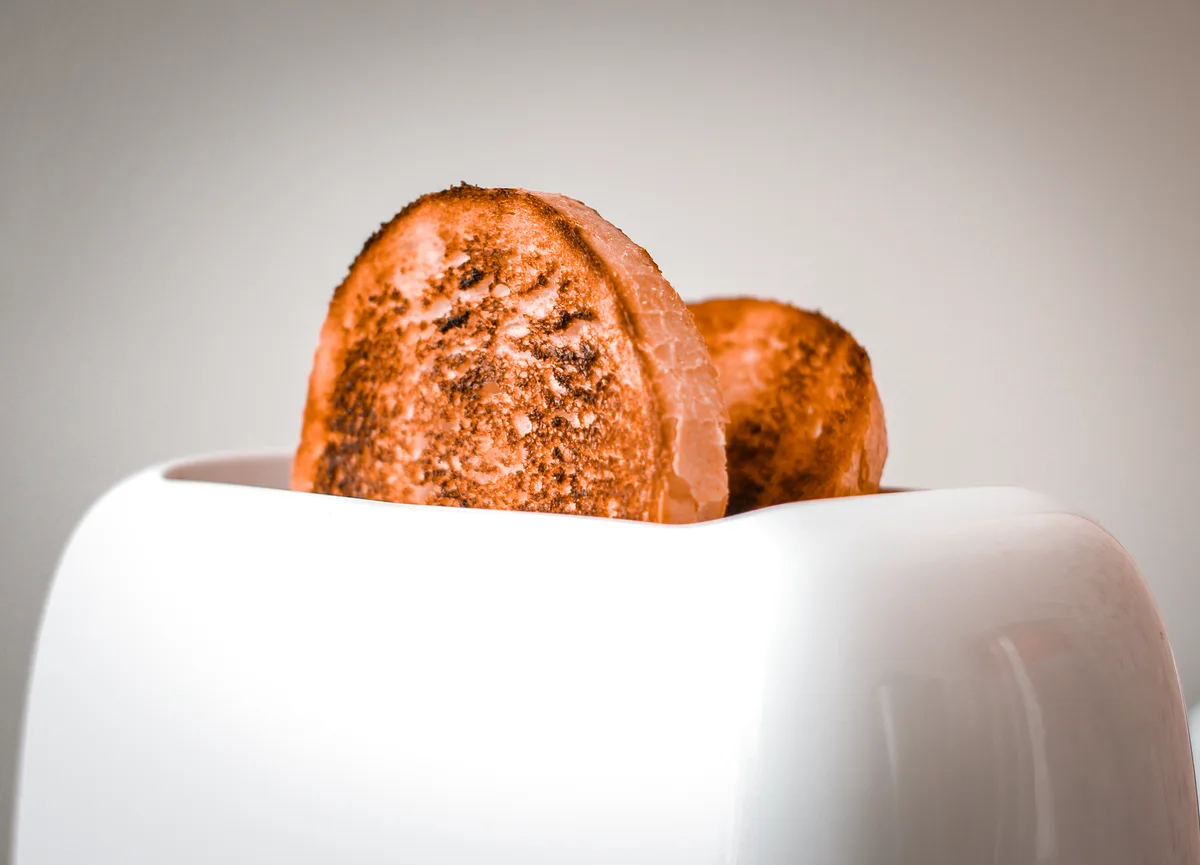
Image source: Pexels / Photography Maghradze PH (Pexels License)
Confirm the toaster is unplugged and fully cooled. Then shine your flashlight into the slot and see what you’re dealing with.
For a loose wedge of bread: grip it with wooden toaster tongs or bamboo chopsticks. Get a firm hold and pull straight up with a gentle wiggle. Don’t yank.
If it resists, work it from a second angle, insert a second chopstick on the other side of the slot and lift from both ends. The bread will usually release once you break its friction lock against the guide wires.
For bread fused to an element: melted cheese or caramelized pastry can weld a piece of bread to the heating wire. Don’t force it. Grip the loose edge with your tongs and pull slowly and steadily.
The bond usually gives before the bread tears. If it tears, pick away at the remaining pieces bit by bit. Never scrape the element itself with anything hard.
The gravity method: with the crumb tray removed, hold the toaster upside down over the sink and shake it gently side to side. Loose bread and debris will drop right out. Use two hands and keep the motion controlled, you’re not trying to rattle anything loose, just let gravity do the work.
If the carriage won’t move because of the jam: the bread is pinching the guide wires. Free the bread first using the methods above, and the carriage will release on its own. Never force the lever while something’s wedged in the mechanism, that’s how guide wires get bent and latches get broken.
A quick word on the fork, because it bears repeating: a metal fork in a plugged-in toaster can complete a circuit through the heating elements and deliver a dangerous shock through your hand. This isn’t folklore. It’s a documented injury pattern.
And even in an unplugged toaster, a fork can snap the delicate nichrome wire or bend it against the mica board, which kills the element permanently. Wood and bamboo only, every time.
Step 3: Shake Out Loose Debris
Even after you’ve pulled the obvious stuff, there’s always more hiding at the bottom.
With the crumb tray out and the toaster upside down over the sink or trash, tap the sides firmly with your palm, not the floor, and not with a hammer. Then rotate the machine a quarter turn and tap again. You’ll be surprised what falls out: years of crumbs, oat flakes, the corner of a tortilla you forgot about, the occasional button or hairpin that slid in from the counter.
Pay attention to what drops. If you see charred black crumbs, the clog has been reaching the elements, and the deep clean in the next steps matters more than you might think. If you see anything metallic, foil fragments, twist ties, a bread tag, set the piece aside and inspect the slots carefully afterward to confirm nothing metal remains inside.
Step 4: Brush and Vacuum the Interior
Now go after the debris that gravity can’t shake loose.
Return the toaster to upright and look into each slot with your flashlight. You’re inspecting the heating elements, the vertical wires running up the slot walls. They should look like intact coils or ribbons.
Note any gaps, sagging wire, or heavy black crust so you know where to focus.
Take your soft pastry brush and sweep down each slot wall, working from the top. Brush around the elements gently. The nichrome wire inside most toasters is strung across fragile mica boards, and it doesn’t take much force to bend or snap it.
Long, light strokes. Let the brush carry the crumbs down and out.
Next, the vacuum. Fit the crevice tool on your vacuum’s hose, set the suction low if it’s adjustable, and hover the tip just inside each slot and over the crumb tray cavity. Don’t jam the nozzle against anything.
The goal is to pull out the loose debris the brush dislodged.
For tight corners, the lever track, the slot bottoms, the gaps around the carriage rails, use short bursts of compressed air, holding the can upright. Work from the top of the toaster downward so you’re blowing debris toward the open tray cavity, not deeper into the machine. Never invert or tilt the can while spraying, because the cold liquid propellant will spit out and can damage components or leave residue.
One warning: skip compressed air entirely if your toaster is a smart model with sensors or electronics in the top housing, unless the manual explicitly says it’s fine. A blast of air can push crumbs onto sensor optics and create a new problem.
Step 5: Wipe Down and Dry
Time to clean what the brush and vacuum can’t lift.
Dampen a microfiber cloth with warm soapy water, wring it out hard, and wipe the exterior housing, the top plate around the slots, and the lever knob. Follow with a second cloth dampened in plain water to remove any soap film, then dry everything.
For greasy film inside the slot openings, a cloth lightly dampened with a 50/50 water and white vinegar mix works well. Wipe only the surfaces you can see and reach. Never pour or spray liquid into the slots.
If the crumb tray area or the mica boards below show burnt-on residue, dip a barely damp cloth in dry baking soda and dab the spots. Let the paste sit for a few minutes, wipe it away with a clean damp cloth, then dry the area. Keep all moisture away from the heating elements themselves, you’re cleaning around them, not bathing them.
Now, the patience part. Let the toaster air-dry with the crumb tray removed for at least a few hours. If any moisture got past the slot openings, leave it overnight in a warm, dry spot, positioned so air can circulate.
Water and electricity don’t negotiate.
Step 6: Run a Burn-Off Cycle
Before you toast anything you plan to eat, run the machine empty.
Plug it in, set it to a medium setting, and run one full empty cycle in a well-ventilated spot, near an open window or under your range hood. Some smoke and a toasted smell are completely normal on the first run. That’s the last of the invisible residue carbonizing and burning away.
Run a second cycle if the first one smoked heavily.
Watch the slots during the cycles. All the elements should glow evenly. If one section stays dark, that element has an internal break, and that’s a replacement situation we’ll cover later.
After the burn-off, unplug the machine, let it cool, reinsert the bone-dry crumb tray, and you’re done. Your toaster should now run like the day you bought it.
Dealing with Stubborn Clogs
Most clogs surrender to the routine above. Some don’t. Here’s how to handle the troublemakers.
Melted Plastic
A bread tag, a plastic bag corner, or a stray wrapper that slid down will melt into a tacky mess on the housing or, worse, on an element.
Unplug and cool first. Then freeze it: press a plastic bag of ice cubes against the melted plastic for several minutes until it hardens and turns brittle. Chip it off with a wooden spatula or a plastic scraper.
Brittle plastic pops off in chunks instead of smearing.
Never run the toaster to “burn the plastic off,” and never do it indoors even if someone online swears by it. Burning plastic releases toxic fumes inside a machine that blows hot air into your kitchen. Mechanical removal is slower and always the better choice.
If plastic is fused directly onto a heating wire, pick at it gently with a wooden toothpick after freezing. Work patiently. If you can’t remove it without stressing the wire, and the smell persists after cleaning, replace the toaster.
Melted Cheese and Sugary Gunk
Caramelized cheese and burnt sugar form a hard, glassy crust. After the machine is unplugged and cold, peel off what you can with wooden picks. Then use the barely damp baking soda method from Step 5 on whatever remains.
Sugar dissolves slowly with moisture and patience, resist the urge to chisel. If a heating wire comes away with a chunk of crust, stop, reassess, and work around it rather than through it.
A Jammed or Stuck Lever
If the lever won’t stay down or won’t pop up, debris is almost always the cause. On many modern toasters, an electromagnet holds the carriage down, and even a thin film of grease on its contact plate breaks the latch.
Unplug the machine. Turn it upside down over the sink and shake. Then blast the lever track and the area under the carriage with short bursts of compressed air, and scrub what you can reach with a dry toothbrush.
If you can see the small metal armature plate the magnet grabs, wipe it clean with a cotton swab lightly moistened with isopropyl alcohol, barely damp, never dripping.
If the lever still won’t latch after a thorough cleaning, the spring or latch mechanism inside is likely broken. That’s a repair-shop job or a replacement, depending on what the toaster cost you.
Foil, Tags, and Metal Objects
Metal inside a toaster is serious. Foil can short across elements; a twist tie can drape across two live wires and burn through in a single cycle.
After removing the object, inspect every slot with your flashlight. Look for scorch marks, melted spots on the guide wires, and, most importantly, breaks in the heating element itself. Then run a burn-off cycle and watch the glow.
If any element section stays dark, or you saw sparks, stop using the machine. A damaged element is a fire and shock hazard, and elements aren’t consumer-replaceable parts on most models.
How to Unclog a Toaster Without Taking It Apart
Short on time? Here’s the five-minute version that handles most routine clogs, no screwdrivers, no disassembly, no drama.
- Unplug and let it cool.
- Pull the crumb tray and dump it. Wash later if you’re in a rush; just make sure it’s dry before it goes back in.
- Hold the toaster upside down over the sink and shake gently for ten seconds.
- Extract any stuck bread with wooden tongs or chopsticks.
- Sweep each slot with a pastry brush, then run two empty burn-off cycles to clear the smell.
That routine, done once a month, prevents about 90 percent of the clogs I see. The full deep clean is for the times something went wrong, a pastry incident, a forgotten bagel, a year of neglect.
The temptation at this point is to grab a screwdriver and open the housing. Resist it unless you genuinely need to, and here’s why.
Unclogging Different Types of Toasters
Not all toasters clog the same way, and the machine on your counter changes the playbook.
Standard two- and four-slice pop-up toasters are what this guide covers end to end. Crumb tray, slots, elements, carriage, the routine above is built for them.
Long-slot toasters handle artisan bread and bagels but their wide slots let narrow items tilt and wedge diagonally. The fix is the same, but extraction takes patience: lift with chopsticks from both ends of the slot at once so the slice doesn’t seesaw deeper.
Toaster ovens don’t really “clog” in slots, they clog on the floor. Crumbs, drips, and foil bits collect on the bottom panel and bake onto the lower element. Unplug, cool, remove the rack and the bottom crumb pan, wash both, and brush the elements gently with a dry toothbrush.
Never use foil to line the bottom of a toaster oven unless the manual says to; loose foil is the number one cause of element shorts in these machines.
Smart and high-end toasters add sensors, motors, and electronics to the same mechanical layout. The cleaning rules are identical, but be extra careful: no compressed air near sensor ports, no liquid anywhere near the top housing, and always check the manual first. Some manufacturers void warranties on DIY cleaning beyond the crumb tray.
| Toaster type | Where it clogs | Best approach |
|---|---|---|
| 2-slice pop-up | Slot bottoms, crumb tray | Full routine: tray, shake, tongs, brush |
| 4-slice pop-up | Same, ×2 — check for two trays | Clean both trays; work one side at a time |
| Long-slot | Bread tilting in wide slots | Extract from both ends; brush slot walls |
| Toaster oven | Floor pan, lower element | Remove rack and pan; brush elements dry |
| Smart toaster | Tray plus sensor gunk | Manual first; no air or liquid near sensors |
What NOT to Do When Unclogging a Toaster
I’ve watched people turn a ten-minute fix into a dead appliance or a kitchen fire. Avoid these mistakes:
- Never use a fork, knife, or any metal tool in the slots. Plugged in, it can electrocute you. Unplugged, it can snap the heating wire. This is rule one for a reason.
- Never clean a plugged-in toaster. Not with a damp cloth, not with a brush, not “just quickly.” Unplug first, every single time.
- Never pour water into or through the toaster. Water in the housing causes rust, corrosion, and short circuits that can show up weeks later.
- Never spray oven cleaner or harsh chemicals inside. Caustic residue on or near the elements burns off into the air you breathe and can corrode the wiring.
- Never run the toaster to burn off plastic. Toxic fumes, and you’re injecting melted polymer deeper into the machine.
- Don’t shake the toaster violently. Hard shaking bends the carriage rails and guide wires, which creates the very jamming problems you’re trying to fix.
- Don’t poke the heating elements. Nichrome wire strung on mica boards is fragile. One careless jab with a chopstick tip can break an element.
- Don’t ignore a burning smell. If the machine smells hot when it’s empty and clean, something inside is failing. Stop using it.
There’s a bigger picture here, too. The National Fire Protection Association identifies cooking equipment as the leading cause of home structure fires in the United States, and small appliances left dirty, damaged, or unattended are part of that story. A clogged toaster with carbonized debris sitting on live elements is a genuine ignition source, treat the cleanup as fire prevention, not just housekeeping.
How to Keep Your Toaster From Clogging Again
An unclogged toaster stays unclogged through a handful of cheap habits. Build these in and you’ll never need the deep-clean section of this guide again.
- Empty the crumb tray weekly. Make it part of another routine, Saturday morning coffee, trash night, whatever sticks. Thirty seconds.
- Deep clean monthly. The full shake, brush, and vacuum routine from Step 3 and Step 4.
- Match the slice to the slot. Cut thick bakery and homemade bread in half vertically. If you have to force it down, it’s too thick.
- Face the frosting up. Pop-Tarts and pastries go in frosting-side up. The melted sugar belongs in the air, not on the element.
- Bagels go cut-side out against the slot walls, per nearly every toaster manual, and tear off any loose chunks before toasting.
- Thaw and separate frozen items. Frozen waffles and pancakes that are stuck together expand apart mid-cycle and jam. Pry them apart first.
- Keep wrappers and tags away. Bread tags, foil, and plastic film never go near the slots. Remove them over the counter, not over the machine.
- Cover it. A cheap toaster cover keeps dust, pet hair, and curious crumbs from drifting in between uses.
- Level, stable surface, away from the edge. A wobbly toaster drops bread unevenly and jams more. A toaster at the counter’s edge gets bumped, knocked, and filled with whatever’s beside it.
- Never toast anything buttered, stuffed, or cheesy unless the manual explicitly allows it. Some modern toasters have bagel and pastry modes designed for it; most don’t.
That’s the whole prevention playbook. None of it costs money, and all of it takes less time than reading this article.
Signs Your Toaster Is Beyond Saving
Sometimes the honest answer is that the machine is done. Cleaning can’t fix these problems, and continuing to use a toaster with any of them is gambling with your kitchen:
- A broken heating element. You’ll see a visible gap or sag in the wire, or a section that stays dark during the burn-off cycle. Elements on most consumer toasters aren’t serviceable.
- A burning smell that survives cleaning. If the machine smells hot while running empty and spotless, insulation or internal wiring is deteriorating.
- A frayed, cracked, or scorched power cord. No exceptions, replace the toaster.
- Sparks, popping, or tripped breakers. Something is shorting. Unplug it and don’t plug it back in.
- Scorch marks or melted spots on the housing. Heat escaped where it shouldn’t have.
- A lever that won’t latch even after the track and mechanism are spotless. The spring or latch has failed internally.
Good toasters last five to ten years with basic care. If yours is deep into that range and showing any of the signs above, a replacement is safer and cheaper than the fire you’re trying to prevent.
FAQ: How to Unclog a Toaster
Can you unclog a toaster without unplugging it?
No. Unplugging is the non-negotiable first step of every method in this guide. A plugged-in toaster has live mains voltage on the heating elements, and inserting anything into the slots risks a severe or fatal shock.
Pull the plug, verify it, and then start work.
Is it safe to use a fork to get bread out of a toaster?
It is not. This is the most dangerous mistake in toaster maintenance. In a plugged-in toaster, a metal fork can bridge the energized elements and conduct current through your hand.
Even unplugged, a fork can snap the fragile heating wire or bend it against the mica board, permanently killing the element. Use wooden tongs or bamboo chopsticks.
How often should I clean my toaster?
Empty the crumb tray about once a week if you toast daily. Do the deeper clean, shake-out, brush, vacuum, and a burn-off cycle, roughly once a month. If you toast pastries, bagels, or anything melty, tighten that schedule.
Can I put water in a toaster?
Never in the slots or the housing. The only water a toaster should ever touch is a washed crumb tray, and that tray must be bone dry before it goes back in. Moisture inside the machine causes rust, corrosion, and electrical shorts that can appear weeks after the cleaning.
Why does my toaster still smell burnt after cleaning?
Leftover residue on the heating elements carbonizes and burns off during the first cycles after a clean. Run two or three empty burn-off cycles in a ventilated area; light smoke and a toasted smell are normal. If the smell persists after three clean cycles with a spotless tray, something internal is overheating, stop using the machine.
Can a clogged toaster catch fire?
Yes. Compacted crumbs and carbonized food sitting directly on live heating elements are a real ignition source, especially when the machine runs unattended. The fire risk is the main reason crumb tray maintenance matters.
Clean trays don’t ignite; packed, greasy debris does.
How do I fix a toaster lever that won’t stay down?
Unplug, shake out the machine, and blast the lever track with compressed air. Scrub what you can reach with a dry toothbrush. If your model uses an electromagnetic latch, wipe the small metal armature plate with a cotton swab barely dampened with isopropyl alcohol.
Grease on that plate is the most common cause. If it still won’t latch after a deep clean, the internal spring or latch has failed.
Is compressed air safe for toasters?
Yes, with two rules: hold the can upright so it doesn’t spit cold propellant, and blow from the top of the machine downward so debris exits through the open crumb tray instead of being driven deeper. Skip it entirely on smart toasters with sensors unless the manual approves.
Can I put the crumb tray in the dishwasher?
Some manufacturers say yes; most recommend hand washing, and nonstick or coated trays can be damaged by dishwasher detergent. Check your manual. Either way, the critical part is the same: dry the tray completely before it goes back into the machine.
How do I get melted plastic out of a toaster?
Unplug and cool the machine, then freeze the plastic with a bag of ice until it turns brittle and chip it off with a wooden or plastic scraper. Never run the toaster to burn plastic off, and never do it indoors. If plastic is fused to a heating wire and the smell won’t go away after removal, replace the toaster.
Why does my bread keep getting stuck every time I use it?
Three usual suspects: slices thicker than the slot, a bent guide wire from a past fork or violent shake, or a lever that trips early because of crumb buildup in the mechanism. Fix the first by cutting bread thinner, the second by replacing the toaster (bent guides usually aren’t adjustable), and the third with the lever-cleaning routine above.
How long should a toaster last?
Five to ten years with regular cleaning. Neglected machines with packed crumb trays fail far sooner, usually through element burnout or latch failure. The weekly tray empty is the single habit that most extends a toaster’s life.
The Bottom Line
Unclogging a toaster comes down to one sequence: unplug, cool, empty the tray, use gravity, extract with wood, brush and vacuum, dry fully, burn off the residue. No metal tools, no water in the machine, no shortcuts while it’s plugged in. Do the weekly crumb tray empty and the monthly five-minute clean, and you’ll rarely see a serious jam again.
And if the machine ever sparks, smells hot when clean, or shows a broken element, let it go. Toasters are cheap. Kitchen fires are not.