Image source: Pexels / FOX ^.ᆽ.^= ∫ (Pexels License)
Let’s be honest. That coffee maker on your counter looks simple enough. But if you’ve never used one before, or you just bought a new model and tossed the manual, the whole thing can feel surprisingly intimidating.
How much water goes in? Where does the filter actually go? Why does the coffee taste bitter?
Here’s the good news. Using a drip coffee maker is one of the easiest kitchen skills you’ll ever learn. Once you understand the basic flow, water in, coffee in, power on, you’ll make a solid pot every single time.
We’ll walk through everything step by step, from setup to cleanup, and we’ll even fix the most common brewing mistakes along the way.
By the end of this guide, you’ll not only know how to use a coffee maker. You’ll know how to use it well.
What You Need Before You Start
Before we dive in, let’s gather the essentials. You probably have most of these already.
The coffee maker itself. This guide focuses on the standard automatic drip machine. That’s the one with a water reservoir, a filter basket, and a glass carafe. It’s the most common type in American homes, and it’s what most people mean when they say “coffee maker.”
Paper filters. Check your machine’s manual or the basket size. Most use a #4 cone filter or a flat-bottom basket filter. You can also use a reusable metal mesh filter if you prefer, and we’ll talk about that in a moment.
Coffee grounds. Buy pre-ground coffee for convenience, or buy whole beans and grind them yourself. Medium grind works best for drip makers. Too fine, and you’ll get muddy, bitter coffee.
Too coarse, and it’ll taste weak and sour.
Cold, fresh water. Tap water is fine if it tastes good. If your tap water has a strong mineral taste, use filtered or bottled water. The water makes up about 98% of your coffee, so don’t skimp here.
A clean carafe. This sounds obvious, but old coffee oils can make new coffee taste rancid. Give the carafe a quick rinse if it’s been sitting.
Got all that? Great. Let’s get brewing.
Step 1: Fill the Water Reservoir
Image source: Pexels / FOX ^.ᆽ.^= ∫ (Pexels License)
This is where a lot of beginners make their first mistake. They eyeball the water, guess at the amount, and end up with either a half-empty pot or a flooded machine dripping all over the counter.
Here’s the right way to do it.
Open the reservoir lid. It’s usually on top of the machine, hinged at the back. Swing it up and look inside. You’ll see either a marked water level line or a set of numbers on the inside wall.
Use the carafe to measure. Most drip coffee makers have water level markings on the carafe itself. Match those markings to the number of cups you want to brew. If the carafe says “4” at the 20-ounce line, you’re making four 5-ounce cups.
Pour the water from the carafe into the reservoir.
Never exceed the MAX fill line. Overfilling is the number one cause of coffee maker overflow. The water needs room to heat and move through the system. If you cram it full, the boiling water will bubble up and spill out the top or the vent.
Pour slowly. Some reservoirs have a narrow opening, and pouring too fast creates a backup of air that splashes water everywhere.
One quick note. That “cup” measurement on the machine isn’t a real kitchen cup. It’s a coffee cup, which is 5 ounces instead of the standard 8.
So if you want a full 16-ounce travel mug, you need to brew about 3 “cups” on the machine, not 2.
Step 2: Add the Filter
Now let’s prep the filter basket. This is the swing-out compartment near the top of the machine. Open it up and take a look inside.
If you’re using a paper filter: Pull one from the box and open it up. It usually comes folded into a circle or a cone shape. Pinch it open so it forms a bowl, then drop it into the basket.
Press it down gently so it sits flat against the sides. Make sure the edges don’t fold over the rim, that prevents the basket from closing properly, and it lets grounds sneak into your coffee.
If you’re using a reusable metal filter: Just drop it into the basket. It should sit snugly with no gaps around the edges. These filters are great because they produce zero waste and they let more of the coffee’s natural oils through, which gives you a richer cup.
Now, rinse the paper filter first? Some people do this to remove the papery taste. It’s a nice touch, but it’s entirely optional. If you do rinse it, run clean water through it and dump that water out before adding coffee.
Step 3: Add the Coffee Grounds
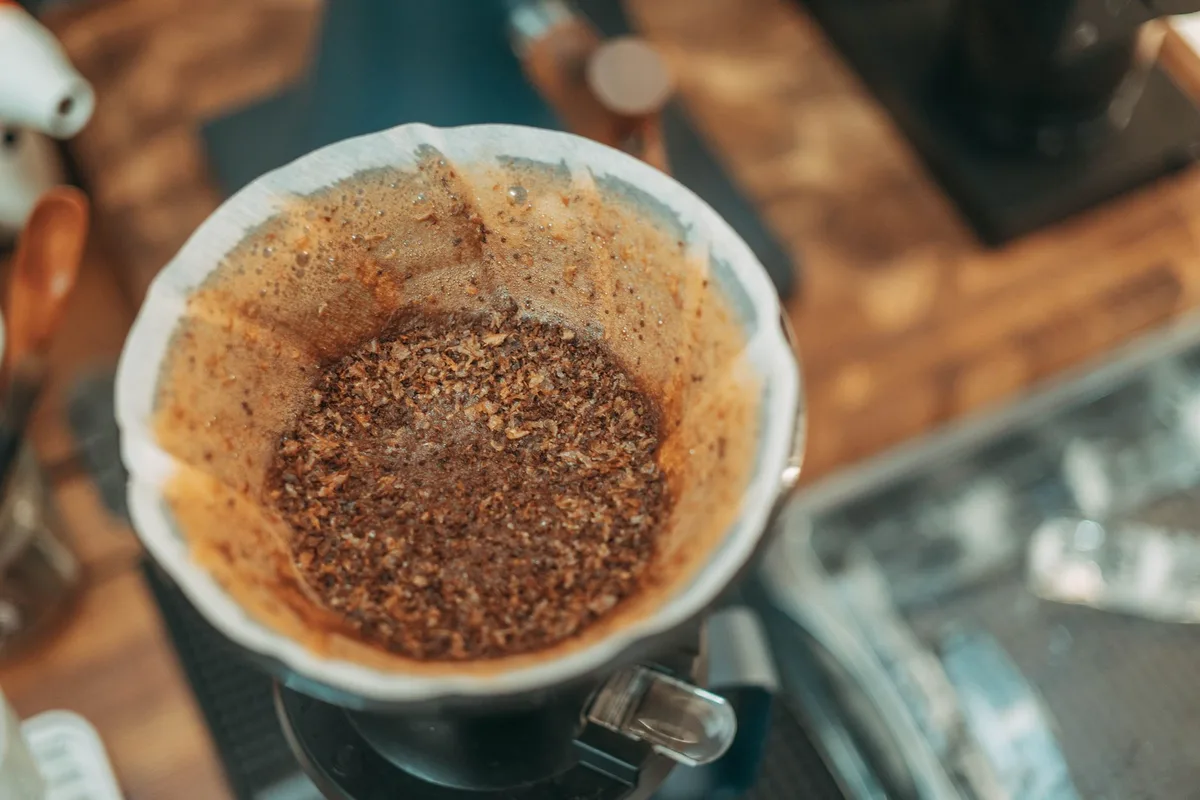
Image source: Pexels / FOX ^.ᆽ.^= ∫ (Pexels License)
This is the step where personal preference really comes into play. But there’s still a solid rule of thumb to follow.
The golden ratio: Use one to two tablespoons of coffee grounds for every 6 ounces of water. Start with one tablespoon per cup for a standard brew. If it’s too weak, bump it up.
If it’s too strong or bitter, dial it back.
Coffee scoops usually hold about one tablespoon, but not always. If you’re serious about consistency, get a digital kitchen scale and weigh your grounds. A good starting point is about 10 to 15 grams of coffee per 6-ounce cup.
Weighing your coffee is the single biggest upgrade you can make to your brewing routine.
Add the grounds directly to the filter. Don’t pack them down, and don’t tap the basket to settle them. The water needs to flow evenly through the grounds. If you compress them, the water will take the path of least resistance and make weak, uneven coffee.
Level the grounds. Give the basket a gentle side-to-side shake to even out the surface. That’s all you need.
Worried about grounds ending up in your cup? That’s usually caused by a paper filter that isn’t seated properly, or a filter that’s too small for the basket. Check those two things if you see grit in your mug.
Step 4: Start the Brew Cycle
Here’s where things get easy. You’ve done all the prep work. Now you just turn it on.
Close the filter basket. Make sure it clicks or locks into place. If it doesn’t close all the way, the machine won’t brew correctly.
Place the carafe on the warming plate. This is critical. Most drip coffee makers have a safety switch in the base. If the carafe isn’t sitting there, the machine won’t brew.
Some models even stop brewing midway if you pull the carafe out for more than thirty seconds.
Hit the power button. Find the on/off switch or the “brew” button. Some machines have a programmable timer, but for now, just press start.
Wait for the magic. The water heats up in the reservoir, travels up a tube, and drips down through the coffee grounds. This process takes about six to ten minutes for a full pot. The exact time depends on your machine and the batch size.
Don’t pull the carafe out early. We get it. The smell is amazing. But letting the brew cycle finish completely ensures you get the full strength and the right volume.
If you pull it out too soon, you’ll end up with a watery pot and spilled grounds on the heating plate.
Listen for the gentle gurgling. When the brew cycle finishes, the machine makes a soft sputtering sound. That’s the last of the water pushing through. Wait for that sound to stop before you call it done.
Step 5: Pour and Enjoy (the Right Way)
Your coffee is ready. Golden brown, steaming, and absolutely glorious. But before you dive in, let’s talk about doing this right.
Give it a stir. The coffee at the bottom of the carafe is always stronger than the coffee at the top. The brewing process creates layers of extraction. A quick stir with a long spoon evens everything out.
Warm your mug, if you want to be fancy. Pour a splash of hot water in your mug, swirl it around, and dump it out. This keeps your coffee hot longer, especially if you’re using a heavy ceramic mug.
Serve it fresh. Coffee starts to lose its flavor within about thirty minutes on the warming plate. The heat breaks down the delicate aromatic compounds. If you’re not drinking it immediately, transfer it to a thermal carafe or an insulated travel mug.
This keeps it hot without cooking it.
Don’t reheat coffee in the microwave. It tastes flat and burnt. If you have leftovers, store them in the fridge and make iced coffee later. That’s a pro move.
How to Clean Your Coffee Maker (Yes, You Have To)
Here’s a hard truth. That coffee maker needs regular cleaning. Coffee is full of natural oils, and those oils build up inside the machine.
Over time, they turn rancid and sticky. That’s why old coffee makers make coffee that tastes like dirt.
After every use: Throw away the paper filter and grounds. Rinse the carafe with hot water and soap. Wipe down the warming plate.
Give the filter basket a quick rinse. This takes thirty seconds and prevents most problems.
Once a week: Wash the carafe, the filter basket, and the lid in warm soapy water. A bottle brush works great for the carafe. Rinse everything thoroughly so no soap residue remains.
Once a month: Descale the machine. Mineral deposits from your water build up inside the heating element, which slows down brewing and makes the coffee taste metallic. Fill the reservoir with a 50/50 mix of white vinegar and water.
Run a full brew cycle without any coffee or filter. Then run two more cycles with just clean water to rinse everything out.
The U.S. Environmental Protection Agency has excellent resources on water quality, and understanding your local water hardness can help you figure out how often you need to descale. Hard water means more frequent descaling.
Common Mistakes and How to Fix Them
Even experienced coffee drinkers mess up sometimes. Here are the most common problems and the quick fixes.
Your coffee tastes bitter. You’re probably using too many grounds, grinding too fine, or letting the coffee sit on the warming plate too long. Use less coffee, use a coarser grind, and drink it faster.
Your coffee tastes weak and watery. You’re using too few grounds or the grind is too coarse. Add more coffee and grind it a bit finer.
Your coffee tastes sour or acidic. This usually means the water is flowing through the grounds too fast. The extraction is incomplete. Grind finer or use slightly more coffee.
The machine is overflowing or leaking. You’ve put too much water in the reservoir. Check the MAX line. You might also have a clogged tube from mineral buildup.
Run a descaling cycle.
There are grounds in your cup. Your paper filter isn’t seated right, or it’s too small. Check that it’s fully open and pressed into the basket.
Your brew cycle takes forever. The machine likely needs descaling. Mineral deposits slow down the water flow.
Drip vs. Other Coffee Makers: Quick Context
You might wonder if you should use a drip machine at all. The market is full of Keurigs, pour-overs, French presses, and espresso machines.
Drip makers win on convenience. You set it and walk away. You can brew a full pot for a group or a small batch for yourself.
They’re also affordable and easy to maintain.
Pour-over and French press give you more control over flavor, but they demand your attention. Single-serve pod machines are fast, but they’re expensive per cup and produce a lot of plastic waste.
For most people, a drip coffee maker is the best daily driver. It’s the workhorse of the kitchen, and it does exactly one job well.
How to Use a Coffee Maker with a Timer or Programmable Features
Modern drip machines often come with digital timers and program settings. These are nice, but they can confuse a first-time user.
Setting the clock: Press the “clock” or “set” button, then use the hour and minute buttons to adjust. Hold the buttons down to scroll faster.
Setting a brew time: Make sure the clock is set. Press “program” or “timer.” Set the time you want brewing to start. Press “program” again to save.
Now fill the reservoir and add coffee the night before. In the morning, you wake up to fresh coffee.
Using the “bold” or “strong” setting: This feature slows down the water flow so it extracts more flavor from the grounds. It won’t make regular coffee “stronger” in the caffeine sense, but it will make it bolder and darker.
Programmable machines are fantastic once you get the hang of them. Just remember to add water and coffee the night before. If you forget the coffee, you’ll wake up to a carafe of hot water.
We’ve all been there.
How to Use a Coffee Maker with a Reusable Filter
We touched on this earlier, but let’s give it a proper section because reusable filters are becoming more popular.
Purchase a filter that matches your machine. Most drip makers have a specific gold-tone or stainless steel mesh filter designed to fit. Check the brand and model number to get the right match.
Use a slightly coarser grind. Metal mesh filters have larger holes than paper. Fine grounds will slip through into your cup. Go with a medium-coarse grind, similar to what you’d use for a pour-over.
Expect a different body. Metal filters let more coffee oils and fine sediment through. This produces a fuller, heavier cup. Some people love this.
Others find it muddy. Try it and see.
Clean it thoroughly. Coffee oils cling to metal mesh. Rinse the filter immediately after use, and give it a deep clean with a soft brush once a week. You can also boil it for a few minutes to remove stubborn oils.
Using a reusable filter is cheaper in the long run and better for the environment. It just requires a little more cleanup effort.
Frequently Asked Questions
How much coffee do I use for 12 cups?
Use 12 to 24 tablespoons of ground coffee, depending on how strong you like it. That’s roughly 3/4 to 1.5 cups of grounds. Start with one tablespoon per cup, so 12 tablespoons for a full pot.
Can I use tap water in my coffee maker?
Yes, as long as your tap water tastes good. If it has a strong chlorine or mineral taste, use bottled or filtered water. The coffee will taste noticeably better.
How often should I clean my coffee maker?
Rinse the removable parts after every use. Wipe down the machine weekly. Descale monthly.
If you use the machine daily, this schedule works perfectly.
Why is my coffee maker not brewing?
Check that the carafe is sitting on the warming plate. Check that the filter basket is closed. Check that there’s water in the reservoir.
Check that the machine is plugged in. If all those are fine, you likely need to descale.
Is it safe to leave the coffee maker on?
Modern coffee makers have an auto-shutoff feature that turns the machine off after two hours. If yours doesn’t, turn it off manually after you finish your pot. It’s safer and saves energy.
Can I brew tea in my coffee maker?
Technically, yes. But the coffee oils will taint the flavor. You’re better off using a kettle for tea and keeping the coffee maker for coffee.
Final Thoughts on Using Your Coffee Maker
Mastering your coffee maker comes down to a few simple habits. Measure your water precisely. Use fresh, good-tasting water.
Add the right amount of grounds. Keep the machine clean.
That’s it. There’s no secret trick, no magic setting, no expensive accessory that changes the basics.
Once you get the rhythm down, you’ll make a better pot of coffee than most coffee shops push out. And you’ll do it every single morning in your pajamas.
So fill that reservoir, grab your favorite mug, and brew something great. You’ve got this.