There’s nothing quite like the satisfaction of a perfectly charred steak or those beautiful grill marks on a chicken breast. But what happens when it’s pouring rain outside, or you live in an apartment without a backyard and a gas grill? You grab a grilling pan.
It’s that simple.
I’ve used these ridged pans for years in my own kitchen. They’re versatile, easy to store, and they genuinely deliver that smoky flavor you crave. But here’s the catch: if you don’t know how to use a grilling pan correctly, you’ll end up with a mess.
We’re talking stuck-on food, smoke alarms going off, and food that’s steamed instead of seared.
This guide covers everything you need to know, from choosing the right preheat temperature to cleaning the ridges without damaging the surface. Let’s dive in.
Image source: Openverse / Matt Bango
What Is a Grilling Pan Exactly?
A grilling pan, often called a grill pan, is a skillet with raised ridges on the cooking surface. Unlike a regular frying pan that has a flat bottom, the ridges elevate the food slightly. This design allows heat to radiate upward, cooking the food while leaving those signature grill marks.
The channels between the ridges catch the rendered fat and juices. This keeps your food out of its own grease, which aids in browning and crispiness.
You’ll find grilling pans in several materials:
- Cast iron: The gold standard. It retains heat phenomenally well and creates an incredible crust. It’s heavy and requires special care.
- Cast aluminum: Lighter than cast iron and heats quickly. Often comes with a non-stick coating.
- Stainless steel: Durable and oven-safe. It’s prone to sticking unless you heat it perfectly.
- Non-stick coated: Easy to clean and great for beginners, but they typically can’t withstand extremely high heat.
On the fence about which one to pick? Cast iron remains the top choice for serious home cooks because of how well it sears. If you want to understand how to use a grilling pan effectively, starting with a sturdy cast iron model is usually your best bet.
Why Cook with a Grill Pan at All?
Before we get into the how, let’s briefly touch on the why. The main benefits include:
- Flavor: The Maillard reaction (the browning process) creates a deep, savory flavor.
- Healthier cooking: Excess fat drips away from the food into the channels.
- Space saving: It works perfectly on standard stovetops.
- Year-round use: You don’t have to deal with the outside elements.
Preparing Your Grill Pan: The First Step
Grab your pan and look at the surface. Is it dusty or has it been sitting in the cabinet for a while? You need to start clean.
If you have a cast iron pan, you generally want to avoid soap. However, a tiny drop of mild dish soap is fine if you’re removing pantry dust. Rinse it thoroughly with hot water and dry it completely, especially if it’s cast iron, as it rusts easily.
Place the pan on the stove burner. This next part is critical: do not add oil to a cold pan.
The Preheating Phase
Turn the burner to medium or medium-high heat. Let the pan heat up slowly. I know you’re hungry, but patience here pays off.
If you heat a cast iron pan too fast on high heat, you risk warping it.
How do you know it’s hot enough?
This is the “water drop” test. Flick a few drops of water onto the pan surface. If they dance and sizzle vigorously and evaporate almost instantly, the pan is ready.
If the water just sits there and bubbles, the pan isn’t hot enough. If the water evaporates before hitting the surface, it’s too hot, turn the heat down.
Proper preheating is essential because the food must hit a hot surface. A cold pan will cause the proteins to stick to the metal, and you’ll lose the entire sear.
Seasoning the Grill Pan
Seasoning sticks to cast iron pans like peanut butter sticks to the roof of your mouth, it’s essential. If your pan is brand new or you have a bare metal surface, you must season it to create a non-stick layer.
Skip this step if you have a stainless steel pan and just add oil before cooking. But for cast iron, follow this process.
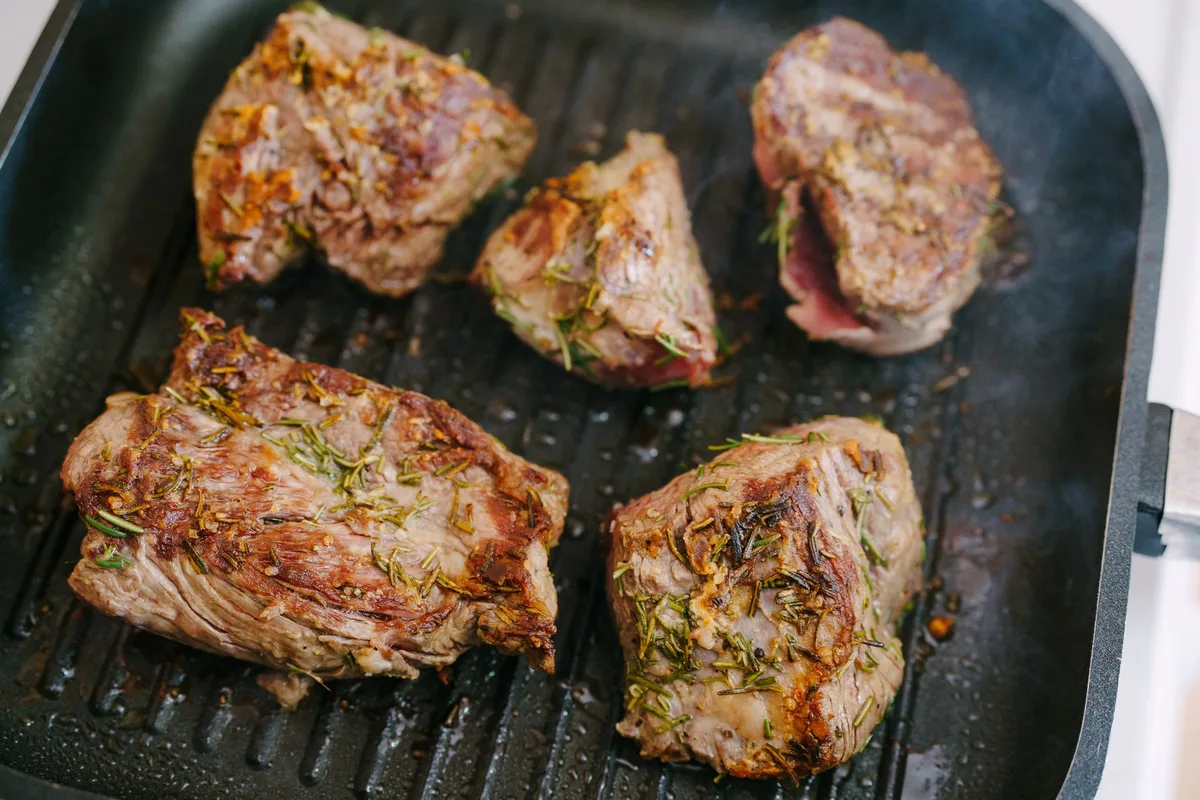
Image source: Pexels / Nadtochiy Photography (Pexels License)
How to Season Like a Pro
- Dry it thoroughly: Place the pan on the stove over low heat until it’s bone dry.
- Apply a thin layer of oil: Use a paper towel to rub a high-smoke-point oil (like canola, vegetable, or grapeseed) all over the pan, inside and out. The surface should look oily but not greasy. If there’s a puddle, you’ve used too much.
- Heat it up: Turn the burner up to medium. Let it heat until the oil starts to smoke slightly. This is the polymerization process, where the oil bonds to the metal to create that slick finish.
- Cool and repeat: Let it cool down. You can repeat this process 2-3 times for the best results.
A well-seasoned pan is your ticket to how to use a grilling pan without fear of tearing your food apart when you try to flip it. The seasoning acts as a natural coating that improves every single time you use it.
Oiling the Food, Not the Pan
Here is a mistake I see constantly: people pour a glug of oil into the pan and then put the food on it. With a ridge pan, this can be a disaster. The oil pools in the valleys, and the food only touches the hot ridges.
As a result, the food might not have enough fat contact to brown evenly, and the trapped oil gets rancid and sticky.
Instead, oil the food itself. Pat your steak dry with a paper towel. Rub it with a small amount of oil and your seasoning.
Now, place it on the hot, dry grill pan.
If you must put oil in the pan, brush it barely onto the ridges with a silicone brush. That’s it. A little goes a long way.
Cooking Techniques: How to Use a Grilling Pan for Steak
Steak is the classic test. Let’s walk through a foolproof method to get a medium-rare cook with distinct crosshatch marks.
Step 1: Get the Right Cut
Aim for a steak that is at least 1 inch thick. Thin cuts cook too quickly and dry out before you get good marks. Ribeye, New York strip, or beef tenderloin are great choices.
Step 2: Season Generously
Salt your steak heavily at least 40 minutes before cooking. This helps dry the exterior, which leads to a better crust. Right before it hits the pan, add black pepper and any other spices you like.
Step 3: The Cook
- Place the steak on the hot pan. You should hear a loud sizzle immediately.
- Do not move it. Leave it alone for 2-3 minutes.
- The crosshatch: After those minutes, use tongs to rotate the steak 90 degrees on the same side (like turning a hand on a clock from 6 to 3). Press down gently to ensure even contact. Cook for 2 more minutes.
- Flip the steak. Repeat the process: cook for 2-3 minutes, then rotate 90 degrees for another 2 minutes.
Pro tip: A digital thermometer takes the guesswork out of it. For medium-rare, remove the steak at 125°F to 130°F.
Step 4: Rest
Never skip resting. Place the steak on a cutting board and tent it loosely with foil. Give it 5 to 10 minutes.
This allows the juices to redistribute throughout the meat.
Cooking Vegetables: Vegetables Smash Hits
Vegetables are where a grill pan really shines. They pick up charred, smoky notes that mimic outdoor grilling beautifully.
- Use smaller pieces: Cut zucchini, squash, and peppers into large flat pieces so they don’t fall between the ridges.
- Wooden skewers: For mini vegetables or shrimp (if you’re mixing proteins, though we’ll stick to veggies here), soaked wooden skewers prevent them from slipping.
Start with firmer vegetables like asparagus or bell peppers. Toss them in a little oil and salt. Place them in a single layer on the pan.
Don’t overcrowd! If you cram too much in, the steam will make them limp. Cook for 3-5 minutes per side until you see char marks and they are just tender when pierced with a fork.
The Mistake: Overcrowding the Pan
I cannot stress this enough. A grilling pan relies on high heat and contact. If you add a mountain of food, the pan’s temperature drops rapidly.
The food starts releasing moisture, and you are boiling, not grilling.
If you’re cooking for the whole family, work in batches. Keep the cooked food warm in a 200°F oven while you finish the rest.
Dealing with the Smoke Point
Cooking at high heat produces smoke. That’s normal. But if you’re setting off the smoke alarm, you need to manage it.
Solution: Use oil with a high smoke point. Extra virgin olive oil is beautiful for dressings, but it burns at high temperatures and tastes bitter. Use avocado oil, peanut oil, or light olive oil (or canola) when searing at high heat.
Also, ensure your kitchen has ventilation. Turn on the range hood or crack a window. Running the exhaust fan is almost non-negotiable if you’re cooking in a closed apartment.
How to Use a Grilling Pan: Cleaning and Maintenance
Okay, the food is eaten. Dessert is done. It’s time to face the dirty pan.
This is the part most people fear, but it doesn’t have to be hard. Here’s how to handle it right after cooking.
Image source: Pexels / Nadtochiy Photography (Pexels License)
The Right Way to Scrub
- Let it cool first: Wait for the pan to cool slightly. Do not plunge a hot cast iron pan into cold water. It will warp or crack.
- Hot water rinse: Rinse with hot water, no soap needed for cast iron if you have a good seasoning.
- Use a brush: Use a stiff brush or a chainmail scrubber specifically for cast iron. Gently scrub the ridges and valleys to lift off food bits.
- Stuck-on bits: If food is stubbornly glued to the surface, add water and bring it to a boil. Boil for 2-3 minutes. The water loosens the gunk, making it easy to scrape off with a wooden spoon.
Drying Is Non-Negotiable
Never leave a cast iron pan “to air dry.” It will rust, generally overnight. Dry it thoroughly with a clean dish towel.
Then, place it back on the stove over low heat for about 2 minutes to ensure all the moisture has evaporated. While it’s warm, rub a tiny bit of oil on the ridges to replenish the seasoning.
Are you using a non-stick pan? You can use gentler soap and a sponge. Avoid metal utensils and abrasive scrubbers, as they scratch the coating.
Common Problems and Quick Fixes
Let’s troubleshoot some issues you might face.
Food Sticks to the Pan
- Cause: The pan wasn’t hot enough.
- Fix: Preheat longer. The “dancing water” test is your friend here.
The Food Tastes Steamed
- Cause: The pan is overcrowded, or the heat is too low.
- Fix: Reduce the amount of food and increase the heat (but watch the smoke point).
The Pan Is Rusting
- Cause: It was left wet or unseasoned.
- Fix: Scrub off the rust with steel wool, wash, dry, re-season, and remember the drying step.
Badly Burnt Charred Bits
- Cause: The heat was too high, or you used a sugary marinade.
- Fix: Avoid sugar-heavy sauces early in the cook. Brush them on at the very end.
Cast Iron vs. Non-Stick for Grilling
Picking your pan matters. Here is a quick breakdown of how to use a grilling pan made of different materials:
- Cast Iron: Best for high heat and perfect searing. Needs seasoning and care.
- Non-stick: Great for beginners who don’t want to worry about food sticking. Can’t get as hot without damaging the coating, meaning less of that dark char.
- Stainless Steel: Beautiful and durable, but sticks more than cast iron if not handled right.
For pure indoor grilling flavor, cast iron is the winner. Starting with a good cast-iron grill pan will set you up for success. Properly seasoned pans are effectively naturally non-stick, and they are durable enough to last for generations.
If you’re curious about the science of heat retention and cooking methods, institutions like the USDA have solid reference materials on safe minimum cooking temperatures that you should check out, a meat thermometer is crucial for safety, not just texture.
Indoor Grilling Without the Grill Pan
What if you don’t have a grill pan? You can improvise. But remember, we’re focused on how to use a grilling pan here, so let’s keep that the star.
The ridge design is what makes the pan special. It provides the heat distribution and fat drainage that a flat skillet simply can’t match.
Final Tips for Perfect Results
Let’s sum up a few golden rules:
- Preheat the pan thoroughly.
- Oil the food, not the pan.
- Do not overcrowd.
- Let the food release naturally from the ridges.
- Do not move the food until it’s seared.
- Rest all meats after cooking.
Sizing Up Your Pan
Think about your burner size. A pan that is too large for a small electric burner won’t heat effectively. The edges will remain cold, cooking unevenly.
Typically, an 8-inch pan is for one person, while a 10-inch pan handles two portions of food easily.
The Bottom Line
Learning how to use a grilling pan isn’t challenging. It just requires a shift in habit from regular frying.
Treat it like a heavy-duty piece of equipment. Give it time to heat up, keep the cooking surface dry and hot, and oil your food. If you follow those rules, you’ll get restaurant-quality char marks in your own kitchen.
The first time I cooked a ribeye in my cast-iron grill pan, I stopped missing my outdoor grill entirely. The smoky, crispy crust made the apartment smell like a barbecue joint, and all it took was a bit of technique.
So crack a window, dry off your cast iron, and get that pan preheating. Your indoor grilled chicken, salmon fillets, and smoky fajita vegetables are waiting.
1 thought on “How to Use a Grilling Pan”