There’s something magical about a bubbling skillet of queso. It’s the first thing gone at any party. It’s the reason people hover near the kitchen island pretending to chat while secretly scraping the bottom of the bowl.
And honestly, it’s the only dip that makes a bag of tortilla chips feel like a full meal.
But here’s the catch. Store-bought queso? That stuff is a gamble.
Some jars taste like liquid plastic. Others are so thick they could double as spackle. The good news?
Making skillet queso from scratch is ridiculously easy. You don’t need a degree in culinary arts. You don’t need fancy equipment.
You just need a skillet, some real cheese, and a few minutes of patience.
This guide walks you through everything. We’ll cover the best cheese blends, the secret to preventing graininess, and the exact heat level that keeps things silky. No more clumpy disasters.
No more oily pools of grease. Just smooth, velvety queso that stays dippable from the first chip to the last.
Let’s get started.
Why a Skillet? The Secret to Better Queso
You might be wondering why we’re making this in a skillet instead of a saucepan. Great question. The skillet isn’t just for show, it actually changes the end result.
First, skillets offer a wider surface area. That means your cheese heats more evenly and faster. Less time on the burner equals less risk of breaking the emulsion.
Second, a cast-iron skillet retains heat like a champ. When you bring the queso to the table, it stays warm for a solid hour. No cold, gluggy dip at the bottom of the bowl.
Third, there’s the aesthetic factor. A rustic iron skillet filled with bubbling cheese just looks right. It screams comfort food.
For the best texture, we recommend using a cast-iron skillet. The USDA has guidelines on safe food handling and serving temps, but for queso, you want to keep it at a gentle simmer, not a rolling boil. If you don’t own a cast-iron pan, a heavy-bottomed stainless steel skillet works too.
Just skip non-stick if you can. It doesn’t hold heat as well.
Now, about the cheese.
Ingredients You’ll Need for Skillet Queso
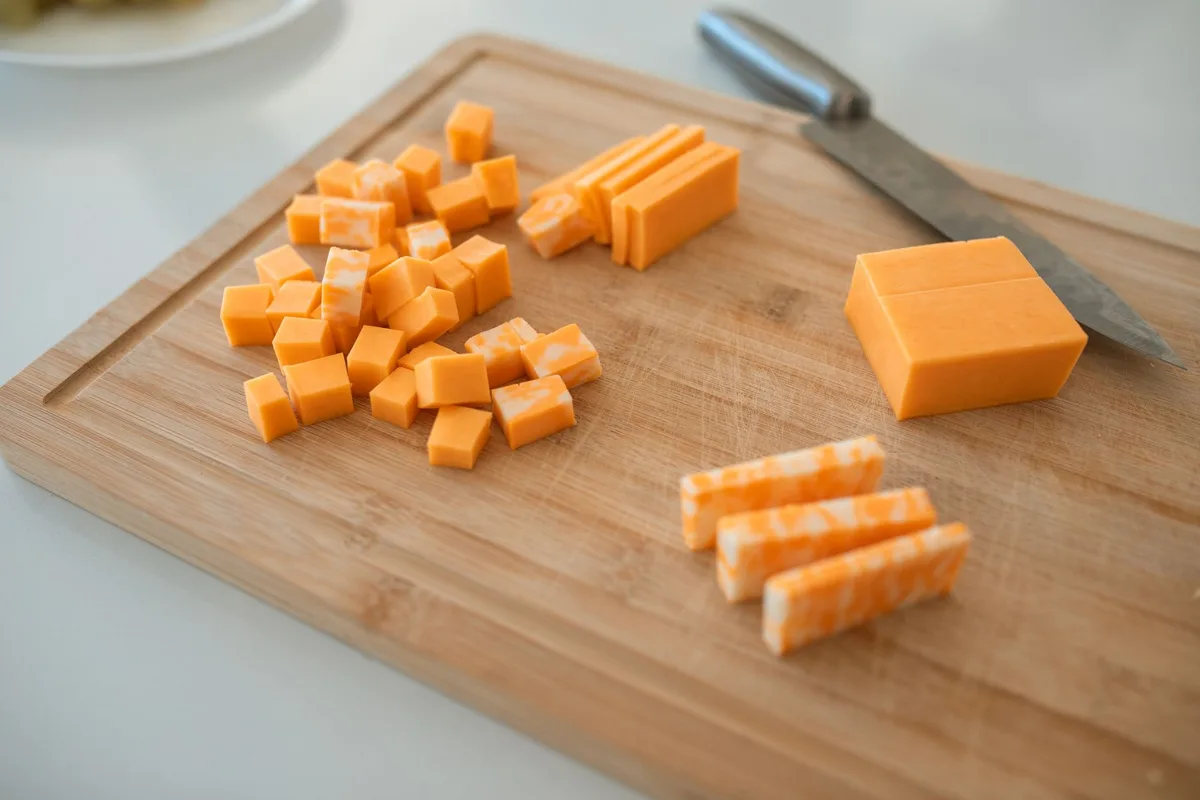
Image source: Pexels / RDNE Stock project (Pexels License)
Here’s the deal. The ingredient list is short, but every component plays a role. Don’t skip the ones that matter.
The Cheese (Non-Negotiable)
- Sharp cheddar, 8 ounces, freshly shredded. This is the flavor backbone. Sharp cheddar brings that tangy, funky bite that makes queso taste like queso. Pre-shredded bags often contain anti-caking agents that mess with melting. Grate it yourself. It takes four minutes max.
- Monterey Jack, 4 ounces, also freshly shredded. This is your meltability champion. Jack is high in moisture and fat, which means it breaks down into a silky sauce without clumping. You can swap for pepper jack if you want a spicy kick.
- American cheese, 4 ounces, torn into pieces. Yes, the ones from the deli counter. American cheese contains sodium citrate, which acts as an emulsifier. This prevents the sauce from separating. It’s the technical insurance policy.
The Liquid Base
- Evaporated milk, 1 cup. Not regular milk. Not heavy cream. Evaporated milk is the perfect middle ground. It won’t water down the cheese like whole milk, and it won’t make the dip as heavy as cream. It stabilizes the sauce and adds a subtle sweetness that balances the cheddar.
The Flavor Builder
- Roasted green chiles, 1 small can (4 ounces). These add mild heat and smoky depth. If you have fresh roasted Hatch chiles, use those. If not, the canned stuff is reliable.
- Diced tomatoes with green chiles, 1 can (10 ounces). Drain them. We don’t want extra water in the pan. The tomatoes give that chunky texture everyone loves.
The Aromatics
- Butter, 2 tablespoons.
- Shallot or onion, ¼ cup, finely diced.
- Garlic, 2 cloves, minced.
The Seasonings
- Cumin, ½ teaspoon. Powdered, not seeds.
- Chili powder, ½ teaspoon.
- Salt, a pinch, but taste first. The cheese carries a lot of salt already.
- Cayenne, a dash if you want extra heat.
That’s it. No weird additives. No expensive ingredients.
Step-by-Step: How to Make Skillet Queso
Let’s break this down into simple, manageable steps. Each one builds on the last.
Step 1: Prep Your Cheese
Grate the cheddar and Monterey Jack into a large bowl. Toss them together with the torn American cheese. Let the cheese sit at room temperature while you prep the other ingredients.
Cold cheese takes longer to melt, and longer cooking time increases the chance of graininess.
Step 2: Build the Flavor Base
Place your skillet over medium heat. Add the butter. Once it foams, toss in the shallots and cook for 2 minutes until translucent.
Add the garlic and cook for another 30 seconds, just until fragrant. If you skip this step, you’ll taste a raw onion bite in the final queso. We’re not about that.
Sprinkle the cumin and chili powder over the aromatics. Stir them into the butter. Toasting the spices for a few seconds opens up their flavor.
Step 3: Add the Liquid and Chiles
Pour in the evaporated milk. Stir it with the aromatics, scraping up any browned bits from the bottom of the skillet. Add the drained diced tomatoes and the green chiles.
Stir to combine.
Let this mixture come up to a gentle simmer. You’ll see small bubbles at the edges. Do not let it boil hard.
High heat is the enemy of smooth queso.
Step 4: Melt the Cheese in Batches
Here’s the most important step. Turn the heat down to low. You want the liquid mixture to be warm but not scorching.
Add your cheese blend in three handfuls. Stir constantly after each addition until the cheese is fully melted before adding the next batch.
Why batches? If you dump all the cheese in at once, the temperature of the pan drops too fast. The cheese seizes up and turns clumpy.
By adding gradually and stirring, you keep the emulsion stable.
Step 5: Stir, Taste, Adjust
Once all the cheese is melted, give the queso a slow, thorough stir. Scrape the bottom and edges. Taste it.
Does it need salt? Probably not. Need more heat?
Add a dash of cayenne. Want more tang? Squeeze in a bit of lime juice or add a teaspoon of pickled jalapeño brine.
Step 6: Serve Immediately
The skillet queso is ready. Don’t let it sit on the stove. Bring it to the table while it’s still molten.
Set it on a trivet. Surround it with chips, sliced veggies, and maybe some grilled chorizo for topping.
The Science of Smooth Queso (Why It Sometimes Breaks)
Let’s talk about the physics for a minute. It matters.
Cheese is an emulsion of fat, water, and protein. When you heat cheese too fast or too hot, the protein contracts and squeezes out the fat. That’s why melted cheese often turns greasy and stringy.
It’s called “breaking.”
The antidote is simple: sodium citrate (found in American cheese) and careful temperature control. Your liquid base keeps things fluid. Your stirring keeps everything combined.
The low heat prevents protein panic.
If you think your queso is too thick (the texture of mashed potatoes), your heat might be too high or you evaporated too much steam. Thicken occurs when the sauce gets overly concentrated. The solution isn’t more milk, it’s patience and a splash of turmeric.
Wait, ignore that last part. Just lower the heat and add a small splash of evaporated milk to loosen it back up.
Common Problems and Quick Fixes (Troubleshooting Table)
| Problem | Why It Happens | The Fix |
|---|---|---|
| Queso is grainy | Heat was too high, or cheese was added too quickly. | Remedy: Whisk in a few tablespoons of warm evaporated milk. Keep whisking. Gently. |
| Queso is oily | The cheese saturated with fat or broken. | Add a slice of American cheese and stir over low heat. That emulsifier saves you. |
| Queso is too thick | Steam evaporated too much liquid. | Stir in warm evaporated milk one tablespoon at a time. |
| Queso is too thin | Too much milk. Drained tomatoes only half-heartedly. | Cook over low heat, stirring, for 3–4 minutes. But don’t boil — or the cheese breaks. |
| Queso tastes flat | Missing that acidic punch or smoky depth. | Add a teaspoon of lime juice or a pinch of smoked paprika. Stir well. |
How to Customize Your Skillet Queso
Once you nail the base recipe, the world is your oyster. Here are a few variations that people ask about constantly.
The Meaty Version
Brown ½ pound of chorizo or breakfast sausage in the skillet before adding the butter. Remove it, leaving the rendered fat in the pan. Build the rest of the recipe normally.
At the end, fold the meat back in. The fatty chorizo adds depth that pairs beautifully with sharp cheddar.
The Extra-Spicy Version
Use pepper jack instead of Monterey Jack. Add one finely diced jalapeño (seeds included if you’re brave) to the shallots. If you want serious heat, whisk in a tablespoon of hot sauce at the very end.
Good options include Crystal or a habanero-based sauce.
The Smoky Restaurant-Style Version
Add ½ teaspoon liquid smoke or 1 teaspoon smoked paprika to the butter. Dice one chipotle pepper in adobo and add it with the tomatoes. This gives that barbecue-joint taste that makes people think you spent hours over a smoker.
The Southwest Version
Stir in a can of rinsed black beans and some corn kernels right after the cheese melts. The beans bulk it up, making it more of a light meal than a dip. It’s excellent with flour tortillas.
Is It Better to Make Queso with Velveeta?
Everyone asks this. The answer is nuanced.
Velveeta and processed cheese blocks produce the absolute smoothest queso every single time. They melt like a dream because they’re formulated with excess emulsifiers. If your priority is perfect texture on the first try, processed cheese is your friend.
But the flavor is distinctly, how do we put this nicely?, plasticky. It takes a lot of seasoning to make processed cheese taste interesting. Fresh cheddar delivers a much more complex, sharp, real-cheese flavor that processed cheese can’t match.
Our recipe uses a blend of both. Some real cheese for flavor, some American cheese for texture. It’s the best of both worlds.
Reheating Skillet Queso (Yes, It Can Be Done)
Queso is magnificent fresh out of the pan. Reheating it is a different story. Reheated whole cheese dips often split and become gritty.
The refrigerator changes the structure of the sauce. If you follow those steps, you can salvage it properly:
- Take the cold queso out of the fridge. Let it sit on the counter for 15 minutes.
- Heat a heavy skillet over medium-low heat. Place the queso inside.
- Add 2, 3 tablespoons of evaporated milk or even a splash of water. The additional liquid is crucial.
- Whisk continuously as you heat it. Slow and steady wins the race.
Do not, under any circumstances, microwave your leftover queso on high. You will create an oily clump that goes in the trash.
Serving Ideas Beyond Tortilla Chips
Tortilla chips are the classic pairing, no debate. But if you have queso left over (a rare but beautiful occurrence), try these:
- Loaded nachos, Drizzle queso over fresh tortilla chips. Top with jalapeños, black olives, and cilantro.
- Queso fries, Crispy French fries drowned in warm queso.
- Queso-topped burgers, Skip the regular cheese slice. Spoon queso directly on the patty.
- Breakfast burrito booster, Add a dollop of leftover queso to scrambled eggs inside a flour tortilla.
- Soft pretzel dip, The salty, malty flavor of a pretzel and the sharpness of the cheese? A match made in heaven.
Nutritional Info and Dietary Modifications
Look, we’re not going to pretend queso is health food. This dip is genuinely rich. One quarter-cup serving runs about 150, 190 calories.
The fat content sits around 14 grams. That comes with the territory.
If you’re looking to lighten things up (without sadness), here are some swaps:
- Dairy-free queso, Swap the dairy components for oat milk, raw cashews soaked and blended, and nutritional yeast. Use vegan cheddar shreds that actually melt well. Oat milk blended with a handful of cashews gives that creamy base.
- Low-carb, This recipe is already naturally low-carb. You don’t need to change anything, just avoid tortilla chips along with the dip.
The Best Skillet Queso Temperature (All the Hot Details)
Your serving temperature really does matter. Here’s the practical dosage:
- Ideal serving temp: 120, 140°F. The queso stays smooth and warm but doesn’t scald your mouth.
- Boiling danger zone: Over 180°F. Do not let it boil, or the sauce breaks completely.
As long as it’s in a cast-iron skillet, it will stay warm enough for 45 minutes to an hour on the table. If you notice things stiffening up, return the skillet to the stove for one slow warm-up over low heat with a splash of milk.
Frequently Asked Questions (FAQ)
Can I use pre-shredded cheese?
Technically, yes, but don’t expect smooth results. Those anti-caking powders, usually potato starch or cellulose, act as a barrier. They prevent the cheese from clumping in the bag, but they also prevent the cheese from melting smoothly.
The sauce will turn out grainy. You spend four minutes shredding a block, you get a much better dip.
Can I make queso in a slow cooker?
You can, but we prefer the stovetop. The slow cooker takes two hours to melt everything, and that long, low heat can sometimes develop a “sweaty” texture. For a party of 20 people, sure, use the crockpot to hold it.
But for 2, 6 people, make the base on the stove.
What if I don’t have evaporated milk?
Whole milk or half-and-half can work in a pinch. Use ¾ cup whole milk mixed with 2 tablespoons of melted butter to mimic the fat content. Heavy cream will be too thick and rich.
Why does my queso become grainy on day two?
When chilled, the starch molecules in the cheese sauce recrystallize and thicken up. This is normal. The sauce is never going to be as smooth when reheated as it was fresh, but following the reheating instructions will help restore a good portion of its old creamy glory.
Queso is always better on day one, so make what you’ll eat.
Can I make it ahead of time?
You can make the flavor base (the onion-garlic-tomato mixture) a day in advance. Let it cool, refrigerate, then gently reheat it in the skillet the next day. Add the cheese then.
This gets you 70% of the way ready without sacrificing texture.
The Bottom Line on Making Skillet Queso
This is one of those recipes that rewards you immediately. The entire cooking process takes roughly 15 minutes start to finish. Two of those steps involve just shredding cheese while the skillet warms up.
The keys to success are simple:
- Use freshly grated cheese, never pre-shredded.
- Keep the heat moderate, low simmer, not boiling.
- Add the cheese in handfuls while stirring constantly.
- Have evaporated milk nearby in case the sauce thickens past your preference.
This skillet queso fits a weeknight dinner for two just as well as a Super Bowl party. It doesn’t care about the occasion. It just wants to get into your mouth, preferably on a chip.
Now get your cast iron out, grab a block of sharp cheddar, and start melting. The dip of your dreams is under 20 minutes away.