You’ve found the perfect spot for a microwave, but will the appliance actually fit? That’s the million-dollar question. Measuring a microwave isn’t complicated, but it’s surprisingly easy to get wrong if you don’t know what to look for.
I’ve helped dozens of friends and family members through kitchen remodels and replacements, and I’ve seen the same mistakes happen over and over again. They measure the outside, forget about the door swing, or completely ignore the venting requirements.
This guide will walk you through every measurement you need, whether you’re measuring a countertop model you already own or trying to figure out if a new unit will fit in your kitchen. I’ll cover the tools you need, the exact dimensions to capture, and the mistakes that trip up even experienced DIYers.

Image source: Pexels / Deon Black (Pexels License)
Why Accurate Measurements Matter
Let me paint you a picture. You buy a sleek new microwave online. It looks perfect in the product photos.
It arrives at your door. You slide it onto the counter, and it sticks out three inches past your upper cabinets. The door can’t open fully because it hits the cabinet handle.
Now you’re boxing it up for a return and paying shipping fees.
Frustrating, right? That’s what happens when you rely on product listings instead of your own tape measure.
The reality is that manufacturers list exterior dimensions, but those numbers don’t tell you everything. Cabinet openings, outlet locations, and ventilation clearance all affect whether a microwave will actually work in your space. You also need to know the internal capacity in cubic feet, which determines what sizes of plates and bowls you can use.
Beyond fit, there’s safety. Microwaves generate significant heat, especially around the vents. If you cram one into a space that’s too tight, you could be creating a fire hazard.
The U.S. Consumer Product Safety Commission has documented fires caused by inadequate ventilation around appliances. That’s why proper clearance isn’t optional.
Tools You’ll Need
You don’t need a professional toolkit for this job. Honestly, a basic household measuring setup works just fine.
- A tape measure, The flexible metal kind is best. A 25-foot tape measure gives you plenty of range for measuring both the appliance and the space where it’ll go.
- A notepad and pen, Write everything down as you go. Don’t trust your memory.
- A step stool, If you’re measuring an over-the-range microwave, you’ll need to reach the top of the unit safely.
- A smartphone camera, Take photos of your measurements and the model number. You’ll thank yourself later when you’re comparing specs online.
- A level, This isn’t strictly necessary, but it helps you verify that your countertop or cabinet floor is actually level. A slightly tilted surface changes how the microwave sits.
If you have a laser distance measurer, feel free to use it. Just know that a standard tape measure is often easier for small appliances because you can measure inside corners more precisely.
Step-by-Step: Measuring Countertop Microwaves
Countertop microwaves are the most common type, so let’s start there. Whether you’re replacing an old unit or buying your first one, the process is the same.
Step 1: Measure the Width
Width is the dimension you’ll hit first, literally and figuratively. The width is the horizontal measurement when you’re facing the microwave door straight on.
Place the end of your tape measure at the left edge of the microwave. Extend it across to the right edge. That number is your width.
Here’s the critical part, do not stop there. You need to measure the width at both the top and the bottom of the unit. Some microwaves have a slightly tapered design or protruding feet at the base.
If your cabinet opening is snug, that extra quarter-inch at the bottom could make the difference between a perfect fit and an impossible squeeze.
Also, measure the depth of the microwave at the top and the bottom. The back of the unit often has a plug that sticks out further than the body.
Step 2: Measure the Height
The height is straightforward. Stand the tape measure at the bottom of the microwave and extend it straight up to the highest point.
But here’s a subtle detail most people miss. The highest point isn’t always the top of the cabinet. Many microwaves have a carrying handle, vents, or a bump on top.
Measure to the absolute highest protrusion, not just the flat surface.
Step 3: Measure the Depth
Depth is the measurement from the front of the microwave (the door) to the back wall. For accuracy, measure from the front-most point of the door handle, not the flat door panel.
The handle can add two to four inches to the overall depth. That matters if you’re placing the microwave on a counter with upper cabinets above. You need to know how much the microwave will stick out when positioned against the back wall.
Step 4: Verify the Interior Capacity
Manufacturers advertise microwave capacity in cubic feet. This is a rough volume calculation based on the interior dimensions. You can measure the interior yourself to see how it compares to what’s advertised.
Open the door and measure:
- Interior width, from left wall to right wall
- Interior depth, from the back wall to the door’s inner edge (not the glass)
- Interior height, from the turntable to the top of the cavity
Multiply those three numbers together and then divide by 1,728 (which is cubic inches per cubic foot). That gives you the actual cubic feet.
This interior measurement tells you what you can fit inside. A 0.7 cubic foot model is fine for basic reheating but too small for a large dinner plate. You want at least 1.0 cubic feet for household use.
Step 5: Check the Turntable Diameter
The turntable eats into your usable interior space. A microwave might have 1.5 cubic feet of advertised capacity, but if the turntable is only 10 inches across, you can’t fit a 12-inch pizza plate on it.
Measure the turntable’s diameter by stretching the tape from one edge to the opposite edge, passing through the center. Remember that some turntables have an off-center drive mechanism that affects how the glass rotates.
Measuring Over-the-Range Microwaves
Over-the-range (OTR) models are a different beast entirely. They’re built into a specific cabinet opening, often above the stove. This installation has strict requirements because the microwave also functions as a vent hood.
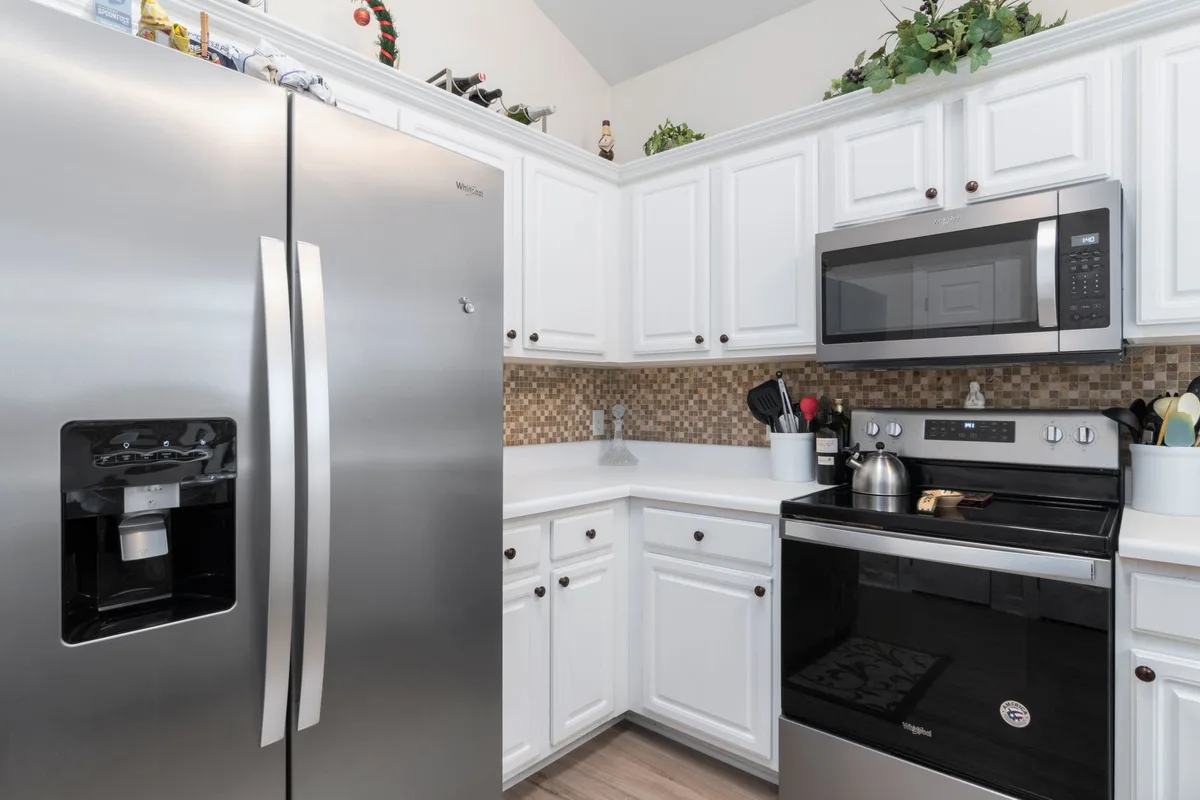
Image source: Pexels / Curtis Adams (Pexels License)
Know Your Cabinet Opening
Before you measure anything else, measure the width of the cabinet opening where the microwave will sit. Standard OTR microwaves are either 30 inches or 36 inches wide, but the actual opening needs to match the manufacturer’s specifications.
Here’s a pro tip that comes from bitter experience. Your cabinet opening might not be perfectly square. Houses settle, cabinets shift, and drywall expands.
Measure the opening at three points, front, middle, and back. Use the narrowest measurement when shopping.
Measure the Distance from the Floor
OTR microwaves sit at a specific height above the cooktop. The distance from the cooktop surface to the bottom of the microwave typically ranges from 13 to 16 inches. This clearance is critical for two reasons.
First, you need enough space to work on the cooktop safely. Second, the bottom of the microwave often has a vent or light that needs airflow. If the clearance is too small, you’ll block that vent and increase the risk of overheating.
Measure from the cooktop grate to the bottom of the upper cabinet where the microwave will sit. Then subtract two to three inches for the microwave’s height profile. Compare that to what you can handle.
Account for the Mounting Bracket
OTR microwaves come with a mounting template in the box. The template shows exactly where the bracket goes and how much clearance you need on each side. Don’t buy a microwave without checking that your space matches its template.
The mounting bracket attaches to the wall and supports most of the weight. The microwave slides onto the bracket and then gets secured through the top into the cabinet above. Each brand has its own bracket design, so a microwave from brand A usually can’t hang on a bracket from brand B.
Clearance Requirements You Can’t Ignore
Let’s talk about airflow because this is where people make dangerous mistakes.
Microwaves generate heat, and that heat has to go somewhere. The majority of models vent through the back, the sides, or the top. Blocking those vents causes the electronics to overheat, which reduces lifespan and can create a fire risk.
- The microwave needs at least 3 inches of clearance above the unit for proper airflow.
- Leave at least 1 inch of clearance on both sides for venting.
- Keep at least 2 to 3 inches between the back of the microwave and the wall.
- If you’re placing a microwave in a corner, add a few extra inches so the door can open fully without hitting the adjacent wall.
The official clearance numbers vary by model, so always check the user manual. When in doubt, I default to more clearance, not less. A few inches of wasted space is better than a toasted appliance.
Measuring for a Built-In or Drawer Microwave
Built-in microwave drawers are fancy and increasingly popular. They slide out like a drawer rather than having a swing door. The installation process is totally different.
With a built-in drawer, you’re typically working with a 24-inch or 30-inch cabinet. The microwave becomes part of the cabinetry, and the cabinet has to be custom-fitted with a specific support structure.
Here’s what matters most:
- The cutout height must be exact. Too small and the unit won’t fit. Too large and there’s a visible gap that looks terrible.
- The unit needs a dedicated electrical circuit. Most drawers require a 15-amp circuit, but check the specs.
- Measure the depth of the cabinet from the front face to the back wall. Built-in drawers need adequate room for the venting in the rear.
If you’re serious about a drawer model, I recommend hiring a professional installer. These units don’t have the same tolerance for installation errors that countertop models do.
Common Mistakes to Avoid
I’ve seen the same errors play out time and time again. Some are minor annoyances. Others turn into full-blown kitchen catastrophes.
Forgetting the Door Swing
The door swing is the silent killer of microwave installations. A microwave might be the perfect width and depth, but when you open the door, it swings into the kitchen aisle and blocks traffic. Or it hits the cabinet next to it and can’t open more than 45 degrees.
When you place a microwave, always test the door swing. Open it fully and make sure nothing blocks the path. For a side-swing door, account for the arc of the handle.
That handle sweeps much wider than the microwave body itself.
Assuming All Measurements Are in the Same Format
Some brands list depth without the handle. Others include it. Some list width to the edge of the trim, others to the edge of the cabinet.
You can’t compare two microwaves side by side unless you know the measurement convention for each.
My advice is to physically measure a display unit in a store. Product listings don’t always tell the full story.
Ignoring the Power Cord
The power cord is short on most microwaves, usually around three feet. If your outlet is on the opposite side of the cabinet, you’ll end up with an extension cord, which is a fire hazard and voids the warranty in most cases.
Measure the distance from the microwave’s installed position to the nearest outlet. Verify the cord can reach without stretching. You can’t easily swap a microwave’s power cord, so don’t plan around an extension.
Not Measuring the Turn
Let me explain this one carefully. A microwave can be the right width, height, and depth individually, but still not fit because it can’t maneuver into the space.
You might need to tilt the microwave to get it through a narrow doorway. If the diagonal dimension is larger than the doorway opening, the unit simply won’t fit. Sounds silly, doesn’t it?
But it happens. Measure the diagonal from the top corner to the opposite bottom corner and compare that to your doorway width.
How to Use Your Measurements When Shopping
By now, you have a notepad full of numbers. What do you do with them?
Start by writing down the maximum dimensions your space allows:
- Maximum width, measure the actual opening where the microwave will sit
- Maximum height, measure from the countertop to the underside of the cabinet above
- Maximum depth, measure from the back wall to the front edge of the counter
When you compare those to product listings, subtract half an inch from each of your maximums. That gives you breathing room. A microwave that’s perfectly flush with the edge of the counter looks nice, but it also means you can’t open the door all the way.
If you’re shopping for an over-the-range model, take the manufacturer’s installation template with you to the store. That’s the most accurate way to verify compatibility.
The Right Way to Measure a Round or Odd-Shaped Microwave
Okay, not every microwave is a perfect rectangle. Some are rounded on top or have curved corners. How do you measure those?
The trick is to use the bounding box method. Pretend the microwave is sitting inside an invisible rectangular box. Measure the maximum width, height, and depth of that imaginary box.
Those are the dimensions that matter for placement because they define the absolute space the microwave occupies.
Manufacturers sometimes list “rounded” dimensions that make the unit look smaller than it is. Always use the bounding box numbers when you’re planning space.
Final Word on Measuring Microwave Dimensions
Measuring a microwave correctly is one of those tasks that takes five minutes but saves you hours of misery. Grab your tape measure, write down the width, height, and depth of the space, check the door swing, and verify you have enough clearance for ventilation.
When in doubt, buy slightly smaller than the maximum possible size. The extra inch of empty space is nothing compared to the guarantee that everything fits neatly.
And if you’re upgrading because your old microwave stopped working, don’t assume the replacement will match the exact footprint. Models change every year. What fits today might not fit tomorrow.
Measure first. Shop after. You’ll be glad you did, and so will your contractor, if you ever bring one in.
1 thought on “How to Measure Microwave Dimensions”