Let me save you the trial and error. I’ve burned more loaves than I care to admit before I figured out the exact right way to preheat a Dutch oven for sourdough. And honestly?
It’s the single most important step in the entire baking process.
That crusty, ear-splitting, bakery-style sourdough you see on Instagram? It starts with a properly preheated Dutch oven. Not the dough.
Not the fermentation time. Not even the flour you use. The heat.
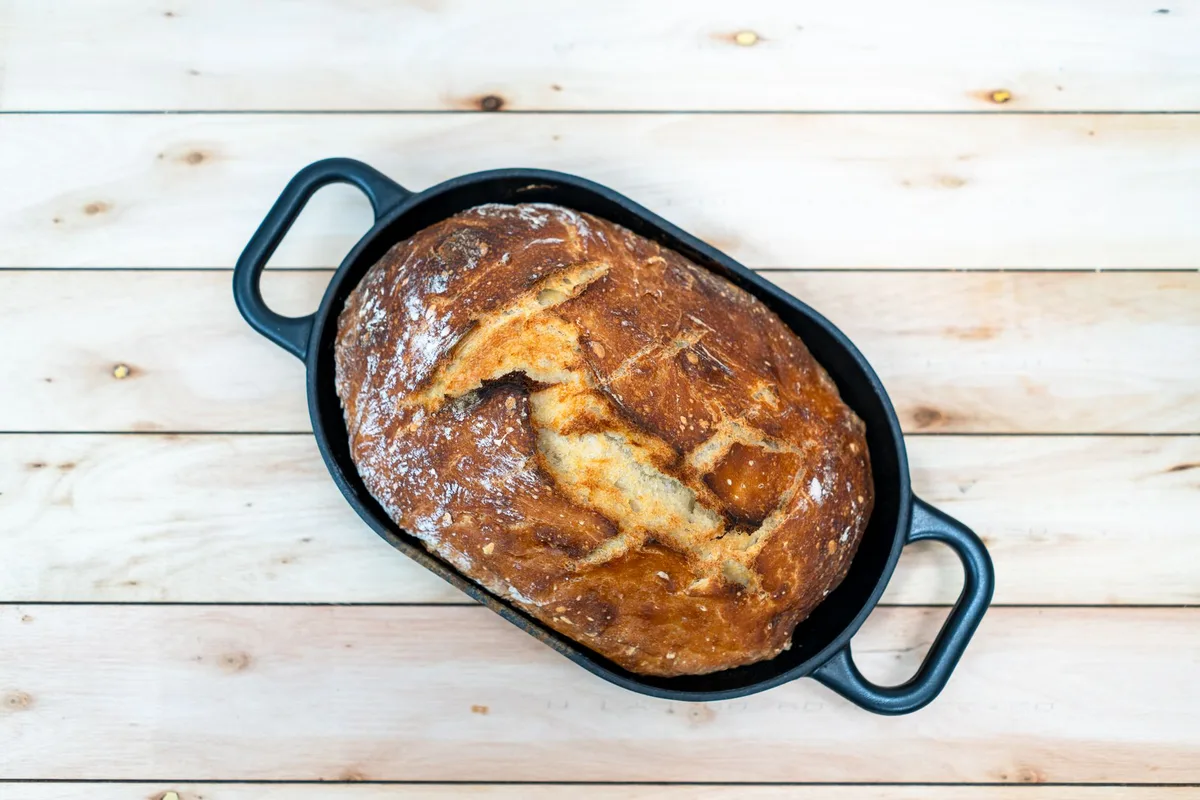
Image source: Pexels / Frank Schrader (Pexels License)
Most home bakers get this wrong. They rush the preheat, or they skip it entirely, or they use the wrong temperature. I’ve been there.
Three years ago, I pulled a loaf out of a cold Dutch oven that looked like a pale, sad pancake. My wife called it “the ghost bread.” Never again.
So let’s get this right. Here’s exactly how to preheat your Dutch oven for sourdough, step by step, no fluff, no guesswork.
Why Preheat a Dutch Oven for Sourdough?
You might think a Dutch oven is just a heavy pot. But for sourdough, it’s a steam trap, an oven within an oven, and a heat battery all in one.
Here’s what happens when you preheat it properly.
The cast iron absorbs heat like a sponge. When you drop your dough onto that scorching surface, it instantly shocks the bottom. That thermal shock creates the oven spring, that explosive rise in the first 20 minutes of baking.
Without the preheat, the dough just sits there, slowly warming up, never getting the lift it needs.
The second thing is steam. A hot Dutch oven traps the moisture released from the dough. That steam keeps the crust soft and flexible during the first half of baking.
The dough expands freely. Then, when you remove the lid, the crust hardens into that shatteringly crisp shell. No steam, no crust.
It’s that simple.
I’ve tested this side by side. Same dough, same oven, same timing. The loaf from the preheated Dutch oven rose 60% higher.
The cold-start loaf? Flat. Dense.
Disappointing.
The USDA’s food safety guidelines for baking bread recommend minimum internal temperatures, but they don’t tell you how to get there. The preheated Dutch oven is how you get there. It’s the difference between a loaf that looks like it came from a bakery and one that looks like it came from a science experiment.
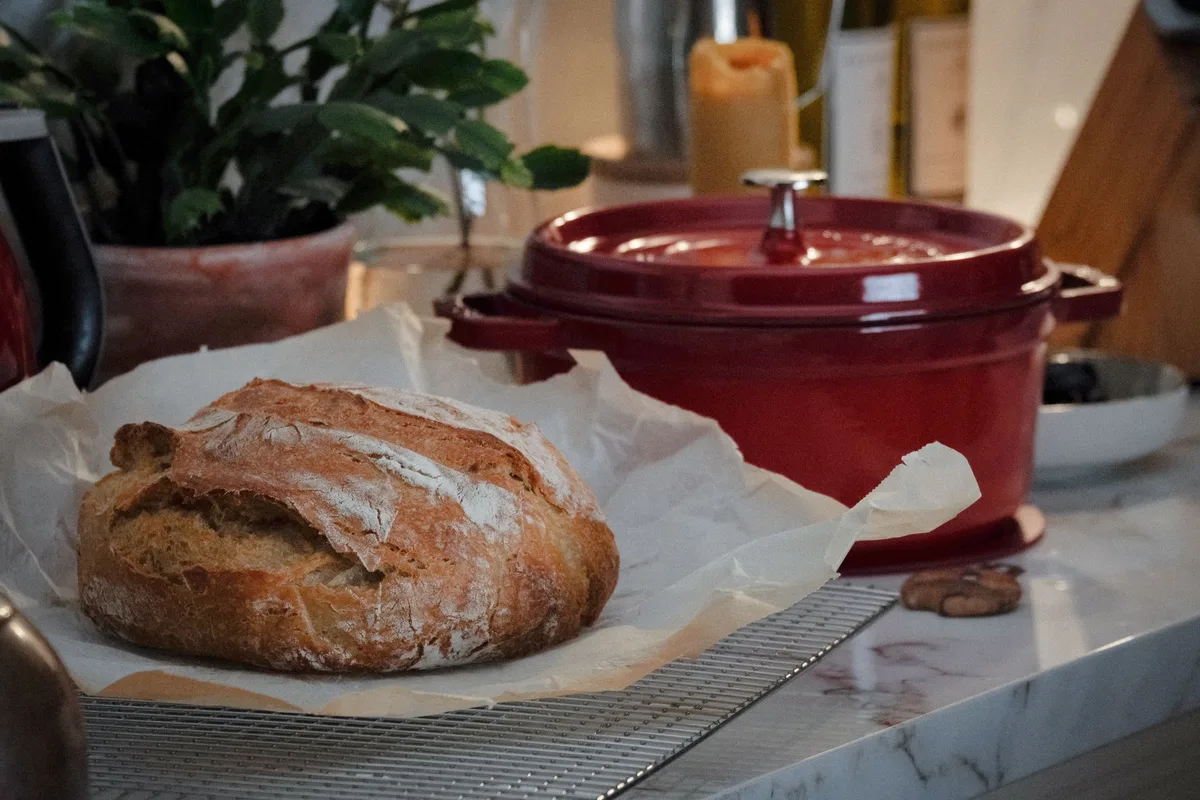
Image source: Pexels / Merve (Pexels License)
How Long to Preheat a Dutch Oven for Sourdough
This is where most people mess up. They throw the Dutch oven in the oven, wait 15 minutes, and call it done. That’s not enough.
Not even close.
Cast iron is dense. It takes time to heat all the way through. The surface might feel hot after 10 minutes, but the interior mass is still cold.
You need the entire pot, walls, bottom, lid, to reach the target temperature.
My rule is simple: 45 minutes minimum at 500°F (260°C).
If you’re using a lower temperature, say 450°F (232°C), give it 60 minutes. The lower the heat, the longer it takes for the cast iron to fully saturate.
Here’s the breakdown by oven type:
Conventional oven: 45-60 minutes. The heating elements cycle on and off, so the preheat takes longer. Stick to 50 minutes to be safe.
Convection oven: 35-45 minutes. The fan circulates hot air, heating the pot faster. Check at 35 minutes, but you’ll probably need 40.
Gas oven: 50-60 minutes. Gas ovens have more temperature fluctuation. The extra time ensures the iron evens out.
I’ve left my Dutch oven in for 90 minutes before. It didn’t hurt anything. Cast iron can handle it.
The only downside is your kitchen gets hot. But that’s the price of good bread.
One more thing: don’t open the oven door during the preheat. Every time you open it, the temperature drops 25-50°F. That adds another 10 minutes to the preheat time.
Just let it do its thing.
What Temperature to Preheat a Dutch Oven for Sourdough
The temperature depends on what kind of crust you want.
500°F (260°C): The standard. This is what most artisan bakers use. It gives you maximum oven spring and a deep, dark, caramelized crust.
The sugars in the dough caramelize faster at this temperature, creating that mahogany color and complex flavor.
475°F (246°C): A middle ground. You’ll get good spring and a lighter crust. This works well if your oven runs hot or if you prefer a less intense bake.
450°F (232°C): The safe zone. Use this if your Dutch oven has a plastic handle or knob that can’t handle high heat. The crust will be lighter, and the oven spring will be slightly less dramatic.
But the bread will still be good.
I bake at 500°F almost exclusively. The higher heat gives me the best results. But I’ve had great loaves at 475°F too.
The key is consistency. Pick a temperature and stick with it until you learn how your oven behaves.
Here’s what I’ve learned the hard way: don’t trust your oven’s built-in thermometer. They’re notoriously inaccurate. I use an oven thermometer to verify the temperature before I put the Dutch oven in.
The difference between 475°F and 500°F matters.
How to Preheat Properly: Step by Step
Let me walk you through my exact process. I’ve done this hundreds of times, and this method works every single time.
Step 1: Place the Dutch oven on the center rack before you turn the oven on.
Don’t wait until the oven is hot. Put the empty Dutch oven on the center rack, then set the temperature. This avoids thermal shock.
Cast iron can crack if you put it into a screaming hot oven.
Step 2: Set the temperature and start the timer.
Set your oven to 500°F (or whatever temperature you’re using). Set a timer for 45 minutes. Don’t let the timer beep without checking the actual temperature with an oven thermometer.
Step 3: Wait. Don’t open the door.
This is the hardest part. You want to check it. You worry it’s not hot enough.
But trust the process. The Dutch oven is heating up. Opening the door just resets the clock.
Step 4: Check the temperature at 45 minutes.
Use an oven thermometer to verify the oven is at the target temperature. The Dutch oven itself should be hot enough that you can feel the heat radiating from the outside of the oven door. If you’re unsure, wait another 10 minutes.
Step 5: Have your dough ready.
This is crucial. You need to have your dough proofed, scored, and ready to go before you pull the Dutch oven out. The pot loses heat fast once it’s out of the oven.
Every second counts.
Step 6: Remove the Dutch oven, place the dough, and cover.
Use heavy oven mitts. The pot is dangerously hot. Remove the lid, carefully place your dough on a piece of parchment paper, then lower it into the pot.
Score the dough, put the lid back on, and return to the oven.
Step 7: Bake immediately.
Start the timer for the first stage of baking (usually 20-25 minutes with the lid on). Don’t let the pot sit on the counter while you take photos or adjust things. The heat is leaving the iron every second.
I’ve streamlined this process over years of baking. The whole operation from pulling the Dutch oven out to getting it back in should take less than 30 seconds. Any longer, and you’re losing critical heat.
The Science Behind the Preheat
Let me get technical for a minute. Understanding why this works makes it easier to get right.
Cast iron has high thermal mass. That means it takes a lot of energy to heat up, but it stays hot for a long time. When you preheat a Dutch oven for 45 minutes, you’re charging a thermal battery.
The heat penetrates about 1/4 inch into the iron every 15 minutes. After 45 minutes, the entire pot, walls, bottom, lid, is uniformly hot. That uniformity is what gives you even baking.
No hot spots. No cold zones.
When you drop the dough in, the heat transfers from the iron to the dough instantly. The starch granules on the surface gelatinize quickly, creating a thin, flexible skin. The trapped steam keeps this skin soft.
The dough expands. The yeast produces gas. The alcohol evaporates.
All of this happens in the first 10 minutes.
If the Dutch oven isn’t hot enough, the starch doesn’t gelatinize fast enough. The steam escapes through the dough. The crust sets too early.
And you get a dense, flat loaf.
The National Institute of Standards and Technology has published research on thermal conductivity of materials. Cast iron’s thermal properties make it ideal for this application. It’s not just a pot.
It’s a precision tool.
What Happens If You Skip the Preheat
I’ve seen blog posts that claim you can skip the preheat. They’re wrong. Here’s what actually happens.
Your dough goes into a cold or lukewarm pot. The oven starts heating, but the pot heats slowly. The dough warms up gradually.
The yeast activity slows down. The oven spring is weak. The crust sets before the dough has fully expanded.
The result is a loaf with a pale, thick crust and a dense, gummy crumb. It’s edible. It’s not terrible.
But it’s not the sourdough you’re working so hard to make.
I tested this once. I put the dough in a room-temperature Dutch oven, then put it in the preheated oven. The loaf rose about 30% less than the control.
The crust was soft. The crumb was tight. It was a waste of 24 hours of fermentation.
Don’t skip the preheat. It’s not optional. It’s the foundation of the entire bake.
Common Mistakes and How to Avoid Them
I’ve made every mistake in the book. Here’s what I’ve learned.
Mistake 1: Preheating too fast.
Some people put the Dutch oven in the oven, crank the heat to 500°F, and set a timer for 30 minutes. They assume the oven is hot because the oven says it’s hot. But the oven thermometer often shows something different.
The cast iron hasn’t had time to absorb the heat.
Fix: Use a separate oven thermometer. Verify the temperature. Give it the full 45 minutes.
Mistake 2: Opening the oven door during preheat.
Every time you open the door, you lose heat. The oven has to work to get back to temperature. This extends the preheat time by 10-15 minutes per opening.
Fix: Trust the process. Don’t peek. If you need to check, use the oven light.
Mistake 3: Using a cold lid.
Sometimes people preheat the bottom of the Dutch oven but leave the lid on the counter. When you put the lid on, it’s cold. That cold surface absorbs heat from the pot and the oven.
The steam doesn’t form properly.
Fix: Always preheat the lid with the pot. They go together.
Mistake 4: Not preheating long enough at lower temperatures.
If you’re baking at 450°F, you might think you need less time because the temperature is lower. But lower temperatures actually require more time. The heat transfer is slower.
Give it 60 minutes.
Fix: Add 15 minutes for every 25°F below 500°F.
Different Dutch Ovens, Different Preheating Times
Not all Dutch ovens are the same. The material and thickness affect how long it takes to preheat.
Lodge cast iron (thick): These are heavy. They take the full 45-60 minutes. The thick walls hold heat well, but they take longer to get there.
Le Creuset or enameled cast iron: These are slightly thinner than Lodge. They preheat in 40-50 minutes. The enamel coating doesn’t affect heat absorption, but the walls are thinner.
Staub (heavy enameled): Similar to Le Creuset. 40-50 minutes.
Antique or vintage cast iron: These are often thinner. They might preheat in 30-40 minutes. Be careful with temperature shock.
Old cast iron can crack more easily.
Lighter-weight Dutch ovens (aluminum core, stainless steel): These are not ideal for sourdough. They don’t hold heat well. If you’re using one, preheat for 30 minutes at 500°F.
The results won’t be as good as cast iron.
I use a 5.5-quart Lodge for most of my baking. It’s cheap, durable, and works perfectly. The 45-minute preheat is my standard.
Temperature Adjustments for Different Ovens
Your oven is unique. It has its own personality. You need to learn its quirks.
Gas ovens: These often have temperature swings of 25-50°F. The heating element cycles on and off. The heat is less even.
Preheat for 50-60 minutes to compensate for the fluctuation.
Electric ovens: More stable. The temperature stays closer to the set point. 45 minutes is usually enough.
Convection ovens: The fan circulates heat. This can actually dry out the dough if you’re not careful. The preheat is faster, but the baking temperature should be 25°F lower than the recipe calls for.
Toaster ovens: I’ve seen people try to bake sourdough in toaster ovens. It doesn’t work well. The heating elements are too close.
The Dutch oven doesn’t fit. Stick to a full-size oven.
Outdoor ovens (pizza ovens, kamado grills): These can work. But the temperature control is harder. You’ll need to experiment.
The preheat time depends on the heat source.
The Water and Steam Factor
Some bakers add water to the preheat process. They put ice cubes in the Dutch oven or spray water on the dough. This is extra.
It’s not necessary.
The steam from the dough itself is enough. The Dutch oven traps that moisture. You don’t need to add more.
But here’s a trick I use: I place a shallow pan of water on the bottom rack of the oven during the preheat. This adds ambient humidity to the oven. It doesn’t affect the Dutch oven preheat, but it helps the overall baking environment.
The USDA’s baking guidelines recommend steam for crust development. But they don’t specify how to get it. The Dutch oven method accomplishes this naturally.
Preheating with the Lid On or Off
Always preheat with the lid on. The lid is part of the system. It needs to be hot too.
When you drop the dough in and put the lid on, you want the entire chamber to be hot. The lid radiates heat down onto the top of the dough. That helps with the oven spring and the crust development.
If the lid is cold, it absorbs heat from the dough. The top of the loaf doesn’t cook as fast. The crust sets unevenly.
I’ve forgotten to put the lid on during preheat before. The result was a lopsided loaf with a pale top. Don’t make that mistake.
How to Know When the Dutch Oven Is Ready
You can’t just look at a Dutch oven and know if it’s hot enough. But there are signs.
The heat test: Hold your hand about 6 inches above the open Dutch oven. You should feel intense heat radiating up. If you can hold your hand there for more than 5 seconds, it’s not hot enough.
The water test: This is risky, but it works. Flick a few drops of water onto the inside of the pot. If they sizzle and evaporate instantly, it’s ready.
If they just sit there, it’s not.
The oven thermometer test: This is the safest. Place an oven thermometer inside the oven (not inside the Dutch oven). When the ambient temperature reaches 500°F, the Dutch oven is close.
Give it 10 more minutes to be sure.
The timer test: The most reliable method. Set a timer for 45 minutes. Don’t touch the oven.
When the timer goes off, it’s ready.
Preheating for Different Sourdough Recipes
Different recipes have different requirements. Here’s how to adjust.
High-hydration dough (80%+): These need maximum heat. Preheat at 500°F for 50 minutes. The extra moisture in the dough needs more heat to set the crust.
Lower-hydration dough (65-70%): These are more forgiving. 475°F for 45 minutes works well. The dough is stiffer, so it holds its shape better.
Whole wheat or rye sourdough: These have less gluten. They need a gentler preheat. 450°F for 50 minutes. The lower temperature prevents the crust from setting before the dough has fully expanded.
Seeded or nutty loaves: Seeds can burn at high temperatures. Preheat at 475°F. The extra heat from the seeds in the dough can cause hot spots.
Small loaves: A smaller loaf needs less heat. Preheat at 475°F for 40 minutes. The dough cooks faster, so the crust doesn’t need as much time to set.
Large loaves: More heat. 500°F for 50 minutes. The larger mass needs more energy to cook through.
The Final Verdict
Preheating a Dutch oven for sourdough isn’t complicated. It’s just time-consuming. But that time is an investment in better bread.
Set your oven to 500°F. Put the Dutch oven in with the lid on. Wait 45 minutes.
Don’t open the door. Have your dough ready. Work fast when you pull the pot out.
Bake immediately.
That’s it. That’s the whole process.
The difference between a preheated Dutch oven and a cold one is the difference between a loaf that makes you proud and a loaf that makes you want to order pizza. I’ve been on both sides of that equation. The preheated side is better.
So next time you’re making sourdough, give yourself the extra 45 minutes. Your dough deserves it. Your crust deserves it.
And honestly, you deserve the satisfaction of pulling a perfect loaf out of the oven.
Image source: Pexels / Merve (Pexels License)
Now go preheat that Dutch oven. You’ve got bread to bake.