Let’s be honest. The single biggest upgrade you can make to your morning cup isn’t a fancy espresso machine or a rare single-origin bean. It’s grinding your coffee fresh, right before you brew.
Coffee starts losing its flavor compounds the second it’s ground. Oxygen, moisture, and time are the enemies, and they work fast.
I’ve been down this rabbit hole for years. I’ve used $20 blade grinders that sounded like a jet engine and $300 burr grinders that hummed like a luxury car. The good news?
You don’t need to spend a fortune to get dramatically better coffee. You just need to know how to use the grinder you have, dial in the right settings, and avoid the rookie mistakes.
This guide covers everything. We’ll talk about the different types of grinders, the exact grind sizes for every brewing method, step-by-step operating instructions, and the mistakes that ruin more bags of coffee than bad beans ever will.
Image source: Wikimedia Commons / bongo vongo (CC BY-SA)
Why Grinding Fresh Matters More Than You Think
Here’s the deal. Whole coffee beans are like tiny sealed flavor vaults. Inside each bean, you’ve got volatile oils, aromatic compounds, and dissolved gases, mostly carbon dioxide, that hold the signature flavors of the origin and roast.
The moment you crack that shell, the vault opens. Those compounds start oxidizing and escaping into the air.
Staleness isn’t just a marketing gimmick. It’s chemistry. Pre-ground coffee from the supermarket shelf might be weeks or months old by the time you open the bag.
The surface area exposed to air is massive, so it goes flat fast.
Grinding at home changes the game. You’re releasing those flavors seconds before the water hits them. Even a modest grinder and decent beans will beat pre-ground coffee from an expensive roaster.
Every single time.
There’s also the consistency factor. When coffee particles are uniform in size, they extract evenly. That means no bitter over-extracted bits mixing with sour under-extracted bits.
Even extraction equals a balanced, sweeter cup.
Types of Coffee Grinders: Burr vs. Blade
Before we get into the “how,” we need to talk about the “what.” There are two main types of grinders on the market, and they operate on completely different principles.
Image source: Pexels / Gizem toprak (Pexels License)
Blade Grinders: The Budget Option
Blade grinders are simple. A spinning metal propeller chops the beans like a food processor. You press the button, the blades whir, and you pray the result is roughly what you wanted.
Pros:
- Cheap. Often under $20.
- Compact and easy to store.
- Easy to clean with a quick wipe.
Cons:
- Terrible consistency. The blades chop the bigger pieces more, leaving a mix of boulders and powder.
- Generates heat. Friction from the spinning blades can literally cook the coffee oils, adding a roasted, burnt taste.
- No control. You’re guessing at grind size based on time.
The problem with blades isn’t that they can’t grind coffee. They can. The problem is they grind it unevenly.
You get fine dust that makes your coffee bitter and chunky pieces that make it weak. The best way to use a blade grinder is to use the pulse function and shake it vigorously. But honestly, if you’re serious about coffee, start saving for a burr grinder.
Burr Grinders: The Gold Standard
Burr grinders crush coffee between two abrasive surfaces, either flat or conical, that are set a specific distance apart. This design delivers uniform particle sizes across the board.
Pros:
- Consistent grind size. This is the single most important factor for good extraction.
- Adjustable settings. From espresso-fine to French press-coarse.
- No heat buildup. The slow crushing action doesn’t scorch the beans.
Cons:
- More expensive. Entry-level burr grinders start around $50, and quality models climb into the hundreds.
- Larger footprint.
- Some models are loud.
For most home brewers, a decent conical burr grinder is the sweet spot. They’re quieter than flat burrs, easier to clean, and produce excellent results for filter coffee.
Understanding Coffee Grind Sizes
Grind size determines how fast water extracts flavor from the coffee. This is a fundamental principle: the finer the grind, the more surface area, the faster the extraction. The slower the extraction, the coarser you need to go.
We use common reference points to describe grind sizes, usually compared to familiar kitchen textures.
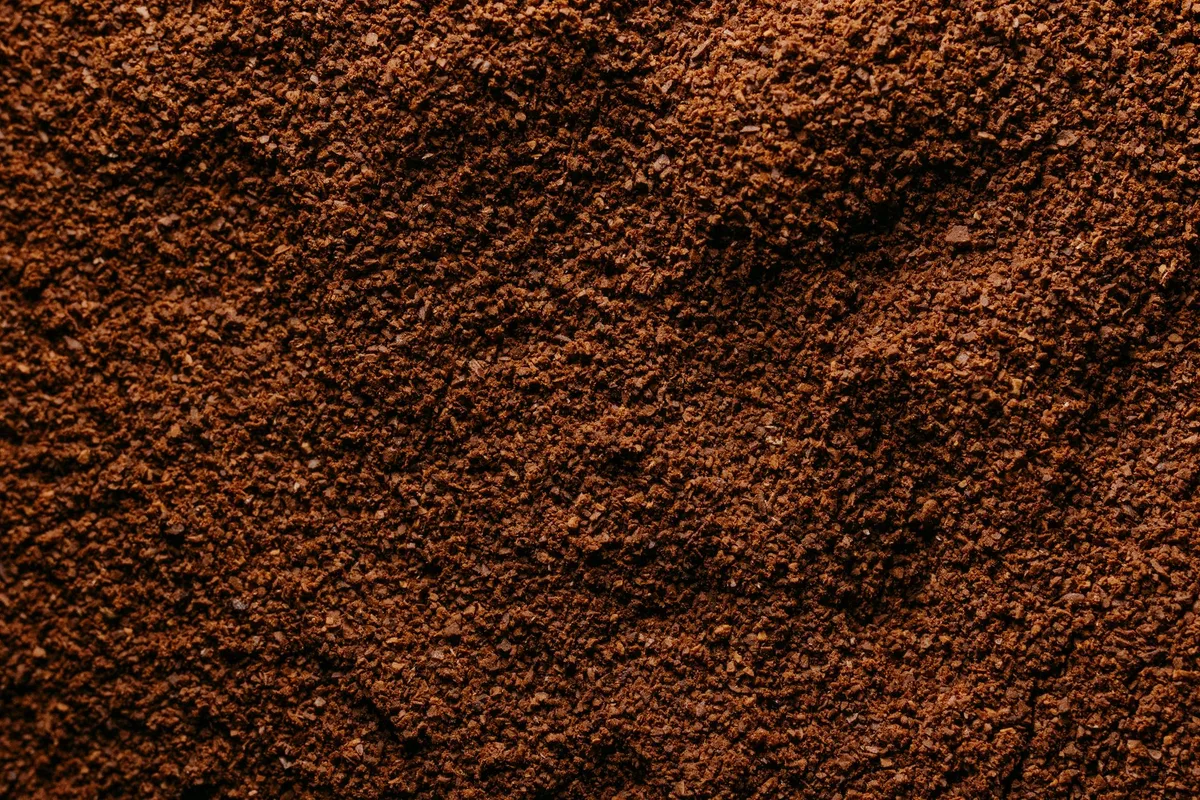
Image source: Pexels / Jonathan Borba (Pexels License)
Here’s your practical cheat sheet:
Extra Fine (Powder, like flour)
Used for: Turkish coffee.
Water touches this grind for only seconds, so it needs maximum surface area to extract any flavor at all. This is the hardest grind to achieve at home and usually requires a specialized grinder.
Fine (Table salt)
Used for: Espresso, Moka pot.
Espresso relies on high pressure to force water through a densely packed bed of fine coffee. Fine grind is non-negotiable here. If your shots run too fast (gushing), go finer.
If they drip out slowly, go coarser.
Medium-Fine (Granulated sugar)
Used for: Pour-over (V60, Kalita Wave), AeroPress with short steep times.
This is a versatile range for manual brewing. It gives you a good balance between flow rate and extraction.
Medium (Rough sand)
Used for: Drip coffee makers, Chemex, clever dripper.
Most automatic drip machines are calibrated for this, though they often run too hot or too fast, so you may need to adjust.
Coarse (Sea salt)
Used for: French press, cold brew, AeroPress with long steeps.
The large particles mean water takes longer to extract flavors. This prevents the brew from becoming bitter and muddy during long immersion times.
Extra Coarse (Peppercorns)
Used for: Cold brew (overnight).
Because you’re steeping for 12, 18 hours, you need very large pieces to slow extraction. This grind is barely crushed beans.
Step-by-Step Guide: How to Use a Coffee Grinder
Alright, let’s get to it. Here’s the exact process, whether you’re using a blade or burr grinder.
Step 1: Measure Your Beans (Always Weigh)
Don’t guess. Coffee-to-water ratio is the foundation of a good brew. Weigh your whole beans before grinding.
- Golden ratio: 1:16 (1 gram of coffee to 16 grams of water).
- Adjust: Stronger (1:14) or weaker (1:18) to taste.
Use a digital kitchen scale for this. It’s the most important tool in your coffee setup after the grinder itself. Weighing beans before grinding keeps your ratios consistent every single day.
Step 2: Set Your Grind Size
This is where you dial in for your specific brewing method. If you have a burr grinder:
- Turn the adjustment ring to the approximate setting for your brew method.
- Make a small adjustment, brew a cup, taste it.
- If your coffee tastes sour and thin, your grind is too coarse. Grind finer.
- If it tastes bitter and harsh, your grind is too fine. Grind coarser.
This is the “dialing in” process. It takes a few tries, but you’ll find the sweet spot for your taste buds.
If you have a blade grinder, choose your grind size by timing the grind. This is tricky and imprecise, but here’s the rule of thumb:
- Fine: Grind for 20, 30 seconds.
- Medium: Grind in short 5-second pulses for about 15 seconds total.
- Coarse: Grind in 1-2 second pulses for a total of 5, 10 seconds.
Step 3: Add the Beans to the Hopper or Chamber
- Burr grinder: Fill the hopper with beans. Never overfill, as it can stall the motor or cause inconsistent feeding. Grind only what you need for your brew. Storing beans in the hopper exposes them to air and degrades quality (read more about freshness from the USDA’s food safety resources).
- Blade grinder: Pour the beans into the chamber. Never fill it more than halfway. A fuller chamber means the blades spin in an empty void at the top while the beans sit at the bottom getting chopped unevenly. Try to keep a single layer if possible.
Step 4: Grind
- Burr grinder: Hit the start button and let it run. It should sound consistent. Collect the grounds directly into your portafilter, paper filter, or a small catch cup.
- Blade grinder: Here’s a pro tip. Do not just hold the button down. Use pulse grinding. Hold the button for 2 seconds, stop, and shake the grinder side to side. This redistributes the beans and evens out the chop. Repeat this for the total time you’ve allocated.
Step 5: Tap Out the Grounds
Grinders hold onto ground coffee. Silver skins (the chaff from roasting) and fine particles get stuck in the burrs or around the blades.
- For burr grinders: Tap the catch cup or the grinder body a couple of times to dislodge the loose grounds. A small brush helps sweep out the chute.
- For blade grinders: Pop the lid off and tap the base on the counter to loosen the grounds from the blades.
Step 6: Clean Up (This Isn’t Optional)
We’ll get into the deep clean in a moment, but a quick maintenance routine after each use keeps your grinder performing well.
- Brush out the burr chamber or blade bowl after each use.
- Wipe down the exterior.
- Do not use water on the internal metal parts unless you’re doing a deep clean and you can dry them completely.
How to Use a Burr Grinder: Specific Settings and Adjustments
Burr grinders have numbered dials or stepless adjustments. That can be intimidating when you first start.
Don’t overthink the numbers. They’re not universal. A “3” on a Baratza Encore means something different than a “3” on a Comandante hand grinder.
Use the numbers as your own personal reference points.
- Start with a recipe from a reputable source. Most specialty coffee brands publish grind settings for their gear.
- Write yours down. When you find the perfect setting for a particular bean and brew method, log it. This is your baseline.
- Make micro-adjustments. Change only one variable at a time. If you adjust the grind, keep the dose and water ratio the same.
A Quick Note on Retention
Some burr grinders retain a few grams of coffee in the chute between the burrs and the catch cup. This means your first few seconds of grinding might be pushing out yesterday’s stale grounds. A cheap fix is to grind a tiny dose of beans (1-2 grams) and toss it before your actual brew.
This “purge” ensures a fresh, accurate grind.
Common Mistakes to Avoid
Even with good equipment, you can sabotage your cup. Here’s what to watch out for.
1. Grinding Too Far in Advance
Grind immediately before you brew. Coffee loses its volatile aromatics within minutes of grinding. If you grind for tomorrow morning tonight, you’ve already lost the battle.
2. Using the Wrong Grind for Your Brew Method
This is the #1 error. Espresso with a coarse grind gives you sour, watery shots. A French press with a fine grind gives you a muddy, bitter cup.
Match your grind to your method. Refer to the chart above.
3. Relying on a Blade Grinder
I get it. Money is tight. But even a modest hand burr grinder ($25-$40) will give you a vastly superior grind consistency than a $30 electric blade grinder.
The difference in the cup is night and day.
4. Overfilling the Grinder
Whether it’s a hopper or a blade bowl, overloading causes inconsistent grinds. The beans don’t circulate properly. In a burr grinder, too much weight can stall the motor.
Grind in batches if you’re making coffee for a crowd.
5. Ignoring the Heat
Blade grinders get hot. The friction of the spinning blades heats the coffee, which accelerates the staling process. If your container feels warm to the touch after 10 seconds of grinding, you’re grinding too long in one burst.
Pulse and shake to minimize heat.
6. Not Cleaning Your Grinder
Coffee oils go rancid. They build up on the burrs and blades, contaminating fresh beans with old, bitter flavors. We’ll cover the cleaning process next.
How to Clean Your Coffee Grinder
You should do a quick clean (just brushing out the loose grounds) after every use. But a deeper clean is needed every few weeks. Here’s how to do it safely.
Cleaning a Burr Grinder
- Unplug it. Always.
- Remove the hopper and the upper burr. Most models have a burr that twists or pops out.
- Brush out the loose grounds from the burr chamber with a stiff brush or a dedicated grinder brush. Many come with one. You can also use a vacuum with a small nozzle.
- Use grinder tablets (like Urnex Grindz). These are food-safe, absorbent pellets. Run a dose through the grinder on a coarse setting. They absorb oils and odors without scratching the burrs. Then grind a few grams of fresh beans to clean out the residue.
- Wipe down. Use a dry or slightly damp microfiber cloth to wipe the burrs and chamber. Let everything dry completely before reassembling.
Cleaning a Blade Grinder
- Add a handful of uncooked white rice to the bowl. There are also commercial cleaners, but plain rice works for the budget-conscious.
- Blend for 30 seconds. The rice absorbs oils and knocks off caked-on coffee dust.
- Discard the rice dust.
- Wipe the bowl and lid with a damp cloth. Dry completely.
Frequently Asked Questions
How do I adjust the grind size on my grinder?
For burr grinders, turn the adjustment dial. Some click into place (stepped) and some move freely (stepless). Always adjust while the grinder is off and empty.
For blade grinders, use the pulse timing method.
Can I use a coffee grinder for spices?
Technically, yes. But you won’t want to go back and forth. Spice oils are potent and will cling to the grinder, ruining your next batch of coffee.
If you want to grind spices, get a dedicated cheap blade grinder for that task. Don’t mix them in the same unit.
What’s the best budget burr grinder?
The Baratza Encore has been the gold standard for entry-level home use for over a decade. It’s consistent, reliable, and parts are easy to find. The Timemore C2 hand grinder is a solid alternative if you want to save money and don’t mind a manual grind.
Both are under $150.
My espresso shots are blonding fast. What do I do?
Your grind is too coarse. Water is rushing through the puck. Grind finer until the extraction slows down.
Conversely, if the shot is a slow drip, go coarser.
Does grind size affect caffeine content?
Not directly. The amount of caffeine extracted depends on water ratio and brew time. But a finer grind extracts more of the bean’s total mass, which includes some caffeine.
The difference is small, so focus on grind size for flavor, not energy.
Final Tip for Beginners
Don’t change five things at once. If you’re new to grinding, start with your current brew method. Set the grinder to the recommended size for that method.
Use a standard coffee-to-water ratio. Brew a cup. Taste it.
Ask yourself: Is it sour (under-extracted)? Go finer. Is it bitter (over-extracted)?
Go coarser.
Make small adjustments. Keep a notebook. Before you know it, you’ll be pulling shots and brewing pour-overs that embarrass your local café.
And you’ll never look at a bag of pre-ground coffee the same way again.